Record video, audio, gameplay, and webcam to record precious moments easily.
Record Screencast Windows 10: 5 Simple Ways to Choose From!
 Posted by Paula Pailaga to Record Video Jun 21, 2024
Whether you want to record a presentation, social media feed, movie, etc., a screencast recorder is the best tool you can use! Now, if you are using Windows 10, it has a built-in screen recorder tool that you can utilize to record a screencast. But you should consider other options, and in this post, you will see five screen recorder tools to record screencast Windows 10! So, without further ado, explore each and see which one fulfills your needs!
Guide List
Ultimate Way to Record Screencast on Windows 10/11 Built-in Game Bar to Record Screencast on Windows 3 More Efficient Ways to Record Screencast on Windows FAQs about How to Capture Screencast on WindowsUltimate Way to Record Screencast on Windows 10/11
If you are looking for the best way to record screencast Windows 10, the professional 4Easysoft Screen Recorder is what you are looking for! This Windows 10 and 11 compatible tool can record all on-screen activities on your computer, like games, meetings, online videos, tutorials, presentations, etc. You can record them on full screen, in a specific region of it, or in an active window. Moreover, this tool provides high-quality settings with up to 60 fps and 4K resolution. Compared to the Windows 10 built-in screen recorder tool, 4Easysoft Screen Recorder supports a primary editing option, records screencasts on Windows 10/11 in different areas, and supports various output formats!
Equipped with a built-in trimmer tool that you can utilize to cut off unwanted parts.
Allow you to customize hotkeys based on your preference: start, pause, stop, etc.
Support a SnapShot tool that lets you take screenshots in selected regions anytime.
Let you add annotation, text, arrows, lines, shapes, etc., while recording.
100% Secure
100% Secure
How to Record Screencast on Windows 10/11 Using 4Easysoft Screen Recorder Tool:
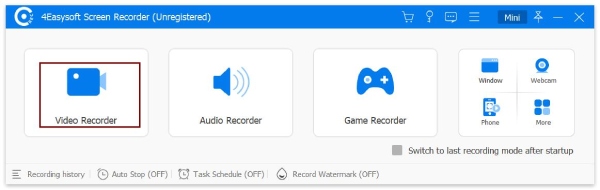
Step 1Download and install the 4Easysoft Screen Recorder tool on your Windows 10/11. Then, head to the screencast you wish to record, launch the tool and select the "Video Recorder" option.
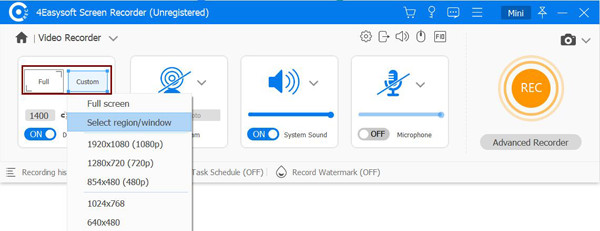
Step 2After that, choose the "Full" option to capture your Windows 10/11 whole screen. Otherwise, click the "Custom" button and select your desired resolution. You can also manually modify the borderlines to adjust the capture area.
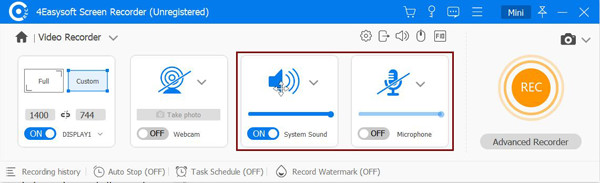
Step 3Then, turn on the "System Sound" option to record the screencast sound. You can also turn on the "Microphone" to record your voice if you want to.
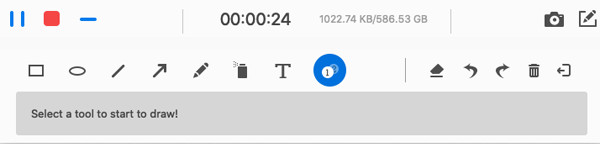
Step 4Next, tick the "REC" button to start the recording process, which will initiate after the 3-second countdown. Then, on the pop-up toolbox, you can add shapes, lines, and callouts and take a screenshot while recording.
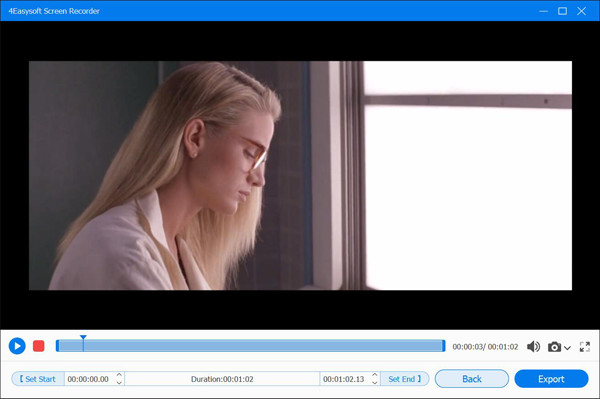
Step 5Once you are done recording, click the "Stop" icon to finish the recording process. Then, in the preview window, you can trim your recording's unwanted start and end parts. Finally, tick the "Save" button to export your recording.
Built-in Game Bar to Record Screencast on Windows
That’s it! That’s the ultimate way to record a screencast on Windows 10/11! Although the first tool provides many advantages, you can still use Game Bar to record a screencast on your Windows 10/11. Since it is built-in, you no longer need to download software to record a screencast. Moreover, this tool is simple to use with minimal setup and captures high-quality footage. However, it doesn’t offer editing features to modify your output! Now, how to record a screencast using Windows 10/11 Game Bar? Here are the steps you must follow:
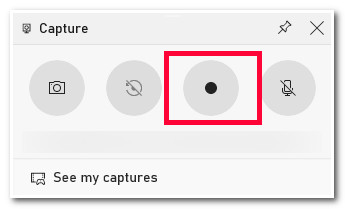
Step 1Access the screencast you want to record and press the "Windows + G" keys on your keyboard to open the Game Bar. After that, tick the "Circle/Dot" icon in the Capture window to initiate the recording process.
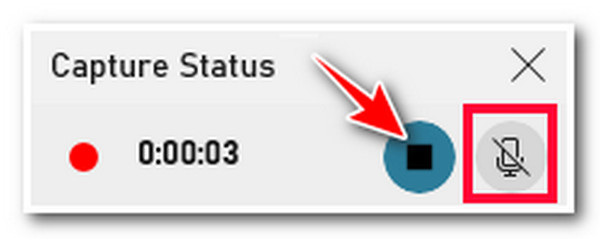
Step 2After that, on the "Capture Status" window, you will see the recording’s duration and microphone and stop controls. You can tick the "Microphone" icon to record your voice. Once you are done recording, tick the "Stop" icon or press the "Windows + Alt + R" keys.
Step 3Then, a pop-up dialogue box will display on the right side of your screen. Click on it to access your recordings. And that’s it! That’s how you record a screencast on Windows 10/11.

3 More Efficient Ways to Record Screencast on Windows
There you have it! Those are the first two recorder tools to record screencast on Windows 10/11. Apart from those tools, here are the other three tools to efficiently record screencast on Windows. Explore each of them now!
1. Screencastify
The first tool you can use to record screencast on Windows 10/11 is Screencastify. Unlike the tools above, you can use Screencastify as a browser extension or a desktop tool. This tool also supports the essential features that a screen recorder usually offers. These include screen capture options, webcam and microphone recording, trimmer, drawing tools, and more. However, unlike the tools above, Screencastify doesn’t offer advanced features. Now, how to record a screencast using Screencastify? Here are the steps you must follow:
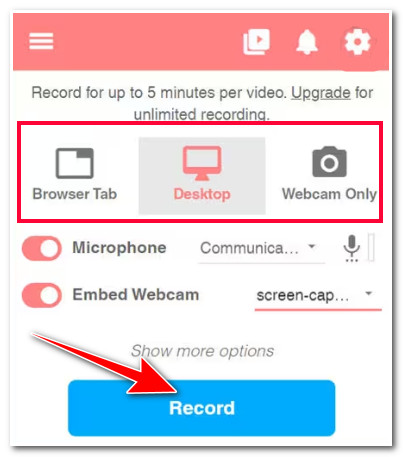
Step 1Access the Screencastify website and click the "Add to Chrome" button. Afterward, go to the subject you want to record, select between the "Browser Tab, Desktop, Webcam Only" options on the tool’s main interface, and tick the "Record" button.
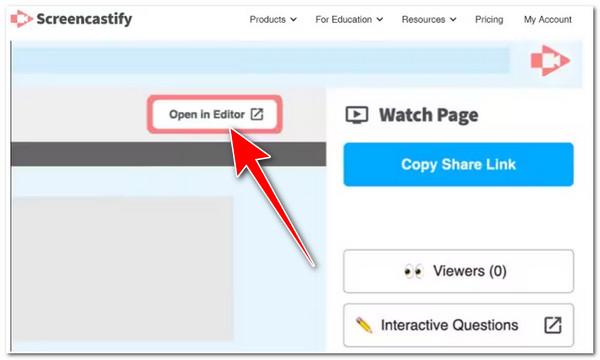
Step 2Once you are done recording, click the "Stop" icon. Next, sign in to your account and tick the "Open in Editor" button. From there, you can get started with the editing process immediately. After that, you can download/export the recording to save it.
2. Screencastify
Apart from Screencastify, you can also use Screen Record Pro to record screencast on Windows 10! Similar to the tools above, Screen Record Pro is also a powerful tool that you can use to record anything on your screen. Moreover, it supports webcam, audio recording, and cursor tracking that you can use to record a tutorial. However, you might experience crashes or instability while recording. Now, how to record a screencast using Screen Record Pro? Here are the steps you should follow:
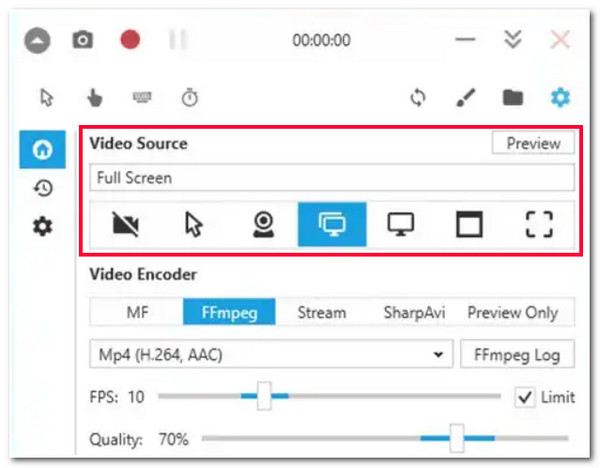
Step 1Access the Microsoft Store and download and install the Screen Record Pro on your Windows 10/11. After that, the program will automatically bring you to its video and audio quality tweaking section. You can choose which area to capture under the "Video Source" section.
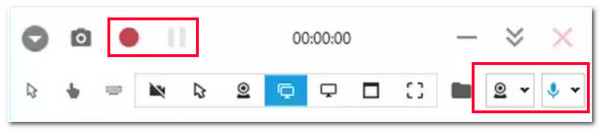
Step 2Next, click the "Start" icon to initiate the recording process. You can take a screenshot during the recording and enable a webcam and microphone. Once you are finished recording, tick the "Stop" icon. Then, you can trim or add voice-over to your recordings.
3. Free Cam
The last tool you can use to record screencast Windows 10/11 is Free Cam. This tool provides a simple solution for capturing on-screen activities on your computer. The same goes for the tools above; Free Cam also lets you capture the entire desktop or a designated screen area easily and quickly. Moreover, this tool also enables you to highlight your mouse (as a pointer), record voice-overs, system sound, background music, and more. However, unlike the tools above, this tool doesn’t support webcam recording. How do you record a screencast on Windows 10/11 using Free Cam? Here’s how you do it:
Step 1Download and install the Free Cam on your computer. After that, access the screencast you want to capture, launch Free Cam, and select a "recording area" to capture.
Step 2 After that, choose an audio output between the "Microphone and System Audio" option. Then, tick the "Record" button to start the recording process.
Step 3Then, while recording, you can add annotations, highlight essential areas, add text, and more. Once you are done recording, tick the "Stop" button, and the program will prompt you to save the recordings.
FAQs about How to Capture Screencast on Windows
-
1. How to record a screencast on a Mac?
To record a screencast on your Mac, run the QuickTime Player and click the File button. After that, select the New Screen Recording option to access the Screenshot and display the tools. Then, tick the Red icon to initiate the recording process.
-
2. Can I record a game using a Game Bar with an overlaid webcam?
Unfortunately, you can’t record an on-screen gameplay and webcam simultaneously. You can use the tools featured here as an alternative solution to record gameplay and your webcam simultaneously.
-
3. Where can I find the captured recordings from the Xbox Game Bar?
The captured recordings from Xbox Game Bar are saved and stored by default within your user folder under the Video category inside the Captures folder. Those recordings are saved in MP4 format by default.
Conclusion
There you have it! Those are the five simple ways how to record a screenshot on Windows 10/11. With these tools, you can now record all the screencasts on your Windows. If you want a tool that offers an advanced yet simple way of recording your computer screen, you can use the 4Easysoft Screen Recorder tool! This tool lets you capture your screen in different areas, including a microphone and webcam, and offers drawing and trimmer tools! To discover more about this tool, visit its official website today!
100% Secure
100% Secure