Transfer and manage all data between iOS devices, device and computer, and iTunes and devices.

[Solved!] How to Fix AirDrop Not Showing Up on Your Mac

Posted by Paula Pailaga to iOS Transfer Oct 14, 2024
Apple’s AirDrop is still one of the best features that lets iOS users transfer files between iOS devices. This feature is usually used to AirDrop photos and videos from iPhone to Mac to save space, backup, or for media editing. However, there are times that you face AirDrop not showing up on the Mac issue. Well, if you are currently having a headache with this issue, continue reading this post, for it features 10 efficient solutions to fix it! Explore them now.
Guide List
Solution 1: Re-open the AirDrop and Check the Settings on Mac Solution 2: Ensure to Open the Wi-Fi and Bluetooth Solution 3: Restart Your Mac Solution 4: Turn off the Focus/Do Not Disturb Mode Solution 5: Make Sure the 2 Devices are Close Enough Solution 6: Check Fireware Settings Solution 7: Check the Device Compatibility Solution 8: Reset the Network Settings Solution 9: Reset the Bluetooth on the Mac Solution 10: Use the Alternative Tool to Transfer Files FAQs about AirDrop Not Showing up on Your MacSolution 1: Re-open the AirDrop and Check the Settings on Mac
The first solution you can do to fix the AirDrop not showing up on Mac Finder is to re-open the AirDrop on your Mac to restart it and check its discoverability settings. In most cases, the reason why AirDrop is not showing up on your Mac is because of improper setting configurations or glitches. Now, to perform these solutions, here are the steps you should follow:
◆ Re-open the AirDrop: Access your Mac’s "Control Center" and click the "AirDrop" to turn it off and then on.
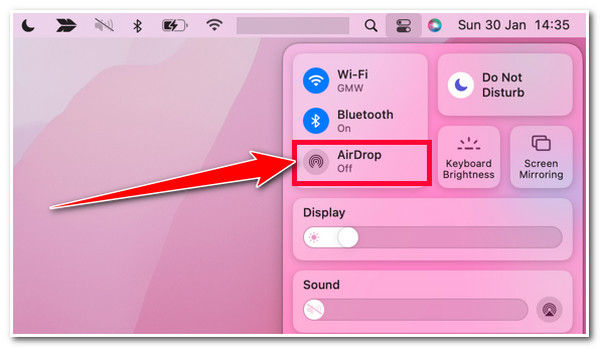
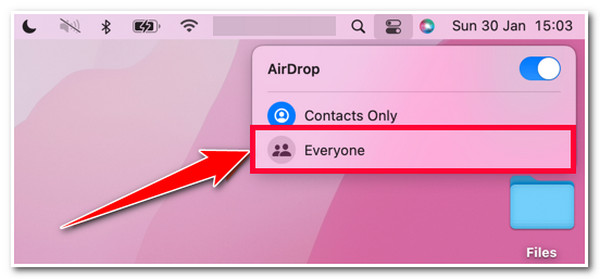
◆ Check the Settings: On your Mac’s "Control Center", tick the "arrow facing on right" icon next to "AirDrop", and select the "Everyone" option. This option will make your Mac’s AirDrop discoverable from other devices and might fix the AirDrop not showing up on the Mac issue.
Solution 2: Ensure to Open the Wi-Fi and Bluetooth
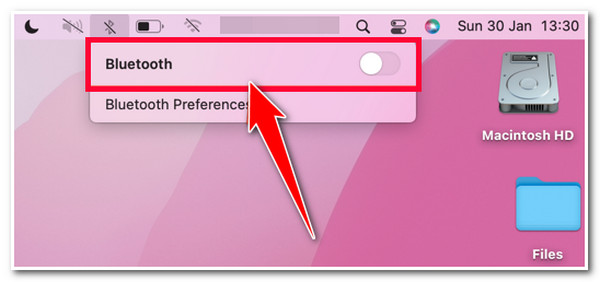
Another option that might fix the AirDrop not showing up on the Mac issue is to ensure that your Mac’s Wi-Fi and Bluetooth are turned on. Sometimes, users forget to turn on their Mac’s Wi-Fi and Bluetooth when using AirDrop, which results in an issue. So, ensure that you have turned on both Wi-Fi and Bluetooth connection on your Mac before using AirDrop.
Solution 3: Restart Your Mac
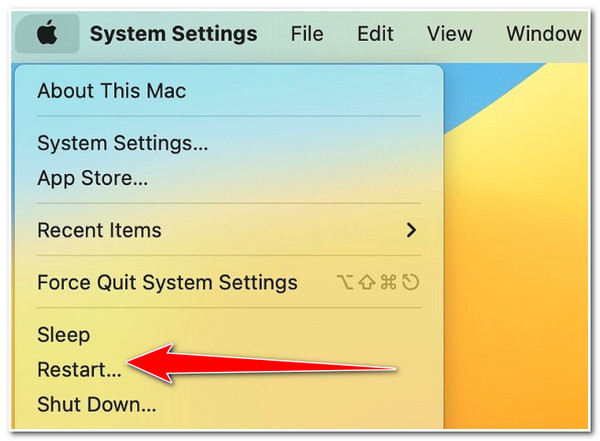
One of the most straightforward solutions you can do to fix AirDrop not showing up on Mac Finder is to restart your Mac. If this issue occurs due to a glitch, restarting it can possibly clear it up. So, to restart your Mac, click the "Apple" icon at the upper left corner of the screen and select the "Restart" option. After that, check whether it fixes the issue.
Solution 4: Turn off the Focus/Do Not Disturb Mode
If there are settings that need to be turned on, there are also some settings that must be turned off to fix the AirDrop not showing up on the Mac issue. These settings are Focus/Do Not Disturb Mode. If these settings are turned on, they might mess up your AirDrop on your Mac. To turn these settings off, access your Mac’s "Control Center" and click the "Focus" mode to turn it off. Then, check whether the issue is solved.

Solution 5: Make Sure the 2 Devices are Close Enough
Besides a simple restart, another solution you can do to fix the AirDrop not showing up on the Mac Finder issue is to ensure both devices are close to each other. AirDrop will establish a connection if both devices are near each other. Thus, you must ensure that the sender (iOS device) and recipient (Mac) must be in close range. Moreover, you also need to avoid any obstruction between both devices, such as a thick wall. Then, check whether it fixes the issue.
Solution 6: Check Fireware Settings
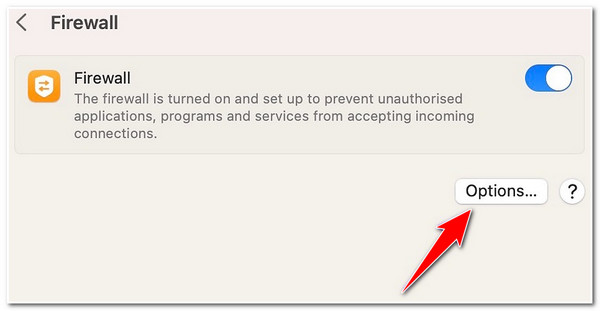
Another setting you need to turn off to fix the AirDrop not showing up on the Mac issue is your Mac’s Firewall. A Firewall can block various incoming connections, including AirDrop, when enabled. In that case, you need to check if your Mac’s Firewall is turned on and turn it off. Now, to perform this solution, here are the steps you should follow:
Step 1Access the "Mac’s System Settings", select the "Network" option, and click the "Firewall" button. After that, tick the "Options…" button at the lower right of the "Firewall" option.
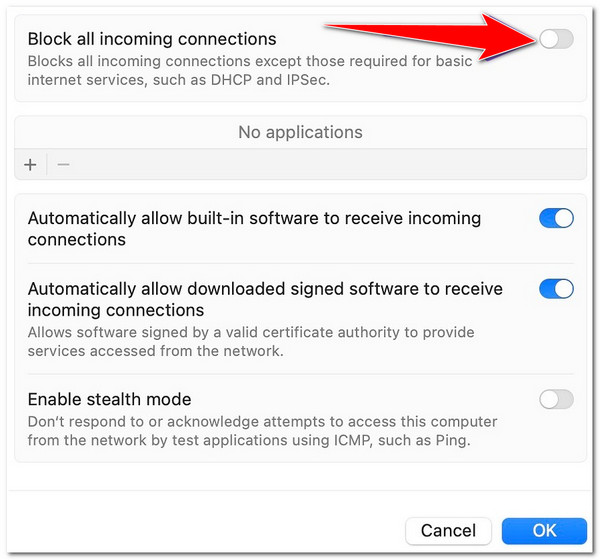
Step 2Then, check whether the "Block all incoming connections" is turned on. If it is turned on, turn it off by toggling its "switch" button and clicking the "OK" button. After that, check whether it fixes the issue.
Solution 7: Check the Device Compatibility
Apart from the settings that trigger the AirDrop not showing up on the Mac Finder issue, device compatibility can also be the reason for its occurrence. AirDrop will not work correctly if your device cannot meet its software and hardware requirements.
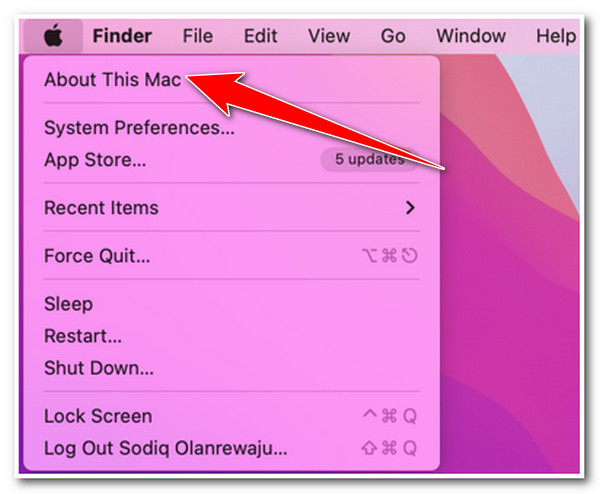
AirDrop works on Mac with those models released in 2012 or later and with OS X Yosemite or later. You can find your Mac’s software and hardware information on the "About This Mac" menu that you can access after clicking the "Apple" icon.
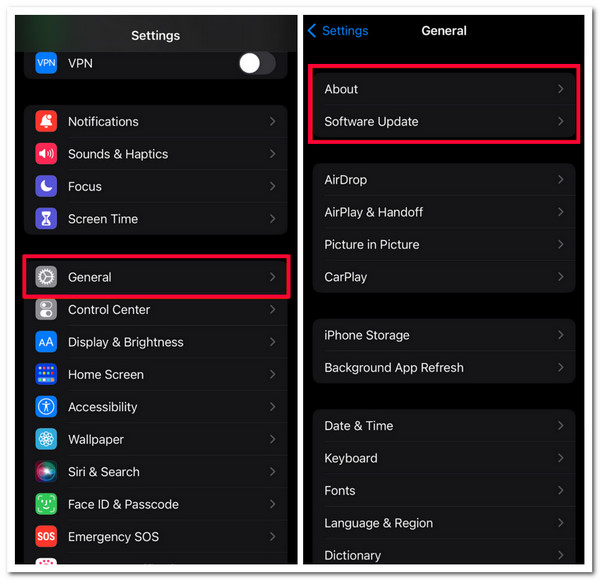
Now, check whether your iPhone/iPad/iPod Touch is compatible with AirDrop. AirDrop works on iPhone/iPad/iPod Touch that runs iOS 7 or later. To check your iPhone’s version, run the "Settings" app, select the "General" option, and tap the "About" button.
Solution 8: Reset the Network Settings
If the AirDrop not showing up on the Mac issue is due to a problematic Wi-Fi network, then resetting it might be a great help to fix it. Now, to reset your Mac’s network settings, here are the steps you should follow:
Step 1Access the "System Preferences" on your Mac, select the "Network" option, and click the "Wi-Fi" on the sidebar. Then, select the "Minus" icon right below the list.
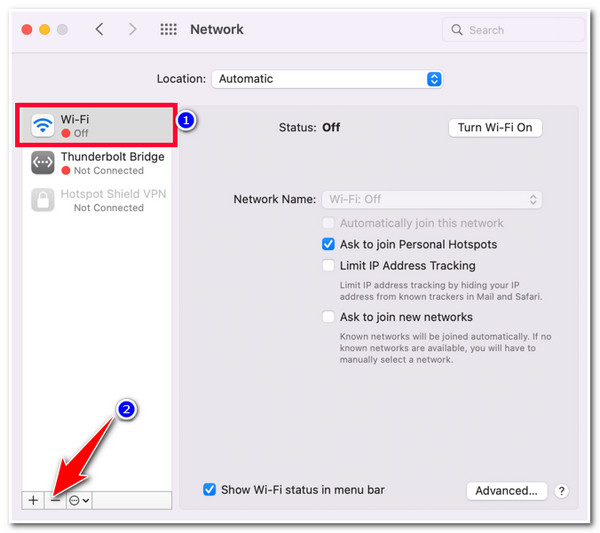
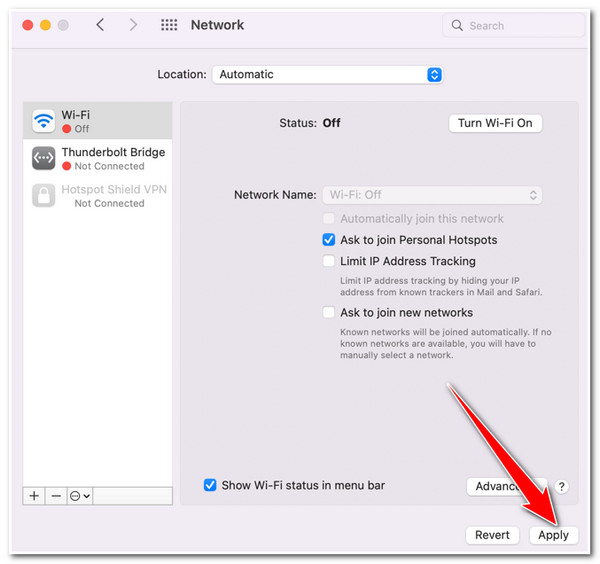
Step 2Next, tick the "Apply" button at the lower right corner of the screen to save the modifications you’ve made. Then, tick the "Plus" icon to re-add the "Wi-Fi" network on the connections list.
Step 3After that, select the "Wi-Fi" in the "Interface" drop-down menu, click the "Create" button, and tick the "Apply" button to restore the Wi-Fi module.
Solution 9: Reset the Bluetooth on the Mac
Otherwise, if your Mac’s Wi-Fi is not the reason for the occurrence of the AirDrop not showing up on the Mac Finder issue, then it might be Bluetooth. If your Mac’s Bluetooth is problematic, it will affect the AirDrop between both iOS devices. So, the best solution you can do for this is to reset your Mac’s Bluetooth.
To do this, press the "Command + Space" keys, search for "Terminal", and access it. After that, copy and paste the sudo pkill bluetoothd and press the "Return" key. Then, enter your Mac’s password to provide authorization for the command.

Solution 10: Use the Alternative Tool to Transfer Files
If none of the above solutions could help you fix the AirDrop not showing up on the Mac issue, you can use an alternative file transfer instead. And one of the best tools you can use is the professional 4Easysoft iPhone Transfer tool. This Windows and Mac-compatible tool can transfer different kinds of files to various target devices like Mac. Some files it can transfer include call history, messages, notes, media files, WhatsApp data, etc. Moreover, this tool can seamlessly transfer files from iPhone, iPad, and iPod Touch to Mac using a USB cord! This tool is the best solution to escape yourself from the AirDrop not showing up on the Mac issue!

An advanced preview feature to easily see and select which files to transfer.
Offer 3 modes to transfer files between iOS devices, computer, and iTunes.
Manage your iOS device’s files before transferring: edit, delete, create, etc.
Provide extra features such as Contacts Backup, Contacts Restore, etc.
100% Secure
100% Secure
How to Use 4Easysoft iPhone Transfer As An Alternative for AirDrop:
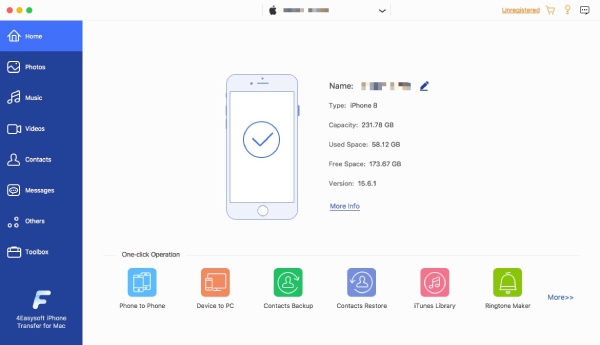
Step 1Download and install the 4Easysoft iPhone Transfer tool on your Mac. After that, launch the tool and link your iPhone/iPad/iPod Touch to the Mac using a USB cable. Then, wait for the tool to detect your iOS device.
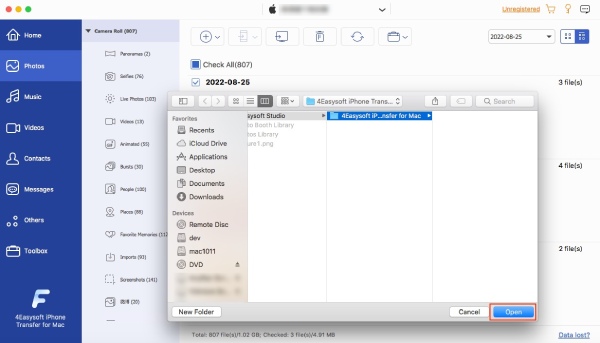
Step 2Next, from the options or tabs on the left side, select an option corresponding to the file you wish to transfer. Suppose you want to transfer images; select the "Photos" tab. Then, select all of the photos you wish to transfer from the different categories.

Step 3Then, tick the "Export to PC" button to transfer all images to your Mac. Then, select a folder where you want to store them and click the "Open" button. And that’s it! That’s how you use this tool if none of the above solutions fix the AirDrop not showing up on the Mac issue.
FAQs about AirDrop Not Showing up on Your Mac
-
Why is my Mac not showing up on AirDrop?
There are many reasons why Mac is not showing up on AirDrop. A few of the most common reasons could be that both devices are too far from each other and Wi-Fi and Bluetooth aren’t turned on.
-
How much distance does AirDrop require to establish a connection between iOS devices?
AirDrop's distance to establish a connection should be within Bluetooth range. This range is approximately 30 feet, and there should be no obstructions for you to have a great connection.
-
How can I make my Mac discoverable for other iOS device’s AirDrop?
To make your Mac discoverable by other iOS devices’ AirDrop, you need to run the Finder and tick AirDrop from the sidebar, or you can also access it on the Go menu bar. After that, select Contacts Only or Everyone on the Allow me to be discovered by option.
Conclusion
That’s it! Those are the 10 efficient ways to fix AirDrop not showing up on the Mac issue. With these ways, you can transfer various files from your iOS devices to your Mac without interruptions. If none of the above default solutions could help you fix the issue, you can use the 4Easysoft iPhone Transfer tool as an alternative instead. This tool lets you quickly and easily transfer various iOS device files to your Mac by linking both devices using a USB cord. To discover more about this tool, visit its official website today.