Convert, edit, and compress videos/audios in 1000+ formats with high quality.
A Guide to Compress Video in Premiere Pro [with Alternative]
Since large video files can be cumbersome to upload and share, Adobe Premiere Pro has a field of tools and settings that can help you compress your videos. With the ‘compress video in Premiere Pro’ techniques, you can ensure your videos maintain high quality while minimizing the file size. So, in today’s article, you’ll learn the techniques on how to shrink video to frame in Premiere Pro. Get the best results from your video projects now!
Guide List
How to Compress Video in Premiere with Output Settings Alternative Way to Easily Shrink Videos without Losing QualityHow to Compress Video in Premiere with Output Settings
Compressing video in Adobe Premiere Pro involves adjusting various output settings to balance quality and size. So, before knowing how to compress video in Premiere Pro, here’s a guide to understanding critical parameters and how they affect the size of your compressed video.
Format. The most common format for compressing videos is H. 264, which is ideal for web and mobile due to its balance between file size and quality. Meanwhile, HEVC has better compression but may not be compatible with all platforms.
Preset. A high bitrate is perfect for maintaining quality if the source video is high resolution. The 1080p Full HD is suitable for YouTube videos with a balance of quality and file size. You can also manually adjust settings yourself based on specific needs.
Resolution. Minimizing the resolution of your video can hugely decrease its file size, but it also reduces its detail and clarity.
Frame Rate. Another critical aspect of compressing video in Premiere Pro is the frame rate. Lowering the frame rate, e.g., from 60 to 30 fps, can reduce the file size but affect the video smoothness.
Audio Settings. For codec, you can use AAC, as it is efficient and widely supported. For bitrate, a lower one can reduce file size without affecting the quality; a higher one offers better audio fidelity.
Bitrate Settings. You can keep the bitrate consistent throughout the video to predict file size, but it can be less efficient regarding quality with CBR. On the other hand, the VBR is based on the video complexity. As for the target bitrate, this controls the average bitrate during the video, and the maximum bitrate sets the higher limit for bitrate during more complex scenes.
Now, to compress a video in Premiere Pro using those output settings, follow the steps below to adjust the parameters and achieve your desired balance between file size and quality:
Step 1Once your video is fully edited and ready for export, go to “File” to “Export” to “Media” to access the “Export Settings” dialog. Or, use the “Ctrl + M” on Windows or “Cmd + M” on Mac.
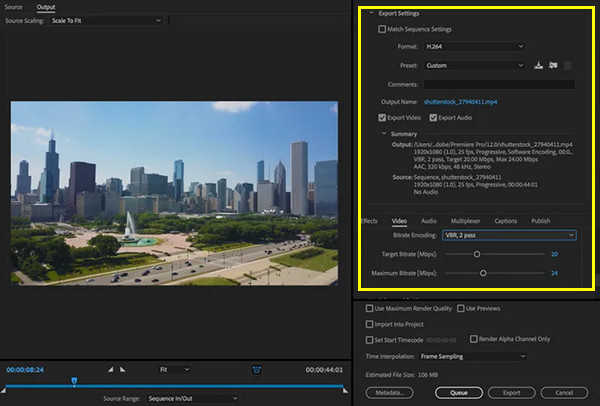
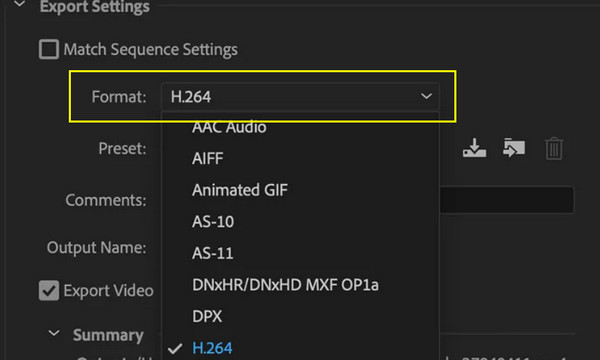
Step 2From the Export Settings window, select “Format”, you can use the “H.264”, which is the commonly used format for compression, providing a perfect balance between quality and file size.
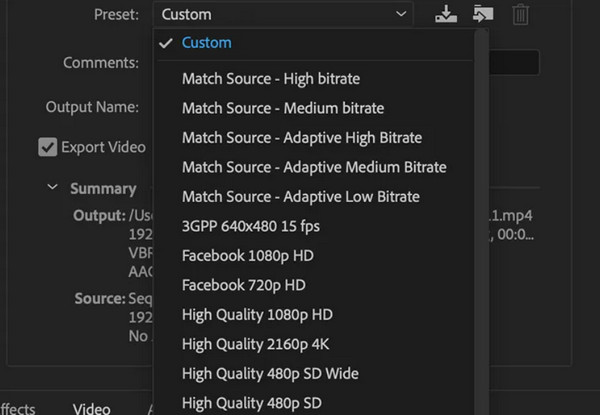
Step 3Next, from the “Preset” pulldown menu, select the best preset that matches your needs, for example, High Bitrate, 1080p Full HD, or Custom.
After that, under the “Video” tab, change the “Height” and Width” to minimize the resolution if needed. You can also adjust the “Frame Rate” to a lower value, from 60 to 30 fps.
Scroll down to the “Bitrate Settings” section, and select “VBR, 2 pass” to get the best quality. Then, use the sliders of “Target Bitrate” and “Maximum Bitrate” to adjust it lower or higher as needed.

Now, move to the “Audio” tab, select “AAC” for the codec, and set the sample rate to “48000 Hz”, a standard for video.
Step 4Now, click the “Output Name” field to choose where to keep the compressed file and name it. And once all settings are settled, click the “Export” button to begin the compression process. That’s how to resize a video in Premiere Pro!
Alternative Way to Easily Shrink Videos without Losing Quality
Though Adobe Premiere Pro is a robust tool when it comes to compressing videos, if you want a dedicated solution to shrink videos while preserving their quality, the 4Easysoft Total Video Converter is an excellent alternative. The all-around software is designed to handle various video-related projects with ease, including compression. It comes with a user-friendly interface and high-powered features, providing an efficient way to reduce video file sizes with one of its toolkits. It surely uses advanced algorithms to maintain the original quality even after compression. And more customization settings for setting your desired resolution, bitrate, and frame rate. So, instead of learning how to compress video in Premiere Pro, why not incorporate the 4Easysoft into your video editing toolkit?

Sophisticated compression algorithms to reduce video file sizes.
Tailor the compression parameters to fit your specific requirements.
The preview function is available to see how your video will look.
Save time by compressing multiple videos simultaneously.
100% Secure
100% Secure
Step 1Start the 4Easysoft Total Video Converter, then move to the “Toolbox” widget above. There, select “Video Compressor” among other toolkits.
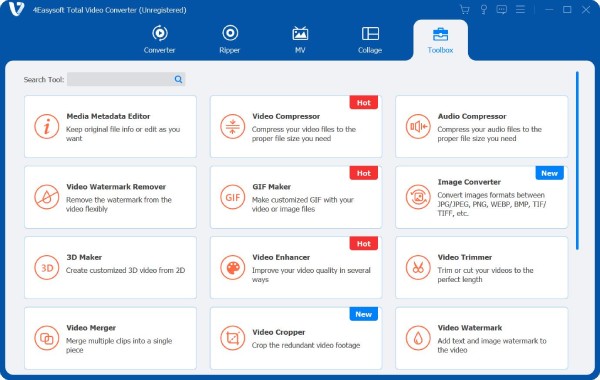
Step 2In the “Video Compressor” window, click the “Add” button in the middle to upload the video file you want to compress. Use the “Up” and “Down” buttons or the slider to adjust the size.
Also, you can get the format you want in the “Format” dropdown menu. Click the “Preview” button to check on your compressed video.
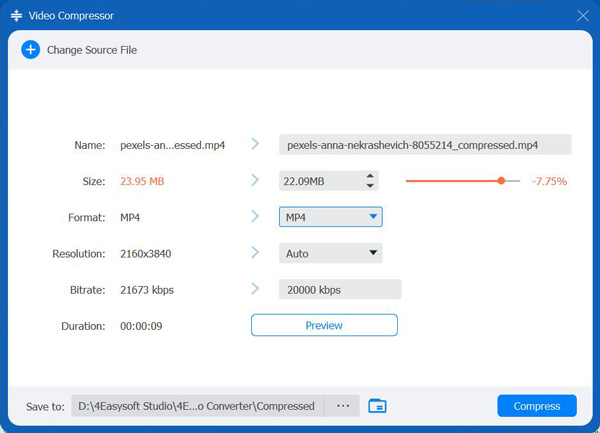
Step 3If pleased with how it turns out, click the “Compress” button after setting the destination and name for your compressed video.
Conclusion
So that’s it! With its tools and power, you can compress video in Premiere Pro quickly and ensure your videos are optimized for various platforms, whether you want faster upload, smoother streaming, or storage. However, if you want a more straightforward approach than ‘how to resize a video in Premiere Pro,’ the 4Easysoft Total Video Converter is an efficient option. With its broad format support, batch processing, and customizable settings, the program ensures you get an enhanced overall quality and performance of your content.
100% Secure
100% Secure


