Record video, audio, gameplay, and webcam to record precious moments easily.
How to Record Zoom Meetings on iPad? 3 Ways Default and Not

Posted by Ethan Brooke to Record Video Apr 03, 2025
To ensure you won’t miss any important details during your virtual meetings in Zoom, recording it on your device is a great solution. So, how to record Zoom meetings on iPad? Thankfully, doing it won’t need any technical skills. To prove it, here are the three simple ways how to record Zoom meeting on iPad, whether as a host or participant. See which method suits your needs.
Guide List
Record Zoom Meetings with High-Quality [No Limitation] How to Record Zoom Meetings on iPad: As a Host How to Record Zoom Meetings on iPad: As a ParticipantRecord Zoom Meetings with High-Quality [No Limitation]
If you’re hunting for a high-quality way to record Zoom meetings on iPad, 4Easysoft Screen Recorder is a great tool to have. This powerful software lets you capture both video and audio from your Zoom meeting, ensuring you won’t miss any crucial details. Unlike the above methods, this program guarantees high-definition recording, saving the quality of both video feeds, including all webcams and audio, which is necessary for meetings. Moreover, this tool covers various output formats like MP4, MOV, and AVI for wider compatibility on any device and platform. With its ability to handle long Zoom meetings without loss in quality, it is indeed a reliable solution for any recording tasks!
Capture Zoom meetings in full HD and 4K by mirroring your iPad screen.
Record both meeting audio and your voice without losing quality.
Real-time annotation is supported to highlight key points on screen.
Adjust recording settings to fit your needs to get the result you want.
100% Secure
100% Secure
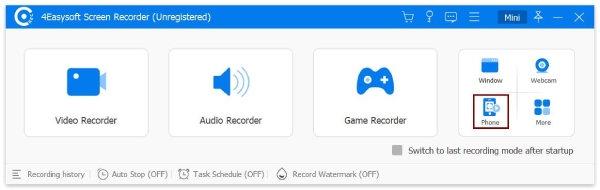
Step 1As soon as the 4Easysoft Screen Recorder launches, click the “Phone Recorder” button. Ensure your iPad is ready on your side because it must be linked to the computer for mirroring.
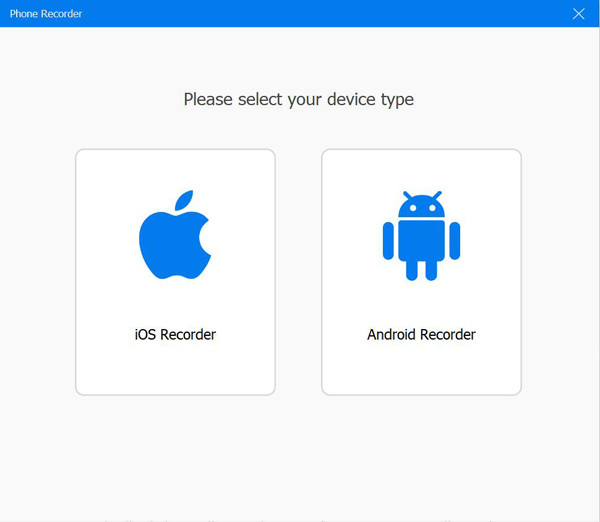
Step 2Choose the sort of device you have on this page. Select “iOS Recorder” for your iPad; they should use the same WLAN to connect it successfully to your computer.
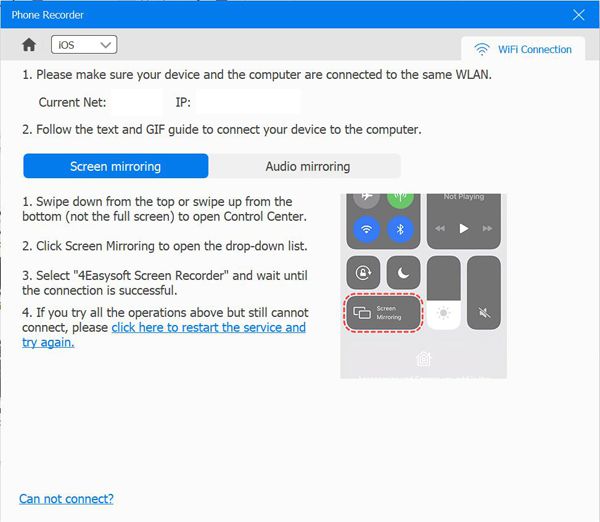
Then, to record Zoom meetings on iPad with sound, use the” Screen mirroring” option. Next, on your iPad, access the “Control Center” and choose the “Screen Mirroring” option, and then select “4Easysoft Screen Recorder”.
Step 3Once your computer presents your iPad screen, start or join a Zoom meeting now, then click the “Record” button from 4Easysoft. That’s how simple it is to record Zoom meetings on iPad, regardless of whether you’re the host!
How to Record Zoom Meetings on iPad: As a Host
If you’re the host of a Zoom meeting, recording it would be straightforward with the built-in recorder of the platform. During the meeting, you can simply tap the record button since you don’t need to get permission from the participants to do so. Meanwhile, once you start, all participants will be notified that the meeting is being recorded, covering both their cameras and audio. Later on, this can be saved to your iPad or the cloud. However, you may face limitations in recording when using a free account, so you may want to upgrade to Zoom Pro. Still, it is the easiest method to record Zoom meetings on iPad.
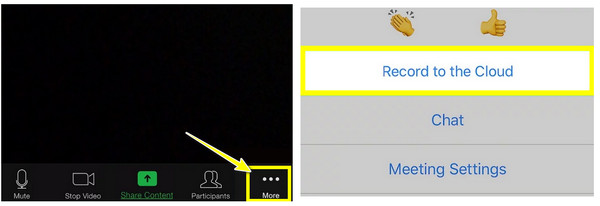
Step 1Start a Zoom meeting on your iPad now. Head to the “three-dot menu” at the bottom right corner of your screen, and select the “Record to the Cloud” option.
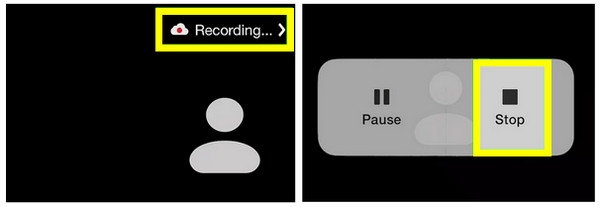
Step 2At the far right corner of your iPad screen, you should see the “Recording” notification. This one will stay until the recording ends. Tap on it when you wish to “Pause” and “Stop”.
Step 3Once you have stopped the recording, tap the “Stop” button again to confirm. The recording will begin to process, and it may take a while, depending on the meeting length.
Then, where do Zoom recordings go? You can find the recording once you log in to your account on the web and look for “My Recordings”. That’s how to record Zoom meetings on iPad if you’re the host!
How to Record Zoom Meetings on iPad: As a Participant
On the other hand, if you are a participant, can you record Zoom meetings as much more straightforward than being a host? Unfortunately, if the host has not given you permission to record, you cannot use the built-in recorder. So, how to record Zoom meeting as a participant on iPad ? Simply go to your iPad’s built-in recorder instead, and it will capture everything on your screen. While you have a solution, this method only records what you see on your end, not the interactive features of the Zoom app. Also, you cannot pause or resume it without ending the Zoom meeting. Despite these, it is still helpful to record Zoom meetings on an iPad , especially when permissions are not granted. See below the steps on how to accomplish it:
Step 1Since you won’t be able to record Zoom meetings on iPad without the host’s permission, access the “Screen Recorder” in the “Control Center” of your iPad.
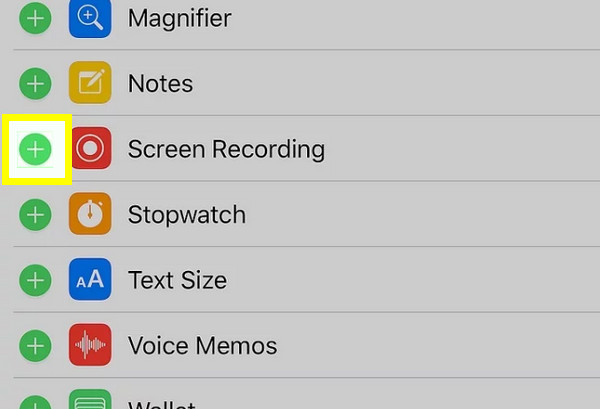
If you can’t find it, go to “Settings” and scroll down to “Control Center” locate “Screen Recording”, and tap the “Add” button next to it to add it.
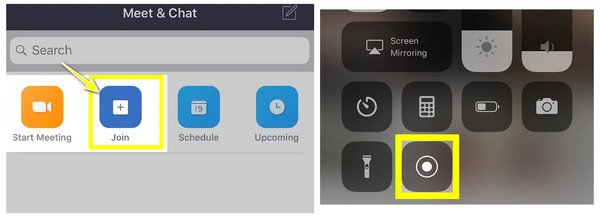
Step 2Now, join the Zoom meeting you wish to record. Access the “Control Center” by swiping up from the bottom of your iPad screen; please tap the “Screen Recorder” button.
Conclusion
Knowing how to record Zoom meetings on iPad is incredibly useful, whether you’re the host or participant. This would give you a record of essential details from the meetings that you can review in the future. While there’s a built-in feature offered by Zoom, this may have limits in terms of quality and functionality. So, for the best experience and highest quality, use the 4Easysoft Screen Recorder. Whether hosting or joining a Zoom meeting, you can capture everything here, video, audio, and even system sound, without interruptions or quality loss. Elevate your recording experience now with this tool!
100% Secure
100% Secure