Convert, edit, and compress videos/audios in 1000+ formats with high quality.
How to Reverse Video in iMovie with High Quality [Ultimate Guide]
Applying an incredible effect like the reverse effects doesnt need any professional skills. It where you play a video backwards or replaying a part over and over again, which gives an amusing effect to viewers. If you’re an iOS user, the iMovie is a capable tool for you. You can use this program on your iPhone, iPad, and Mac. So, "How to reverse video in iMovie?" comes up. To create the reverse effect, below are the shared detailed steps to learn how to reverse video in iMovie.
Guide List
Part 1: Can You Reverse Videos in iMovie on iPhone/iPad? Part 2: Detailed Steps to Reverse Video in iMovie on Mac Part 3: The Best Alternative to iMovie to Reverse Video on Windows/Mac Part 4: FAQs about How to Reverse Videos in iMoviePart 1: Can You Reverse Videos in iMovie on iPhone/iPad?
Unfortunately no. Since the default iMovie does not support a reverse feature on iPhone and iPad, you may need to download the InShot video editor to reverse videos on iPhone/iPad. The good thing is several tools can help, one of which is the InShot.
InShot has a simple interface that lets you edit simple videos, like reversing them, adding effects, applying filters, and more. If you want a quick video editor, get InShot on your device. Below is a detailed guide on how to InShot to reverse a video.
Step 1To get the InShot app, download it on the AppStore. Then, open it once it is downloaded.
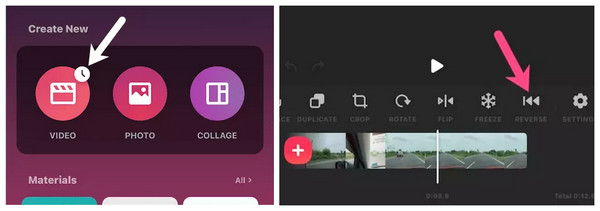
Step 2Then, tap on the Video among other options, such as Photo and Collage. You will need to select a video from your album and then open it to the editor.
Step 3Left-slide the below editing toolbar to see more tools, locate the Reverse option, then tap on it to play your video backward. You can do further edits after that. If satisfied, tap the Save button in an upward arrow icon to save it on your iPhone/iPad.
Part 2: Detailed Steps to Reverse Video in iMovie on Mac
After knowing how to reverse a video on your iPhone and iPad, reversing video on Mac is also included. Unlike iPhone, you can quickly reverse video on your Mac with iMovie. However, the steps might be slightly different depending on your iMovie version. If ready, continue reading to learn how to reverse video in iMovie on Mac.
Step 1Launch the iMovie on your Mac, then open the project you want to edit.
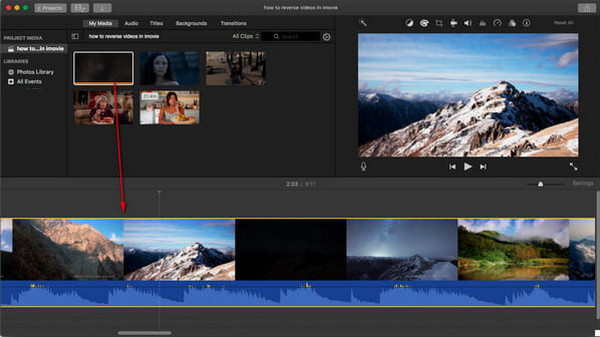
Step 2Click on the video clip on the Timeline, then select the Speed button with a Speedometer icon from the above tools above the preview. Hit the checkbox of Reverse.
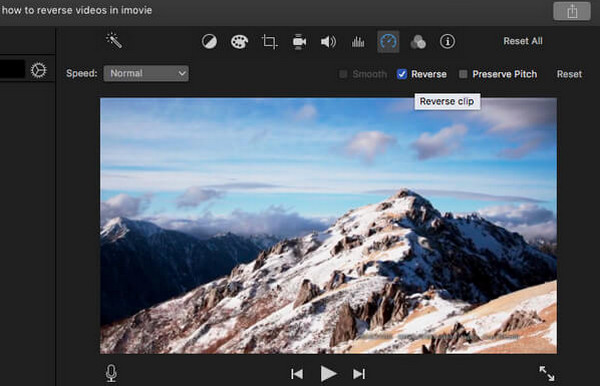
If you want to reverse several clips, go to the Edit tab and then Select All from the drop-down menu. Then, you can proceed to the next instruction.
Part 3: The Best Alternative to iMovie to Reverse Video on Windows/Mac
Unfortunately, if you're using a Windows PC, you can’t reverse a video in iMovie. And now, you’re having trouble finding a video editor that can help you reverse video without it, go and search for 4Easysoft Total Video Converter. This program works not only for Windows but also on Mac — which other programs do not support. Furthermore, it supports a collection of effects, filters, and themes you can apply to your videos. Besides this, you can quickly reverse a video without iMovie. Although you must note that if your video contains a sound, the sound will not be reversed. But it isn't a problem since you can easily add new tracks or mute the audio.

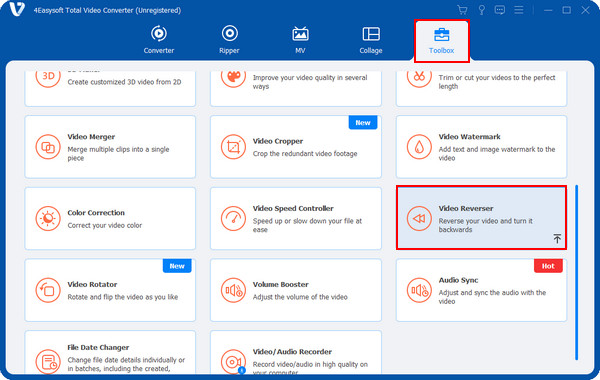
Provide a Video Reverser in the Toolbox, allowing you to quickly reverse a video clip without learning complicated steps and watching tutorials.
Easily add background music if the reversed video has audio since the sound won’t be reversed alongside the clip.
Equipped with a preview function to let you monitor every change you make on the video clip and see if you’re satisfied before exporting.
Allow you to customize video settings to maintain a high-quality output and select your preferred output format.
100% Secure
100% Secure
Step 1To get the latest version of 4Easysoft Total Video Converter, go to its official website, then complete the installation process to launch it on your computer. Go to the Toolbox tab once you open it, then locate the Video Reverser to reverse videos without iMovie.
Step 2Hit the Plus button to add the video you wish to reverse. Remember that after reversing the video, the audio won’t be reversed; you can mute it and add a new one if you like.
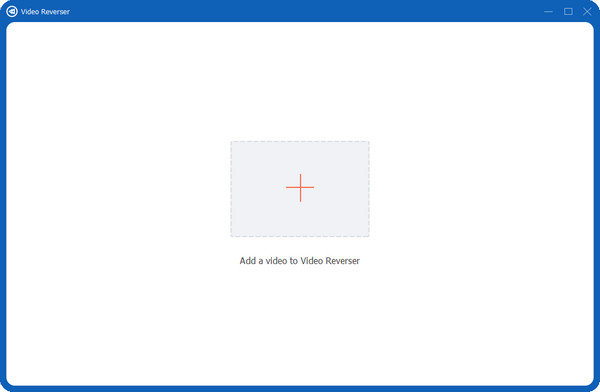
Step 3Once your video is imported, adjust the progress bar or set a start and end time for the video you want to reverse. You can watch all the changes you make to your video.
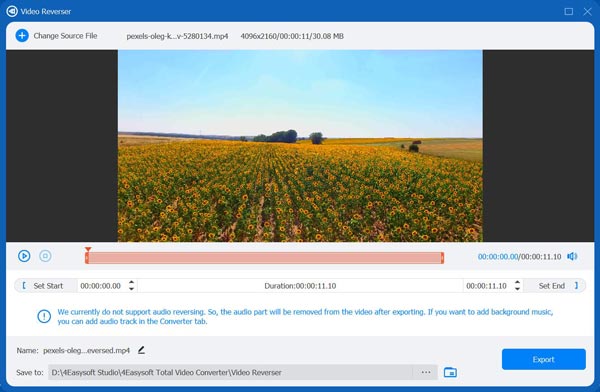
Step 4If satisfied, set a file destination and name, then you can hit the Export button to save the reversed video. Want to add background music to your newly reversed video? You can go to the Converter tab from the above menu.
Part 4: FAQs about How to Reverse Videos in iMovie
-
Can I use Snapchat as an alternative to iMovie for reversing videos?
Yes. You can hold down the Shutter button to capture a video, then swipe to locate the Reverse effect. And before saving your Snapchat video, you can preview the reverse effect you apply.
-
How to reverse video in iMovie’s alternative, QuickTime?
Yes, it does support reversing videos like iMovie. To do this, press and hold the Shift key and double-click the video clip. Then, the video will start playing backward.
-
Is there an app for Android like iMovie to reverse video?
Fortunately, there are many apps you can find on PlayStore to reverse video. One good example is mentioned in this post which is InShot. This video editing app is available on iOS and Android devices and supports many useful editing features, like reversing, cropping, cutting, adding filters, etc.
Conclusion
As usual, the reversing video can be very effective if you want your video to look unique compared to others. For iOS users out there, iMovie is one great tool for you to edit videos, and learning how to reverse video in iMovie is best. But for general use, always go for a tool that supports Windows and Mac: the 4Easysoft Total Video Converter. This program lets you take advantage of its features, like the more than 15 toolkits in the Toolbox that allow you to enhance video, reverse video, remove watermarks, and more. Don’t miss the opportunity to start creating an engaging video with this all-in-one video converter!
100% Secure
100% Secure


