Transfer and manage all data between iOS devices, device and computer, and iTunes and devices.
How to Transfer Photos from iPhone to Google Photos: 6 Ways!
Transferring your photos from your iPhone to Google Photos provides excellent benefits. Transferring them to Google Photos allows you to access your photos remotely and use it as another option to back up your photos. If you don’t know how to transfer your photos from iPhone to Google Photos, continue reading this post! This post features two workable ways how to transfer photos from iPhone to Google Photos with the four alternatives! Explore them now!
Guide List
How to Transfer Photos from iPhone to Google Photos 4 Alternative Ways to Backup/Transfer iPhone Photos FAQs about How to Transfer iPhone Photos to GoogleHow to Transfer Photos from iPhone to Google Photos
Google Photos offers two ways how to transfer photos from iPhone to Google Photos. You can sync an entire library of pictures to the app or upload specific ones. Both ways provide the ability to access all of the images from various devices remotely, and, of course, you can save more space on your iPhone/iCloud. So, how will you do these? Here are the steps you must follow:
1. Sync all the photos
You must enable the sync option to automatically transfer your iPhone photos to Google Photos and acquire continuous backup and remote access. So, are you asking, "How do I transfer photos from iPhone to Google Photos via sync? Here are the steps you must follow:
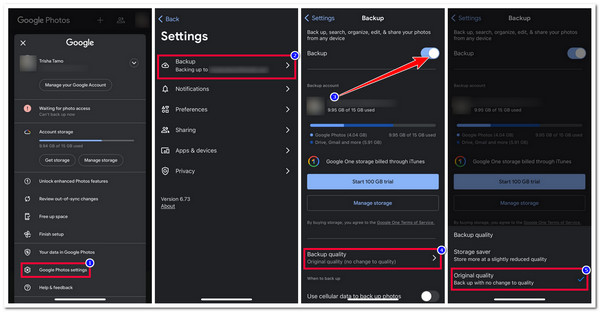
Step 1Install the Google Photos application on the App Store. After that, launch the app, sign in to your Google account, and tap the "Profile picture" icon at the top right corner. Then, select the "Google Photos settings" option.
Step 2Next, tap the "Backup" button and toggle on the "Backup" switch button. Then, tap the "Backup quality" button and select the "Original quality" option. And there you go! Those are the simple steps on how to transfer photos from iPhone to Google Photos via sync.
If the backup process isn’t initiated after the above steps, ensure you have provided Google Photos with the necessary access to your photos. Here is the photo for your reference:
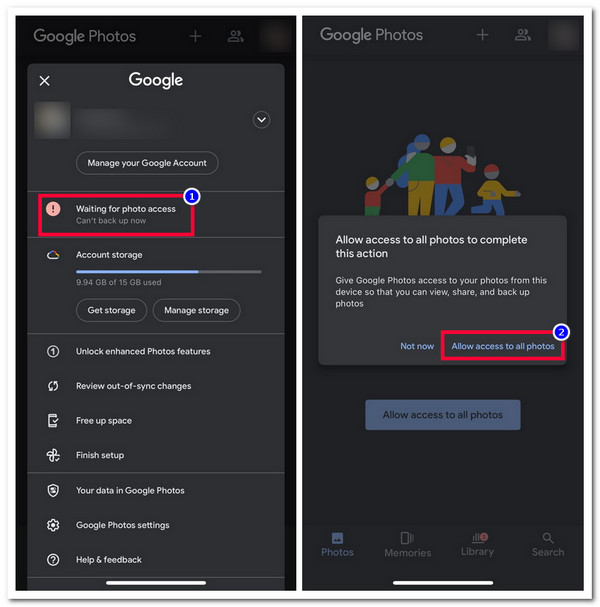
2. Upload Selected Photos
Otherwise, if you don’t want to sync all your iPhone photos to Google Photos, you can manually upload selected ones. Here’s how you do it:
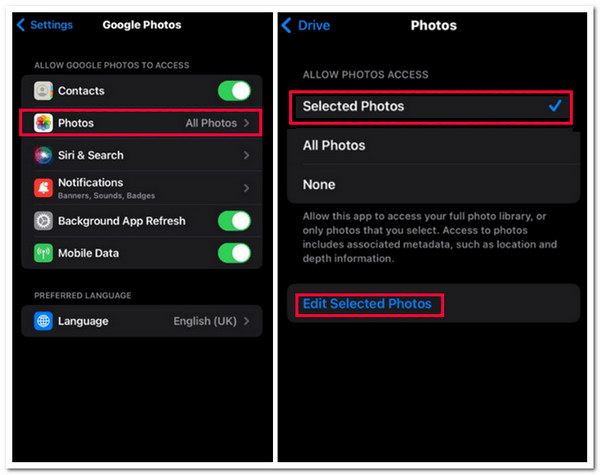
Step 1Launch the Settings app, tap the "Google Photos" button, and select the "Photos" option. After that, select the "Selected Photos" option and tap the "Edit Selected Photos" button.
Step 2Next, select all the photos you wish to upload to Google Photos from your iPhone. Once you are done, tap the "Done" button. And that’s it! Those are the simple steps on how to transfer photos from iPhone to Google Photos via manual upload.
Now, although doing those ways above provides excellent benefits, there are also a few disadvantages you need to consider. Google Photos only provides 15GB of free storage space to backup/sync/upload your photos. If you exceed this free storage space, the app will no longer let you upload new images. Moreover, the app slightly compresses your photos to reduce file size, leading to a minor quality loss.
4 Alternative Ways to Backup/Transfer iPhone Photos
There you go! Those are the two workable ways how to transfer photos from iPhone to Google Photos! Now, if you are hesitant to use Google Photos to transfer your iPhone images due to the abovementioned considerations, here are the four best alternatives! Explore each of them and see which one could provide your needs!
1. 4Easysoft iPhone Transfer
The first option that you can use as an alternative to those steps on how to transfer photos from iPhone to Google Photos is the 4Easysoft iPhone Transfer tool. This Windows and Mac-compatible tool lets you efficiently back up or transfer your iPhone photos in a location that offers massive space, like your computer. Moreover, this tool also supports an intuitive preview that lets you easily see and select which photos you want to transfer (either all of them or only those specific ones). Furthermore, compared to Google Photos, you can transfer multiple images to your computer without losing their original quality!
Offer an option to manage your photos, like album creation, preview, deletion, etc.
Let you check each of the details of the pictures, such as size, data, format, and more.
HEIC Converter that lets you convert iPhone HEIC photos to JPG or PNG formats.
Allow you to transfer other data such as contacts, text messages, music, etc.
100% Secure
100% Secure
Step 1Download and install the 4Easysoft iPhone Transfer tool on your Windows or Mac computer. After that, launch the tool and connect your iPhone to the PC/computer through a USB cable. Then, click the "Photos" tab on the left pane.

Step 2Next, the tool will categorically display your photos on your iPhone. Select all images you wish to transfer by ticking their corresponding checkbox.

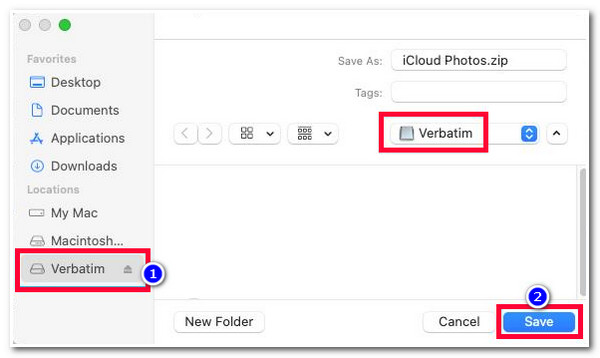
Step 3After that, tick the "Export to PC" button with the "computer" icon above. Then, on a pop-up folder window, select a folder where you wish to store the selected photos and click the "Select Folder" button. And that’s it!
2. Dropbox
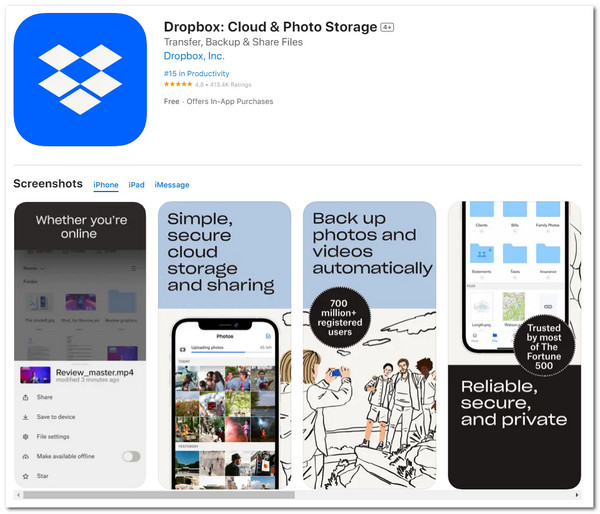
Apart from that tool, Dropbox can also be a good alternative if you want to use something other than the two ways how to transfer photos from iPhone to Google Photos due to the disadvantages. You can upload and transfer photos from your iPhone to another device with Dropbox. Moreover, this tool can automatically back up all new images on your iPhone’s Photos.
- Pros
- Focus on file (such as photos) management services.
- An easy-to-access app since it is accessible to all operating systems.
- Support a user-friendly interface with easy navigation.
- Cons
- Only provide 2GB of free storage.
- Offer expensive upgrades for large libraries.
3. Amazon Photos
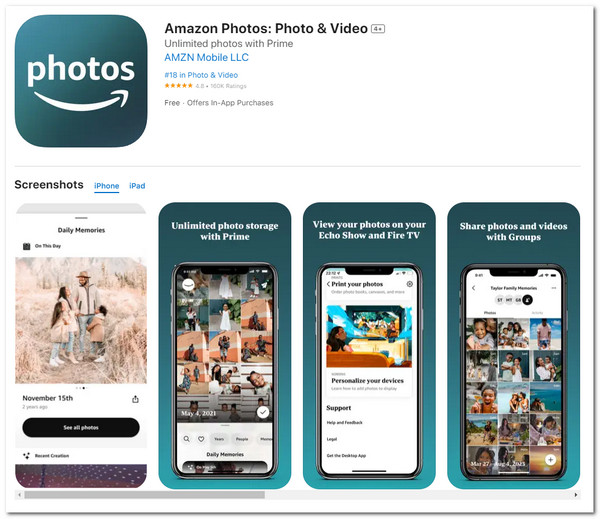
The following alternative tool for this lineup is Amazon Photos. This app is a good choice if you are a Prime member and already part of the Amazon Ecosystem. If you are, you can enjoy this app’s unlimited free storage space! With that, you can transfer tons of photos from your iPhone to the Amazon Photos app without worrying about storage space. With this app, you no longer need to perform the steps on how to transfer photos from iPhone to Google Photos if you worry about storage space.
- Pros
- Offer basic photo editing features.
- Let you create an album and organize photos by date.
- Allow you to transfer/store various photos in different formats.
- Cons
- Only offer 5GB storage space for users who are not Prime member users.
- Not worth the cost without Amazon Prime.
4. iCloud
The last option for this lineup is iCloud! If you are already invested in Apple devices, iCloud would be the best choice! iCloud offers a seamless integration for automatic photo backups and management. Moreover, iCloud also offers photo adjustment features that let you modify the looks of your photos. With this service, you no longer need to master the steps on how to transfer photos from iPhone to Google Photos. You need to set it up, and you are good to go!
- Pros
- Provide an efficient photo-syncing process across different iOS devices.
- Let you automatically upload newly captured photos to the cloud.
- Cons
- Only offer 5GB of free storage space to store photos.
- Provide quite an expensive storage upgrade.
FAQs about How to Transfer iPhone Photos to Google
-
1. How can I upgrade Google Photos' free storage space on an iPhone?
To upgrade Google Photos' free storage space, tap your Profile picture at the top left corner and select Get 100 GB+ storage. Then, follow the on-screen process to complete the purchase.
-
2. How can I access the transferred iPhone photos on Google Photos to other devices?
Head to the device where you wish to access the transferred photos. Then, download and install the Google Photos app. After that, launch the app, sign in using the same Google account you use to upload the iPhone photos, and then you will see all the transferred photos.
-
3. How long will it take for Google Photos to back up and sync my iPhone photos?
If you upload or transfer tons of high-quality photos with large file sizes from your iPhone, it might take many hours for Google Photos to back up and sync them. You must patiently wait for it and ensure you are linked to a stable Wi-Fi or data connection.
Conclusion
There you go! Those are the two workable ways how to transfer photos from iPhone to Google Photos and the four best alternatives! With those two ways, you can now transfer your iPhone photos to Google Photos to save more space or to make them accessible on various devices. If you are looking for a professional tool that lets you transfer iPhone photos with no quality loss and to a location with massive storage space, then the 4Easysoft iPhone Transfer tool is what you are searching for! Visit this tool’s official website to discover more.
100% Secure
100% Secure


