準備と方法 - DVD を YouTube にアップロードする方法
DVD を YouTube にアップロードすると、お気に入りの映画を保存して公開し、貴重な DVD コレクションを世界中の映画愛好家と共有することができます。ただし、アップロード プロセスに進む前に、いくつかの準備を理解する必要があります。このガイドでは、DVD を YouTube と互換性のある形式に変換することから、ビデオを正常にアップロードするまでのすべての手順を説明します。
DVDをYouTubeにアップロードする前の準備
DVD を YouTube にアップロードする準備をするときは、スムーズなプロセスを確実にするために特定の手順に従うことが重要です。これらの準備は、潜在的な問題を回避するのに役立つだけでなく、アップロードしたビデオの全体的な品質を向上させることにもなります。アップロードを開始する前に知っておくべき準備をいくつか紹介します。これらの重要な準備に従うことで、DVD を YouTube に正常にアップロードし、お気に入りのコンテンツを世界中の視聴者と共有できます。
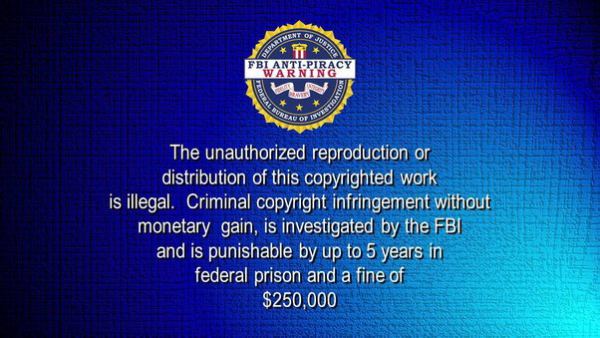
著作権ステータスを確認する: DVD コンテンツを YouTube にアップロードする前に、必ず DVD コンテンツの著作権状態を確認してください。多くの DVD には著作権で保護されたコンテンツが含まれており、許可なくアップロードすると YouTube チャンネルに警告が表示されたり、ブロックされたりする場合があります。したがって、DVD を YouTube にアップロードする前に、DVD コンテンツがパブリック ドメインであるかどうか、または著作権所有者から許可を得ているかどうかを必ず検討してください。
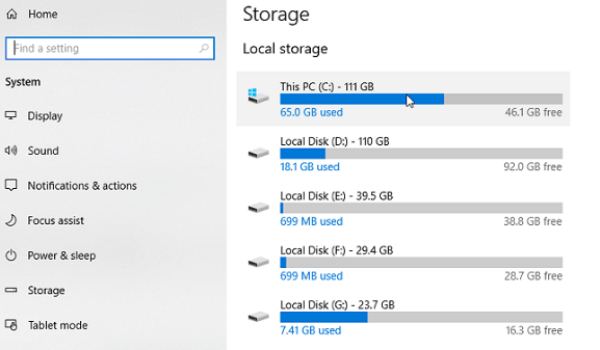
ストレージ容量を確認する: DVDをデジタルビデオ形式に変換する 大量のストレージ容量を消費する可能性があります。変換したファイルを保存するために、コンピュータまたは外付けハードドライブに十分な空き容量があることを確認してください。DVD のサイズは 1 ~ 8 GB の範囲であるため、DVD を変換してアップロードする前に、コンピュータのストレージ容量を確認してください。十分なスペースがない場合は、適切にクリーンアップしてください。
YouTubeアカウント: YouTube アカウントまたはチャンネルをまだお持ちでない場合は、まず作成する必要があります。動画のアップロードとコンテンツの管理には YouTube アカウントが必要です。これにより、将来的に YouTube チャンネルに DVD コンテンツをアップロードしやすくなり、より多くのファンや動画愛好家を引き付けることができます。

適切なビデオ形式YouTubeはさまざまな動画形式をサポートしていますが、 DVDをMP4に変換する 品質とファイル サイズのバランスが最も優れているため、最も推奨されるオプションです。他の形式を選択することもできますが、DVD を YouTube にアップロードするときは注意してください。再生の問題を回避するために、YouTube と互換性のある形式を選択してください。
DVDをYouTubeでサポートされている形式に変換する方法
前述のように、DVD を YouTube にアップロードする場合は、YouTube がサポートする適切な形式を考慮する必要があります。これらの制限は、DVD の最大長さが 11 時間、ファイル サイズが最大 20 GB、タイトル文字数が最大 70 文字など、DVD の一般的な仕様に関するものだけでなく、YouTube ビデオのデフォルトのアスペクト比が 16:9 であること、DVD または VOB 形式がサポートされていないことなど、ビデオ パラメータに関するより詳細な規制も含まれます。つまり、YouTube にはビデオのアップロードに関する制限がかなり多く、各パラメータを手動で調整する必要がある場合は、多くの時間と労力がかかる可能性があります。

したがって、専門家を直接選択するのが最も便利で迅速なオプションです 4Easysoft DVDリッパー DVDコンテンツをYouTubeでサポートされている形式に変換します。変換プロセス中は、YouTubeにアップロードするのに適したプリセットビデオ形式を選択し、ワンクリックでさまざまなパラメータを調整するだけです。また、 DVDを無料でコンピュータに保存する バックアップを作成します。4Easysoft を使用して DVD を変換し、YouTube にアップロードする方法は次のとおりです。
DVD を完全にコピーして、元のコンテンツを保持します。
DVD を YouTube でサポートされている適切な形式に変換します。
DVD の偶発的な損傷や紛失を防ぐために DVD をバックアップします。
小さいサイズの DVD の全体的な再生品質を向上させます。
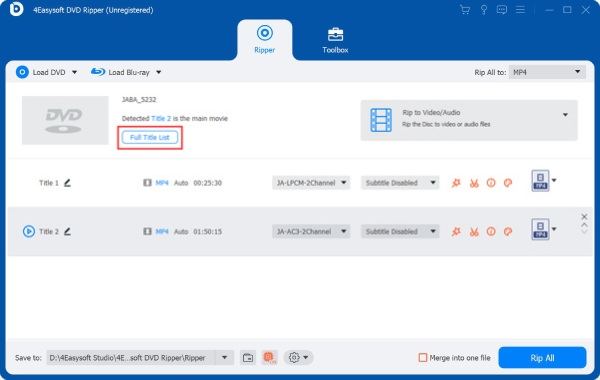
ステップ14Easysoft DVD Ripper を起動し、YouTube にアップロードする DVD を挿入します。「DVD の読み込み」ボタンをクリックします。
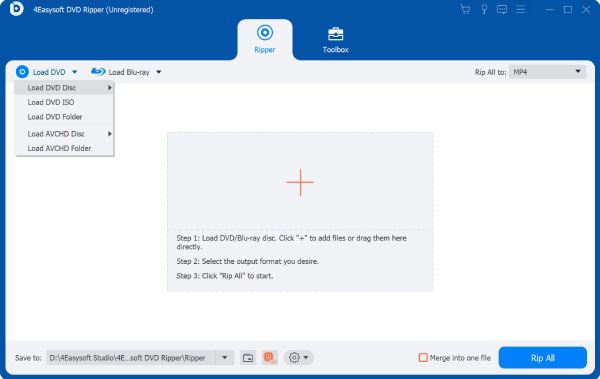
ステップ2DVD ディスクのメインタイトルが読み込まれたら、「フルタイトルリスト」ボタンをクリックしてすべてのタイトルを読み込みます。次に、「OK」ボタンをクリックして設定を保存します。
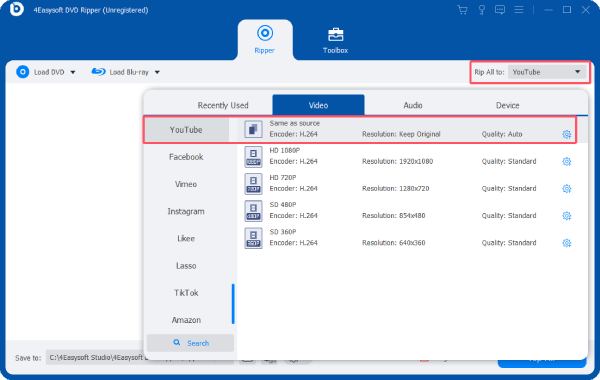
ステップ3「すべてをリッピング」および「YouTube」ボタンをクリックして、DVD を YouTube 対応形式に変換します。最後に、「すべてをリッピング」ボタンをクリックします。
3 つのステップで DVD を YouTube にアップロードする方法
4Easysoft DVD Ripper を使用して DVD を YouTube でサポートされている形式に変換したら、それを YouTube チャンネルに直接アップロードできます。DVD を YouTube に簡単にアップロードする方法がわからない場合は、次の手順に従って簡単に完了できます。
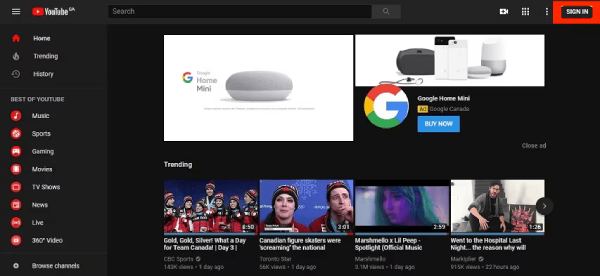
ステップ1YouTube の公式ウェブサイトにアクセスし、「サインイン」ボタンをクリックしてアカウントでログインします。
ステップ2自分の YouTube アカウントのホームページから、「動画を管理」ボタンをクリックして、投稿したすべての動画を確認します。

ステップ3「ビデオをアップロード」ボタンをクリックしてポップアップウィンドウを呼び出します。「ファイルを選択」ボタンをクリックしてDVDをYouTubeにアップロードします。

結論
結論として、DVDをYouTubeにアップロードする準備には、スムーズで成功するプロセスを確実にするためにいくつかの重要な手順が含まれます。DVDの著作権状態を確認することに加えて、最も重要なことは、YouTubeでサポートされているビデオ形式をアップロードする必要があることです。 4Easysoft DVDリッパー DVD をリッピングすると、アップロード作業が大幅に簡素化されます。必要な場合は、今すぐダウンロードして無料で試し、DVD を YouTube にアップロードしてください。


