棚からクラウドへ: DVD をクラウドに保存する方法 [2025 ガイド]

投稿者 ポーラ・パイラガ に DVDをリッピングする 2025年2月8日
クラウド ストレージは、増え続けるビデオ コレクションを管理するのに欠かせないツールとなっているため、DVD をクラウドに保存することを検討するのは良いことです。ただし、アップロードできるのは標準のビデオ ファイル形式のみなので、DVD をクラウドに保存するにはどうすればよいでしょうか。幸いなことに、今日のデジタル時代では、役立つ方法や、選択できるクラウド ストレージ サービスがあります。DVD を安全かつ簡単に共有できるように、クラウドに DVD を保存する最適な方法を見つける準備をしましょう。
ステップ1:DVDをビデオにリッピングしてクラウドに保存する
クラウドに DVD を保存するには、まず DVD を適切なビデオ ファイル形式でリッピングすることから始めましょう。豊富な編集機能と高速リッピング機能を備えたツールについて学ぶ機会がきっとあるはずです。 4Easysoft DVDリッパー という名前です。このソフトウェアは 100 を超えるフォーマットに対応しており、スマートフォン、メディア プレーヤー、コンピューターなどをサポートしているため、出力をあらゆるデバイスで再生できます。統合されたビデオ エディターを使用すると、DVD ビデオを回転、切り取り、トリミングしてから、正常にリッピングできます。さらに、この素晴らしいツールは、保護されているかどうかに関係なく、あらゆる種類の DVD を特別な助けなしで処理します。このプログラムを使用して、DVD コレクションとスペースを今すぐ改善しましょう。

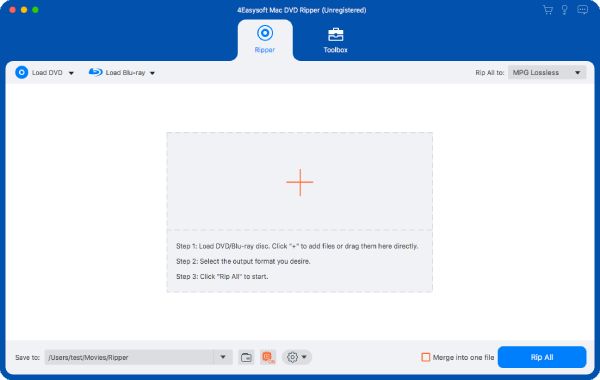
ステップ1続行する前にディスクをドライブに挿入してください。 4Easysoft DVDリッパー 画面に起動したら、「DVD のロード」をクリックし、「ディスクのロード」を選択して DVD ソースをインポートします。
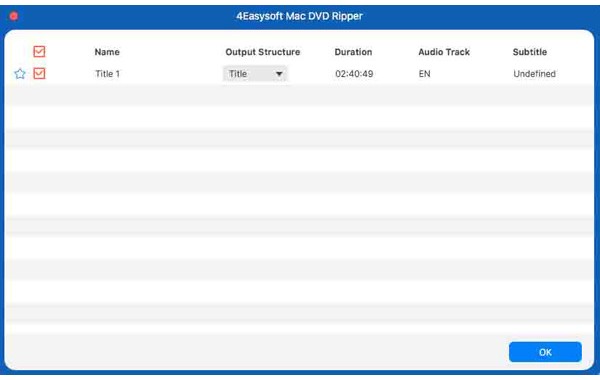
ステップ2メインタイトルが画面に表示されます。「全タイトルリスト」をクリックしてすべてのタイトルを表示し、ボックスにチェックを入れてデジタル版を取得するタイトルを選択します。選択を確定するには、「OK」をクリックします。
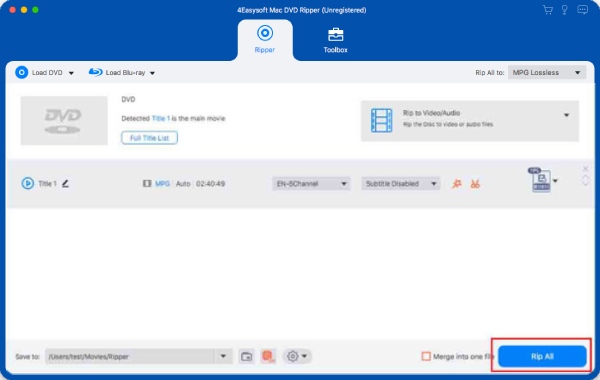
ステップ3MP4、AVI、MKV、その他のビデオ形式など、希望する形式を選択するには、「すべてをリッピング」メニューまでスライドし、「ビデオ」を選択します。選択した形式の横にある「カスタム プロファイル」ボタンを使用してプロファイル パラメータを変更するか、そのままにしておきます。

ステップ4最後に、DVD を選択したデジタル ファイルにリッピングします。プログラムのホーム画面に戻り、選択したすべてのトラックと字幕を確認してから、下のファイルの保存先を選択します。[すべてリッピング] をクリックしてプロセスを終了します。次に、次の部分に進み、DVD をクラウドに保存します。
ステップ 2: リッピングした DVD をクラウドに保存する - どれを選択すればよいですか?
DVD をビデオ ファイル形式にリッピングしたら、次は DVD をクラウドに保存します。次に、適切なストレージ サービスを選択します。各オプションには、独自の機能、容量、およびさまざまな価格プランがあります。以下は、Google Drive、Dropbox、および iCloud という 3 つの最も人気の高いクラウド ストレージ ツールの比較です。後で、リッピングした DVD をクラウドに保存する詳細な手順を説明します。
| クラウドストレージサービス | 無料ストレージ | 有料プラン | アクセス | ファイルサイズ制限 |
| グーグルドライブ | 15GB | $1.99/月 100 GB | ウェブ、モバイル、デスクトップ | 5TB |
| ドロップボックス | 2GB | $2TBの場合月額11.99 | ウェブ、モバイル、デスクトップ | 50GB |
| アイクラウド | 5GB | $月額0.99ドル 50GB | iOS、macOS、ウェブ | 50GB |
1. Googleドライブ
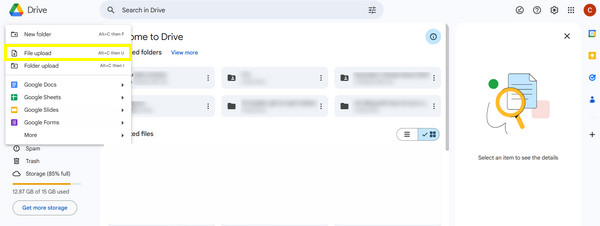
ステップ1Google アカウントで Google ドライブにサインインします。次に、左側の [新規追加] ボタンをクリックして [ファイルのアップロード] を選択し、DVD を iCloud に保存します。次に、コンピューター ファイルからリッピングした DVD を決定します。
ステップ2アップロードが完了したら、「新規追加」ボタンでフォルダを作成し、「フォルダ」を選択して整理できます。アップロードしたリッピングしたファイルをフォルダに転送します。
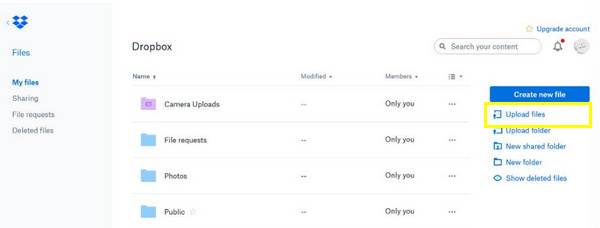
2. ドロップボックス
ステップ1Dropbox にアクセスし、適切な資格情報を使用してアカウントにサインインします。[ファイルをアップロード] ボタンをクリックし、[ファイルを選択] を選択して、リッピングした DVD ファイルの選択を開始し、クラウドにアップロードします。
ステップ2サイドバーの「新しいフォルダー」ボタンをクリックして、フォルダーを作成し、さらに整理します。リッピングしたファイルを新しいフォルダーにドラッグ アンド ドロップします。DVD をクラウドに保存するのはとても簡単です。
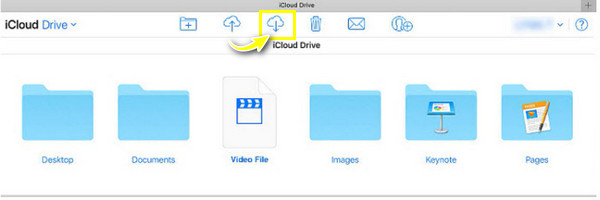
3. iCloud
ステップ1Web ブラウザで iCloud.com を検索し、Apple ID でサインインします。「iCloud Drive」アイコンに移動し、リッピングした DVD をウィンドウにドラッグ アンド ドロップします。「アップロード」ボタンを使用してファイルを選択し、インポートすることもできます。
ステップ2ファイルを整理したい場合は、上部の「フォルダ」ボタンをクリックします。作成したフォルダにファイルをドラッグアンドドロップするか、手動で追加して、DVD を iCloud に正常に保存できます。
結論
ご覧のとおり、DVDをクラウドに保存するのは非常に簡単です。DVDから映画を取り出したら、DVDをクラウドに保存してさまざまな用途に使用できます。クラウドストレージサービスには、Google Drive、Dropbox、iCloudの3つの最適な選択肢があります。ニーズに応じて、バックアップや簡単なアクセスに使用できます。ストレージツールには多くの選択肢がありますが、 4Easysoft DVDリッパー DVD をリッピングするために必要なのはこれだけです。複数のフォーマットをサポートしているほか、編集やカスタマイズのオプションがあり、処理速度も速いので、よりエキサイティングで効率的な体験ができます。