Record video, audio, gameplay, and webcam to record precious moments easily.
Handy Shortcuts to Take Real-time Screenshots on a Mac

Posted by Ethan Brooke to Record Video Mar 25, 2025
What’s the shortcut for screen recording in a MacBook? I’d like to capture the meeting records.
-from QuoraRecording the screen on your Mac becomes a lot easier if you know the right Mac screen recording shortcuts. This Quora user's question probably conveys a common question for many people. Whether you want to capture gameplay, create a tutorial, or save funny moments, shortcuts can save time and make the process more efficient. This guide will walk you through the default shortcuts for screen recording, exploring how to screen record on Mac like a pro with shortcuts.
Guide List
How to Screen Record on a Mac with the Default Shortcut How to Screen Record on a Mac Using QuickTime Shortcut Permission Settings for Advanced Screen Recorders Using Shortcuts The Most Powerful Way to Screen Record Mac with DIY ShortcutsHow to Screen Record on a Mac with the Default Shortcut
Recording your screen on a Mac is easy thanks to the built-in shortcuts macOS provides users with. This feature is perfect for those who need to quickly capture their screen for tutorials, presentations, or to share content. The default shortcuts eliminate the need for additional software, making it a convenient choice for both casual and professional use. With this shortcut, you can access macOS's intuitive recording tools to capture your entire screen or a selected portion. Here's how to quickly record your screen using your Mac's default shortcut:
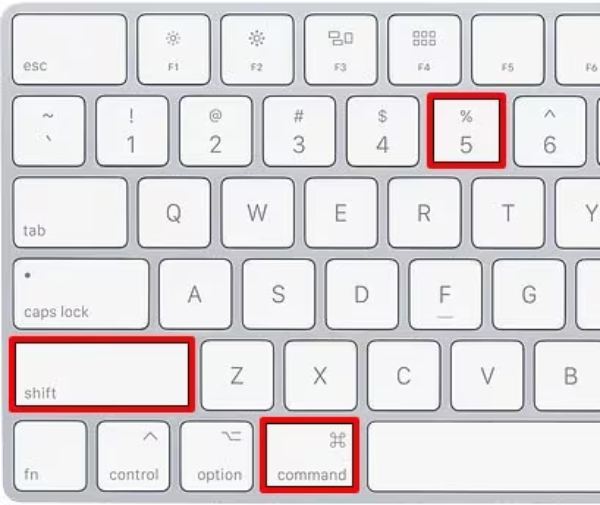
Step 1On your Mac, press the "Shift", "Command", and "5" buttons together to launch the recorder.
Step 2Click to choose the mode for screen record from "Record Entire Screen" or "Record Selected Portion".

Step 3Now, click the "Record" button to screen your Mac screen easily.

- Pros
- Convenience: Easily accessible with a simple shortcut.
- Convenience: Easily accessible with a simple shortcut.
- Free: Available to all Mac users without additional costs.
- Cons
- Limited Editing Features: Minimal tools for trimming or enhancing recordings.
- No Advanced Options: Lacks features like annotations, webcam overlay, or noise reduction.
- Basic Audio Support: Only records external microphone input and fails to screen record on Mac with audio.
How to Screen Record on a Mac Using QuickTime Shortcut
QuickTime Player is a native macOS application, which likewise offers a reliable way to record your screen with a shortcut. With QuickTime, you can capture the entire screen or a selected portion, making it ideal for tutorials, presentations, and more. While it doesn’t rely on a direct shortcut, it’s still efficient and straightforward for most users to access QuickTime’s recording capabilities by following these quick steps.
Step 1Launch QuickTime Player after finding it in the "Application" folder.
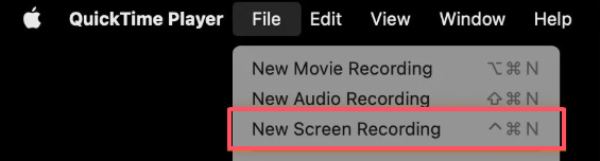
Step 2Click the "File" button and then the "New Screen Recording" button.
Step 3Click the "Record" button to start recording. To stop screen recording on your Mac, press the "Command", "Control", and the "Escape" button.
- Pros
- Pre-installed: Comes with macOS, so no extra downloads are required.
- Editable: Opens directly in QuickTime for trimming or sharing.
- Lightweight: Doesn’t consume significant system resources.
- Cons
- Basic Features Provided: Limited to simple screen recording without advanced tools.
- No System Audio: Can only record external microphone input without third-party tools.
- A Manual Start: Requires opening QuickTime and navigating menus, which may take more time than using a shortcut.
Permission Settings for Advanced Screen Recorders Using Shortcuts
If you think that the built-in Mac shortcut screen recorder and QuickTime screen recording can't meet your advanced needs, such as more abundant editing functions or customized shortcut keys for different functions, then you may consider some more advanced screen recorders for your Mac. No matter which one you choose, one thing you need to make clear in advance is that you need to turn on the advanced permissions of video recording in advance to use them normally. If you don't know how to turn on video recording with shortcut keys on your Mac, you can follow the demonstration steps below to ensure that your advanced screen recorders with shortcuts can run normally on your Mac:
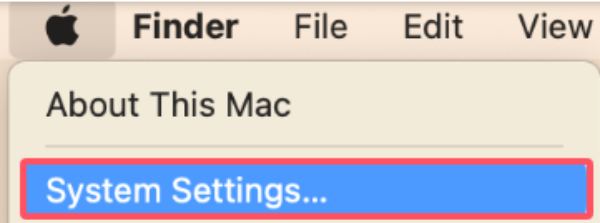
Step 1Click the "Apple" button and then the "System Settings..." button.
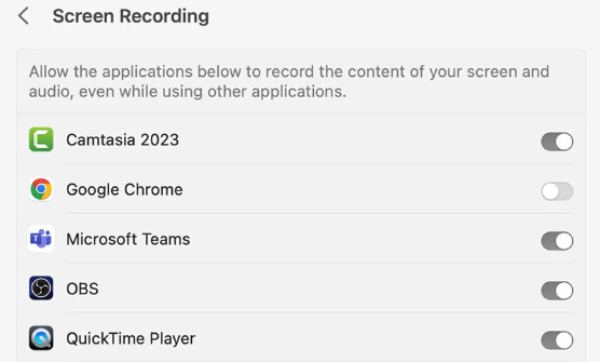
Step 2Click the "Privacy & Security" button. Then, click the "Screen Recording" for adjustment.

Step 3Find your desired screen recorder for Mac with shortcut and ensure the button is toggled.
The Most Powerful Way to Screen Record Mac with DIY Shortcuts
Nevertheless, using the built-in screen recorder with default screen recording shortcuts on Mac still leaves some users feeling lacking. These inconveniences mainly come from the following aspects:
First, these shortcuts are still cumbersome, which means that after pressing the shortcut, you only launch the screen recorder tool instead of starting the recording directly.
Second, these shortcuts usually only support one or two settings on Mac, and you cannot customize multiple shortcuts for different specific functions.
In addition, the quality of the default screen recorder is not guaranteed, and you may find that the quality of recordings does not meet your requirements, not to mention that you cannot directly edit them.

Based on the above shortcomings and inconveniences, you may need a more powerful and more comprehensive screen recorder, which also supports more extensive shortcut customization. 4Easysoft Screen Recorder is the one you are looking for! If you want to start recording with a single shortcut, you can set it up as follows and enjoy the convenience of starting screen recording on your Mac with one click in the future:
Customize multiple shortcuts as you want to record your Mac screen.
You can choose multiple modes to apply to different Mac usage scenarios.
Edit the recordings right after capturing the Mac screen with shortcuts.
Support exporting your Mac screen recording in multiple formats.
100% Secure
100% Secure
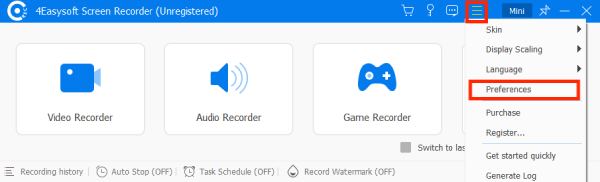
Step 1Launch 4Easysoft Screen Recorder and click the "Menu" button and then the "Preferences" button.
Step 2Click the "Hotkeys" button to DIY the shortcut for recording your Mac screen with system audio included.
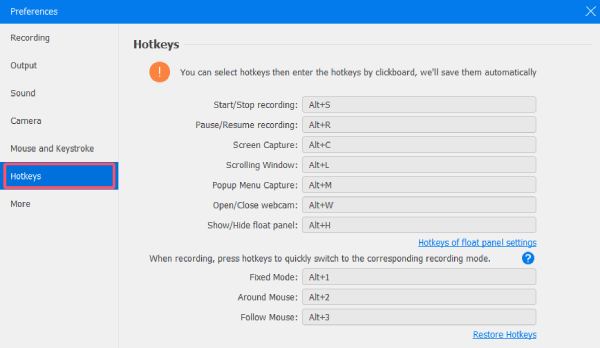
Step 3After clicking the "OK" button to save the settings, you can press the shortcut and start recording your Mac screen instantly.

Conclusion
All in all, both the default macOS shortcuts and QuickTime Player provide reliable ways to screen record on Mac. These default shortcuts are great for quick access and basic screen recording needs. However, both methods have limitations. For more complex needs, you may need 4Easysoft Screen Recorder, which has greater flexibility and features. If you need it, download it now and try it for free!
100% Secure
100% Secure