Record video, audio, gameplay, and webcam to record precious moments easily.
How to Record Mac Audio Out Using Tools like OBS Studio

Posted by Ethan Brooke to Record Audio Mar 25, 2025
For Mac OBS, how do you add Desktop Audio if it's disabled?
-from QuoraCapturing Mac audio using OBS Studio can be a challenge, even though OBS does a great job of helping you record screen activity on your Mac. Unlike other operating systems, macOS imposes some limitations that make it difficult for OBS to directly capture system audio. If you’re struggling with this issue, you’re not alone. This guide will help you bypass macOS’ limitations and introduce how to easily record screen and system audio using OBS Studio.
Guide List
Can OBS Studio Record Mac Audio Directly? How to Bypass Mac Audio Recording Restrictions How to Make OBS Record Mac Audio Out The Most Hassle-Free Way to Record Mac AudioCan OBS Studio Record Mac Audio Directly?
Many people have similar questions because they fail to make OBS record Mac audio out: can OBS Studio record Mac audio directly? In fact, this needs to be discussed on a case-by-case basis, because OBS Studio's ability to capture Mac desktop audio depends largely on the version of macOS and OBS you are using.
Although OBS is an excellent Mac screen recorder, due to macOS's built-in limitations on internal audio recording, you usually need some additional measures to ensure that the recording runs normally and achieves full functionality. Depending on your settings, you may need to update the software or rely on third-party plug-ins to achieve high-quality screen recording.
If your Mac is running Ventura (macOS 13) or newer, OBS Studio 30 introduced a built-in feature for capturing desktop and application audio. This feature simplifies the process, allowing you to seamlessly set up and start recording system audio with just a few clicks.

However, for users using older versions of macOS or OBS, screening record on Mac with audio becomes more complicated. OBS 28 and 29 can capture application audio on Ventura, but only if a screen capture source is added. For macOS versions before Ventura, OBS lacks the ability to record system audio on its own.
How to Bypass Mac Audio Recording Restrictions
Recording Mac desktop audio with OBS Studio usually requires extra steps to bypass macOS's built-in limitations. Here's a simple guide to help you record your screen and audio using third-party plugins and the proper OBS settings. In general, you need to perform two different steps to avoid macOS's default limitations on audio recording and ensure that Mac audio recording can work properly. These two steps are: installing third-party plugins to act as virtual audio drivers; and setting up the details for OBS Studio recording.
1. Install a third-party plugin
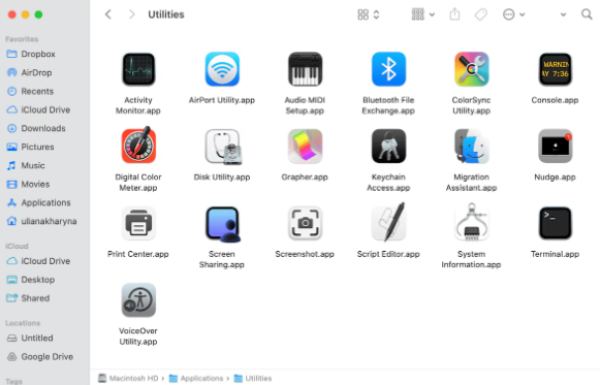
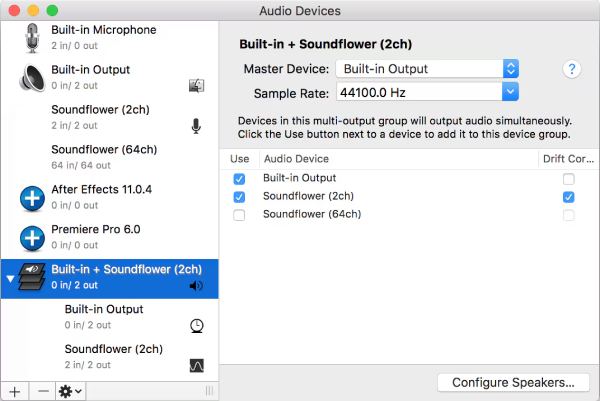
Since macOS does not natively support OBS system audio recording, you will need a third-party audio routing plugin such as iShowU audio Capture, Loopback, or BlackHole. These tools create a virtual audio device to route system audio to OBS. After downloading and installing your favorite plugin from the official website, you should:
Go to System Preferences > Sound > Output and select the virtual audio device created by the plugin
2. Configure OBS settings
After you install a third-party plugin for audio recording, you will also need to make some changes to OBS Studio’s default settings to ensure that these third-party plugins work properly. If you do not make corresponding settings and selections, your OBS Studio may still not be able to run these virtual audio plugins normally during screen recording.
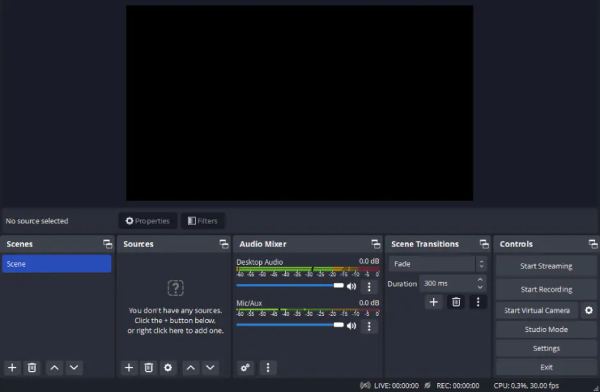
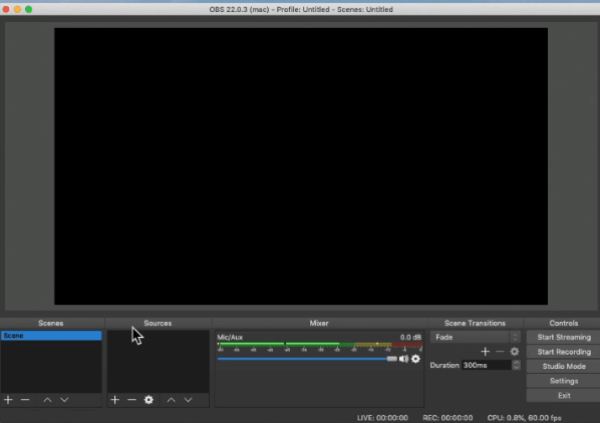
Step 1Launch OBS Studio and create a new scene for recording as you usually do.
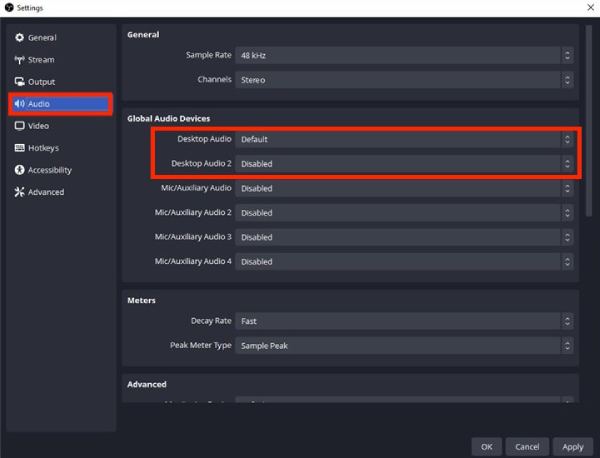
Step 2Click the "Settings" button under the "Control" tab. Then, click the "Audio" button.

Step 3Under the "Global Audio Devices" tab, click the "Desktop Audio" button to change the audio input. Finally, click the "Apply" button.
How to Make OBS Record Mac Audio Out
After installing a third-party audio plugin and configuring the correct settings, you can effectively bypass macOS's restrictions on system audio recording in OBS Studio. This setup enables you to capture high-quality audio alongside your screen recordings, allowing OBS Studio to function as a complete recording solution for both video and sound. The process may seem complicated initially, but with the right steps, it becomes straightforward and highly rewarding. Once the plugin is installed and properly configured, you’re ready to proceed. Simply follow the step-by-step instructions below to set up OBS Studio and start recording Mac audio out with ease.
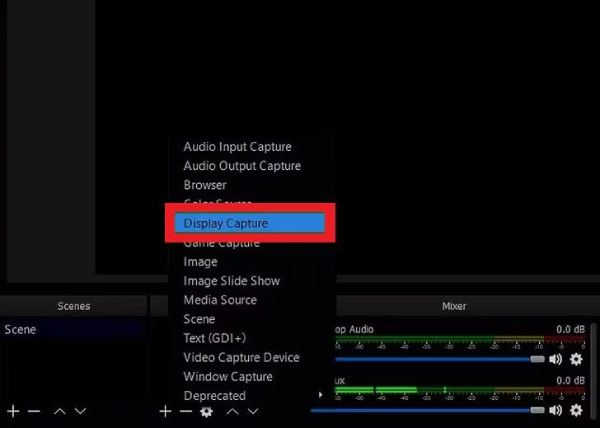
Step 1Launch OBS Studio and click the "Add" button under the "Sources" tab. Click the "Display Capture" button.
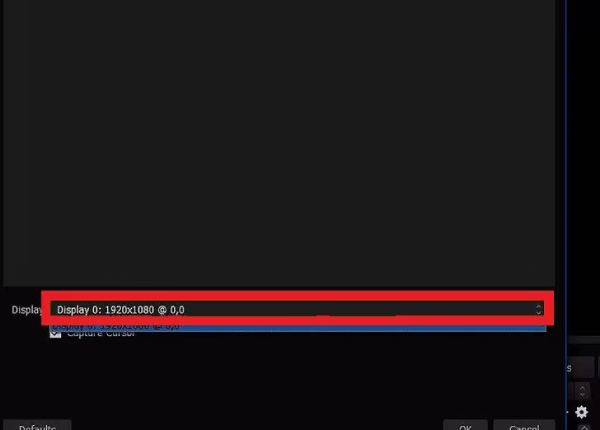
Step 2Click the "Display" button and click the "Display xxx" to select the device for recording system audio on your Mac.
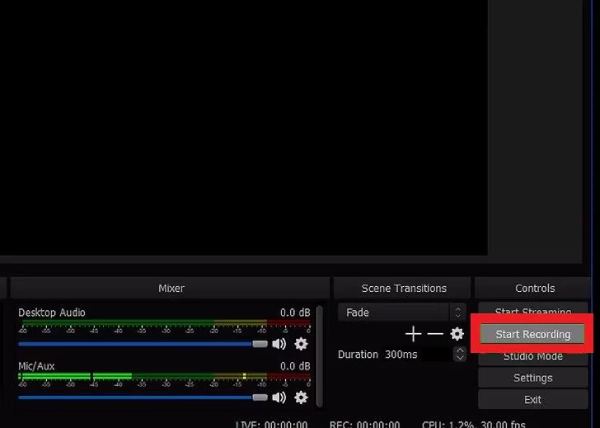
Step 3Now, you can adjust the audio settings as you desire. Once finished, click the "Start Recording" button.
The Most Hassle-Free Way to Record Mac Audio
If using OBS Studio with third-party plugins and complex configurations overwhelms you, then you may need a simpler solution to record Mac audio. Many advanced screen recorders are designed to handle screen and system audio without the need for additional tools or complicated setup. These all-in-ones eliminate compatibility issues, reduce the steps required, and provide a smoother experience.
4Easysoft Screen Recorder is one such excellent professional screen recorder, which generally provides excellent recording quality, supports high-resolution video and crystal-clear audio. With built-in editing tools, customizable settings and direct export options, 4Easysoft Screen Recorder is an ideal choice for users looking for an efficient and professional recording solution. Whether you are creating tutorials, capturing meetings or recording gameplay, these choices ensure you get a smooth experience with minimal effort.
Ensure Mac audio can be captured while recording screen.
No need to install third-party plugins or additional settings.
Choose the device to record to with custom settings.
Remove background noise to improve the audio quality.
100% Secure
100% Secure
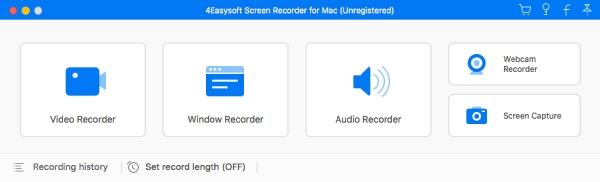
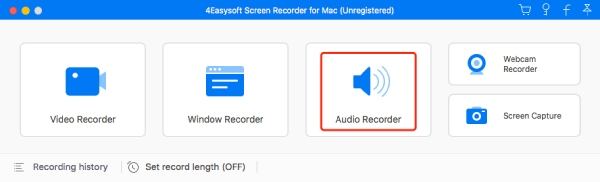
Step 1Launch 4Easysoft Screen Recorder on your Mac. Click the "Audio Recorder" button.
Step 2Click the "System sound" button to record the Mac screen with audio sound included.
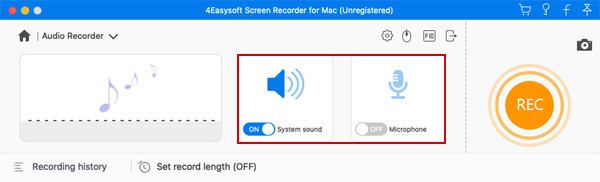
Step 3Click the "Record" button to make it record Mac audio out. When finished, click the "Stop" button to stop screen recording on your Mac.
Conclusion
In conclusion, recording Mac audio with OBS Studio is effective, but requires additional plugins and configuration. For users seeking a more straightforward solution, hassle-free screen recorders offer a great alternative that simplifies the process while providing high-quality results. If you want to enjoy such seamless and high-quality recording on your Mac, download and 4Easysoft Screen Recorder now to record Mac screen with audio in one click.
100% Secure
100% Secure