Record video, audio, gameplay, and webcam to record precious moments easily.
How to Take Screenshots on OnlyFans on All Devices with High-Quality
"Can you screenshot OnlyFans?"- OnlyFans imposed screenshot restrictions protecting creators from those who want to publicize their content for business-related use without their consent. Unless it is not for business use, you’ll not encounter the consequences of the imposed restrictions. If you are looking for ways to take screenshots on OnlyFans, well, you are on the right page! This post features 5 ways how to screenshot OnlyFans. Explore them now!
Guide List
Part 1: How to Screenshot OnlyFans on Windows/Mac with High Quality Part 2: The Default Ways to Screenshot OnlyFans on All Devices Part 3: FAQs about How to Take Screenshots on OnlyFansPart 1: How to Screenshot OnlyFans on Windows/Mac with High Quality
If you are looking for a tool to screenshot OnlyFans easily and with high quality, then the 4Easysoft Screen Recorder tool is what you are searching for! Aside from its built-in video and audio recorders, this tool also has a Snapshot feature where you can take screenshots easily. Moreover, this tool supports capturing any region of your screen, whether the whole or specific portion of your screen or window. Furthermore, this tool supports hotkeys which you can use to take screenshots on OnlyFans quickly at any time. These are just a few powerful capabilities; it still has much to offer. So, without any further delay, discover them all now!

Infused with an output customization setting where you can tweak your OnlyFans screenshot output format and quality.
Equipped with drawing tools, you can use them to modify your screenshots by adding annotations.
Support an easy-to-understand hotkeys, which you can use to start, pause, and take screenshots.
Allow you to customize hotkeys according to your preferred keyboard combinations.
100% Secure
100% Secure
How to Screenshot OnlyFans on Windows/Mac using 4Easysoft Screen Recorder Tool:
Step 1Download and install the 4Easysoft Screen Recorder tool on your Windows or Mac computer. After the installation, launch the tool and go to the OnlyFans platform. Access the tool once again and select the Snapshot feature from the option.

Step 2Next, your mouse will become a cursor move; left-click and move the selected area to place it properly. You can also use the borderlines to modify the scope of the selected area.
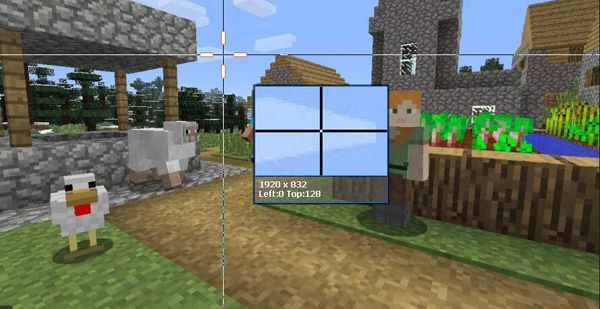
Step 3After that, a toolbox will pops-up on your window. You can edit your screenshot by adding arrows, shapes, text, callouts, etc.
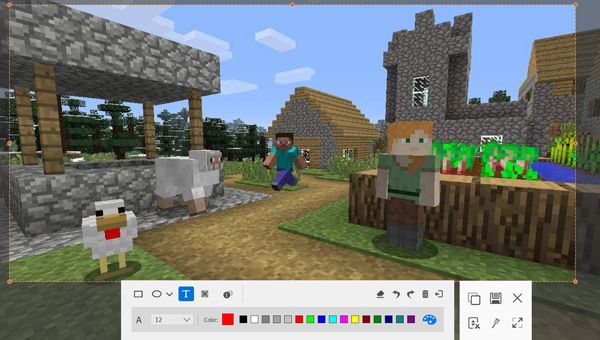
Step 4Once you are done customization your screenshot and satisfied with it, click the Save icon at the right side of the toolbox to save the file on your local storage.
Part 2: The Default Ways to Screenshot OnlyFans on All Devices
Now that you have discovered the best way to screenshot OnlyFans using 4Easysoft Screen Recorder, here are the other ways to capture screenshots using different platforms with their built-in screenshot functions.
How to on-screen capture OnlyFans on Windows - In Windows, there are various ways how you can take screenshots on OnlyFans. You can take screenshots of the entire screen or a specific portion. Here are the ways how you do it.
- The Print Screen Button - This method is one of the easiest ways to take screenshots of your whole screen. Here are the basic steps you need to follow:
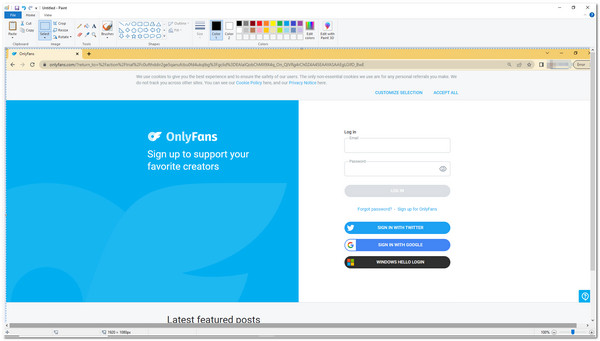
Step 1Access OnlyFans on your browser. After that, on your keyboard, press the PrtScn button to take quick screenshots on OnlyFans. Then the screenshot will then be copied onto your clipboard.
Step 2Paste it to any program that allows you to edit or insert images, like Microsoft Powerpoint or Paint; press the Windows key + V to paste the screenshot.
- The Snip & Sketch Tool - Alternatively, you can screenshot a specific window on OnlyFans if it is currently on a minimized window. Aside from that, this method also supports taking Rectangular, Free-form, and Full-screen screenshots. Here’s how you do it:
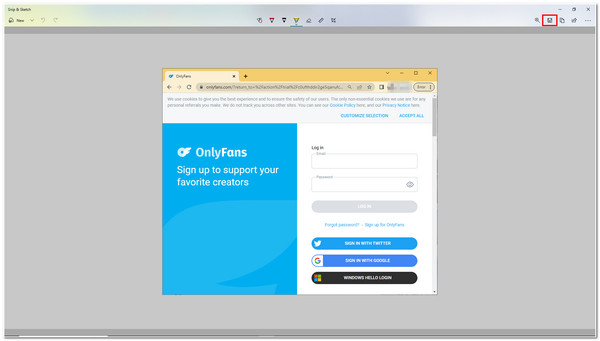
Step 1Press the Windows Key + Shift + S. After that; you’ll notice that your screen will dim, and a toolbox will appear on the upper middle part of your screen.
Step 2Select the Window Snip icon from the option and click the OnlyFans window. Then, a preview of your screenshot will notify you at the lower-right corner of your screen.
Step 3Tick the notification to launch the Snip & Sketch program and click the Save as icon at the upper right corner of the tool, or you can also press Ctrl + S on your keyboard for a much faster saving.
How to initiate screenshot OnlyFans on Mac - Alternatively, if you are accessing OnlyFans using your Mac, this platform is infused with different default ways to take one. Here are the ways how you do it:
- Shift + Command + 4 + Space Bar - This method lets you take screenshots on OnlyFans of a specific window. Here are the steps for you:
Step 1Launch the OnlyFans and simultaneously press Shift + Command + 4 + Space Bar. After that, your cursor will then become a camera icon.
Step 2Select the OnlyFans window; the screenshot function will automatically save the image on your local storage.

- Shift + Command + 3 - Otherwise, if your OnlyFans window is at its full screen, you can use this method to capture it. Here’s what you need to do:
Step 1Press and hold these keys on your keyboard: Shift + Command + 3.
Step 2Then a thumbnail will appear on your screen; wait until Mac’s screenshot function save’s your image.

How to capture screen on Android while using OnlyFans - Like desktops above, Android also has a built-in screenshot function. To do this, here are the steps you need to follow:
Step 1Access OnlyFans on your device and press the Power and Volume down buttons. Otherwise, if this doesn’t work, press and hold the Power button until the Screenshot option appears on your screen.
Step 2After that, the screenshot preview will pop up on your screen and automatically save on your Album.
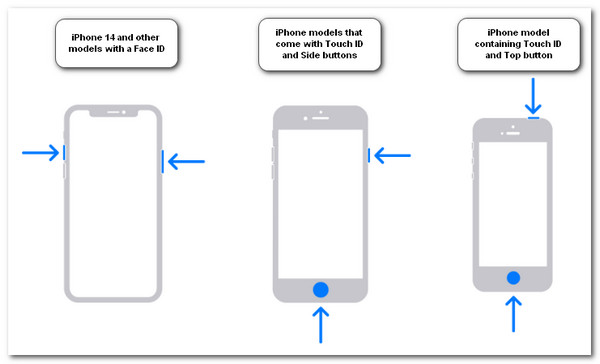
How to Screenshot OnlyFans iPhone way - If you are using iPhone to access OnlyFans, the ways to take screenshots differ from each iOS version. Follow the one that applies to your iPhone.
Step 1For those who use iPhone 16/15 and other models with a Face ID:
Press and quickly release the Side and Volume Up buttons simultaneously.
- Otherwise, if you are using iPhone models that come with Touch ID and Side buttons, here’s what you need to do to capture OnlyFans on your iPhone:
Press and quickly release the Side and Home buttons at the same time.
- Alternatively, if you use an iPhone model containing Touch ID and Top button, consider these ways to initiate screen capture on the OnlyFans screen:
Press and release the Home and Top buttons simultaneously.
Step 2Then, a thumbnail of your screen capture pops up on your screen; wait for your device to save it to your Album.
Part 3: FAQs about How to Take Screenshots on OnlyFans
-
1. Does OnlyFans notify screenshots?
No, OnlyFans doesn’t have a feature that notifies creators when someone screenshots their content. So, as a creator, it is vital to becoming attentive and protective of your content as it is very vulnerable to those who use it for business-related activities without your consent.
-
2. What will happen if I screenshot OnlyFans?
There’s nothing to worry about if you take screenshots on OnlyFans. Not until you republished it to other platforms, which once you get caught or reported, your membership will ban because of sharing content without the creator’s permission.
-
3. Where do Mac screenshots go after capturing one?
By default, Mac saves your screenshots on your desktop. It was named "Screen Shot [date] at [time] .png" Changing Mac’s default location for saving screenshots is only made available under macOS Mojave or later.
Conclusion
Now those are the ways how to screenshot OnlyFans on various platforms. Remember, OnlyFans allows its users to take screenshots but doesn’t allow you to republish them to other platforms for business-related activities without the creator’s consent. If you are looking for the a great way to take screenshots on OnlyFans with high-quality, then 4Easysoft Screen Recorder is the one you need. Feel free to visit its official website to learn more about it.
100% Secure
100% Secure


