Chuyển đổi, chỉnh sửa và nén video/âm thanh ở hơn 1000 định dạng với chất lượng cao.
Edit Like a Pro: How to Change Aspect Ratio in Premiere Pro?
 Gửi bởi Paula Pailaga ĐẾN Chỉnh sửa video/âm thanh Th10 16, 2024
You know that the aspect ratio is one of the crucial elements that hugely impact the visual presentation of your content. Understanding how to adjust aspect ratios in tools like Adobe Premiere Pro can be a game changer. But how can you change aspect ratio in Premiere Pro? Whether you want a cinematic masterpiece or a social media clip, you will learn here how to change the aspect ratio in Premiere in four ways. Dive in and control your project's dimensions!
Danh sách hướng dẫn
How to Set Aspect Ratio in Premiere for A New Sequence Change the Aspect Ratio in Premiere Pro for All Videos Best Alternative Tool to Change Aspect Ratio FreelyHow to Set Aspect Ratio in Premiere for A New Sequence
To change aspect ratio for a new sequence in Premiere Pro, you have to create a sequence and configure its settings to match your desired ratio perfectly. Whether you want the standard ratio or custom size, setting the correct one ensures that your footage presents perfectly across different devices and platforms. Here’s a detailed guide on how to change the aspect ratio in Premiere for a new sequence:
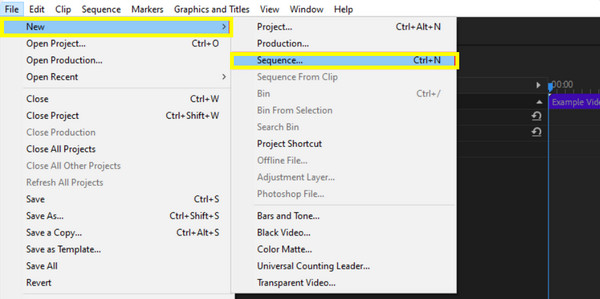
Bước 1Launch the Adobe Premiere Pro and start a new project. Head to the "File" menu and choose "New" then "Sequence". Otherwise, click "New Item" from the Project panel and select "Sequence".
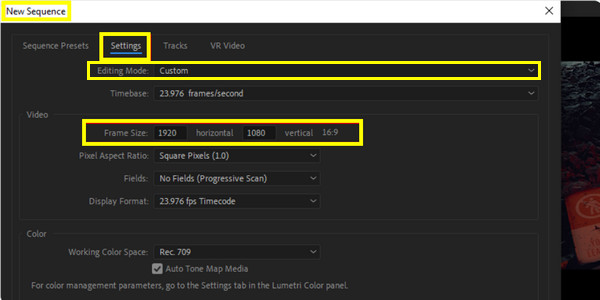
Bước 2After that, in the New Sequence dialog box, click the "Settings" tab, and from the "Editing Mode" pulldown, choose "Custom" to manually set the frame size.
In the “Horizontal” and “Vertical” fields, enter your desired frame size, e.g. 1920x1080 for a 16:9 aspect ratio or 1440x1080 for a 4:3 aspect ratio. Also, ensure that the “Pixel Aspect Ratio” is set to “Square Pixels” unless you need specific non-square pixels.
Bước 3Now, name your sequence in the "Sequence Name" field. Once everything is settled, click "OK" to create your sequence with the aspect ratio you want.
Change the Aspect Ratio in Premiere Pro for All Videos
After learning how to change the aspect ratio in Premiere Pro for a new sequence, how about changing it for all videos? Changing the aspect ratio for all clips can be done in several ways, and each of them has specific advantages depending on your workflow and requirements. Here are the three different ways to achieve this:
Method 1: How to Change Aspect Ratio in Premiere by Cropping
This technique is used to change the aspect ratio by eliminating parts of the video frame to fit the new ratio. It effectively resizes the visible portion of your video, focusing on the central area and getting rid of the edges. Here’s how to do it:
Bước 1Run the Premiere Pro and open the video project with all the clips you wish to adjust. Once opened, click the video clip in the Timeline you want to crop.
Bước 2Head to the "Effects" panel, and search for the "Crop" effect from the "Transform" under "Video Effects", then drag and release it onto your clip.
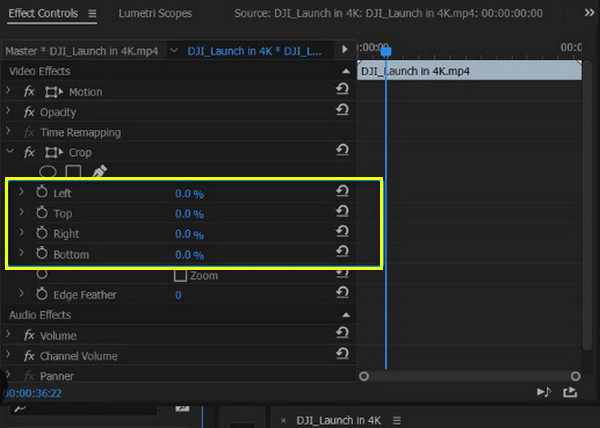
Bước 3Next, adjust the crop settings in the "Effect Controls" panel. From the "Crop" effect, use the left, right, top, and bottom sliders to crop the frame in line with your new aspect ratio.
Bước 4Later, once you’re satisfied with the look of your video, review the footage on your screen to ensure it looks as expected.
Method 2: How to Change Aspect Ratio in Premiere by Adding Black Bars
Meanwhile, this black bars method can be done without cropping the footage. This solution involves placing black bars on the top, bottom, or sides of the video to fit a different aspect ratio while preserving the original content, which helps fit a widescreen video into a square frame.
Bước 1Open your video project to the Adobe Premiere Pro. Slide into the "File" menu, go to "New", and select "Black Video". Drag the black video effect to the Timeline.
Bước 2Select the black video in the Timeline and position it using the “Effect Controls” panel. For instance, scale the black video to cover the areas outside if you want to create a 16:9 aspect ratio.
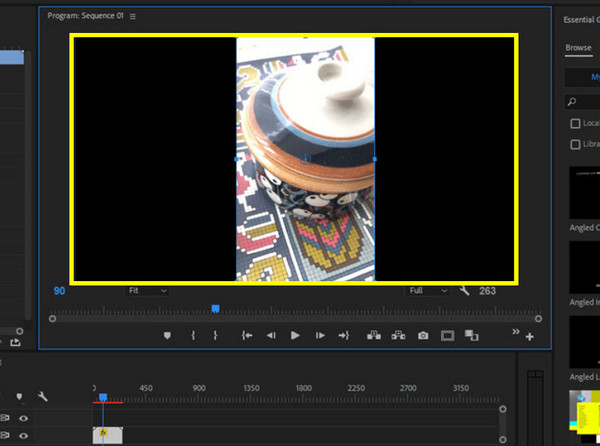
Bước 3Drag and release the black video on a track above your main video in the Timeline, and adjust the black video layer to fit the desired aspect ratio. Finally, repeat this process for each clip.
Method 3: How to Change Aspect Ratio in Premiere by Adding an Adjustment Layer
A versatile approach that lets you apply effects or transformations to multiple clips at once is by adding an adjustment layer. Using this method, you will create an adjustment layer that covers the complete timeline or specific segment, letting you scale and reposition clips uniformly.
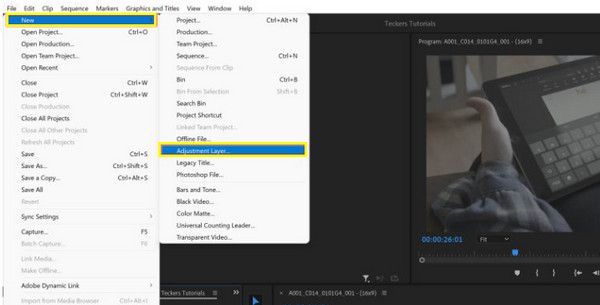
Bước 1Launch Adobe Premiere Pro and load your video project. Head to the "File" menu, and select "Adjustment Layer", then click "OK".
Bước 2Drag the layer from the Project panel to a track above your video in the Timeline. Select the adjustment layer and head to the "Effect Controls" panel. Apply the "Scale" and "Position" effects to change the footage to the desired aspect ratio.
Bước 3Review the video and make sure all clips fit correctly within the new aspect ratio. That’s how to change aspect ratio in Premiere quickly through the adjustment layer!
Best Alternative Tool to Change Aspect Ratio Freely
When it comes to video editing, having the right tools in your hand can make all the difference. While Premiere Pro is a powerhouse for video editing, sometimes you need a more streamlined solution for tasks like ‘how to change aspect ratio.’ So, the 4Easysoft Total Video Converter is here! It is an all-around tool designed to handle a wide array of video conversion and editing needs with ease. You can effortlessly set custom aspect ratios, making sure your videos fit seamlessly within any desired frame. It has straightforward cropping and resizing options, letting you fine-tune your video’s dimensions to achieve the ideal look.
Support a variety of standard and custom ratios to match specific requirements.
Ensure your video retains its clarity and sharpness after adjustments.
Can manage multiple videos at once with the batch processing feature.
Wide format support, like MP4, AVI, MOV, and more, with customizable settings.
Bảo mật 100%
Bảo mật 100%
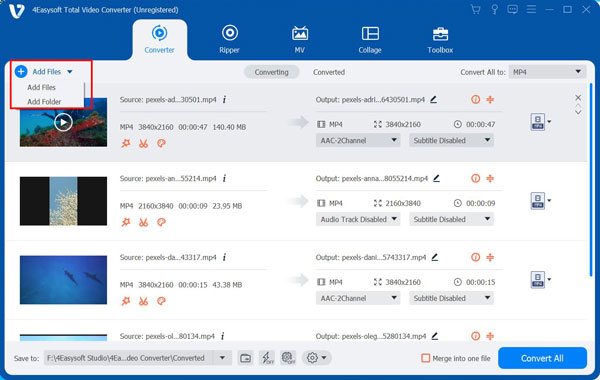
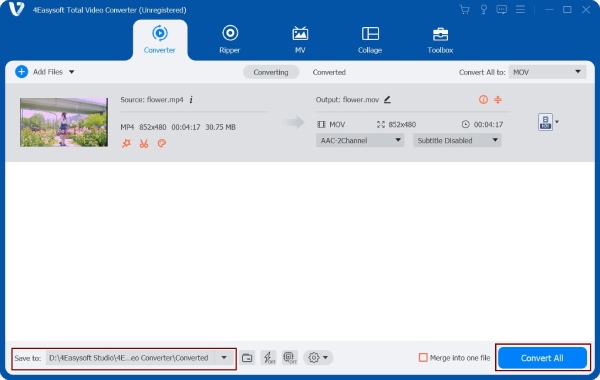
Bước 1Khởi động 4Easysoft Total Video Converter. Upload the video by clicking the “Add Files” button; you can add one or multiple files, depending on your needs.
Bước 2Click your video file's "Edit" button, then navigate to the "Rotate & Crop" section, where you’ll find options for adjusting the aspect ratio. Use the "Aspect Ratio" pulldown menu to select "Freely" to change the ratio as needed.
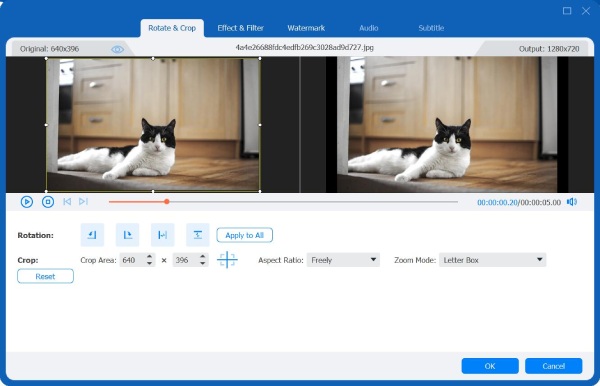
Bước 3Use the crop and resize tools to change the frame accordingly to ensure your video fits perfectly within the new aspect ratio. Before finalizing, preview the video to check how the aspect ratio changes affect its overall look.
Bước 4Later, select a format in the "Convert All to" pulldown menu if you want. Select a name and path, then apply all changes and save your video by clicking the "Convert All" button.
Phần kết luận
Whether you want to resize your video for social media or your project, learning how to change aspect ratio in Premiere Pro is a fundamental skill! From setting up your sequence to using crop and other tools, Adobe Premiere Pro provides many options to customize the aspect ratio to suit your needs. However, while it has robust capabilities, the 4Easysoft Total Video Converter can streamline your editing process and help you achieve the desired results for the aspect ratio. With this program, it guarantees that your video won’t only fit perfectly but also stand out in a digital landscape.
Bảo mật 100%
Bảo mật 100%