Record video, audio, gameplay, and webcam to record precious moments easily.

How to Convert PowerPoint Slides into Video [5 Doable Ways]

Posted by Paula Pailaga to Record Video Oct 18, 2024
You are probably looking for a way to make your PowerPoint easy to present while keeping its dynamics and interactive state. Well, the best thing you can do is convert it into a video, which you can play on various devices and let your audiences watch. Now, how do you convert PowerPoint to video? Well, continue reading this post, for it features 5 workable yet efficient ways to convert PowerPoint to video! So, without further ado, start exploring each of them now.
Guide List
Default Ways to Convert PowerPoint to Video [Windows/Mac] How to Record and Convert PowerPoint to Video with Audio 2 Easy Ways to Convert PPT to Video Online for Free FAQs about How to Convert PowerPoint to VideoDefault Ways to Convert PowerPoint to Video [Windows/Mac]
As mentioned earlier, this post featured 5 workable ways that you can do to convert PowerPoint to video. Now, in this specific part, you will see 2 different default ways to convert PowerPoint to video on Windows and Mac platforms. You can follow the one that is applicable on your end. So, without further delay, explore them now.
If you are utilizing a Windows computer, here are the steps on how to convert PowerPoint slides into video:
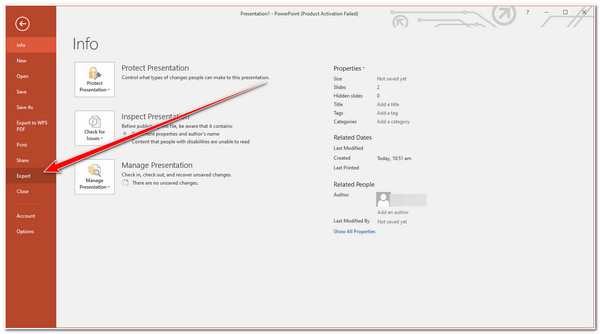
Step 1Launch the PowerPoint program on your Windows computer and access the presentation you wish to convert to video. After that, tick the "File" button and select the "Export" option.
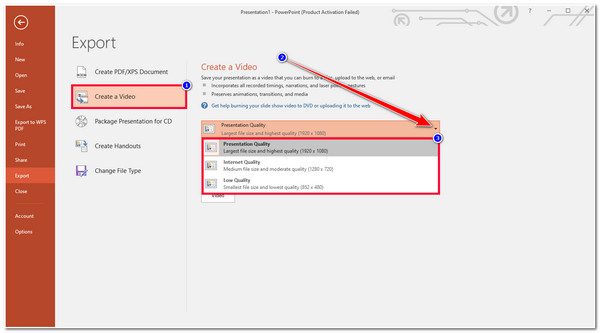
Step 2Next, on the "Export" section, tick the "Create a Video" button, click the "Presentation Quality" dropdown button, and select your preferred option. Before selecting a specific quality option, consider their corresponding file sizes.
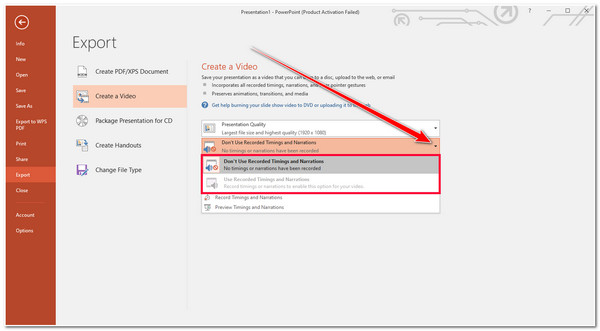
Step 3Then, if your presentation contains timings and narrations, select the "Use Recorded Timings and Narrations" option from the dropdown list below the quality options. Otherwise, select the "Don’t Use Recorded Timings and Narrations" option if not.
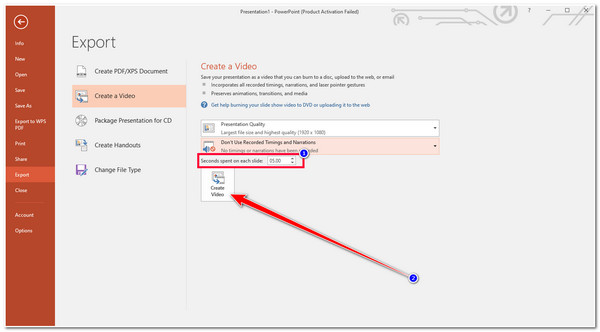
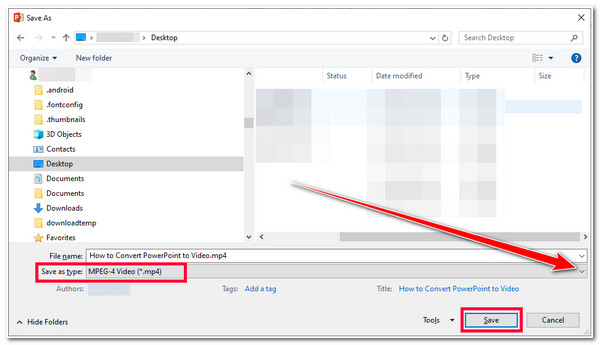
Step 4After that, specify the display time for each video by entering specific seconds on the "Seconds spent on each slide" input field. Once you are done, tick the "Create Video" button, and on the "Save As" window, select a file folder to store the converted PPT and rename it.
Step 5Then, tick the "Save as type" dropdown button and select the "MPEG-4 Video (*.mp4)" option. Finally, tick the "Save" button to initiate the conversion process. And that’s it! That’s how you convert PowerPoint to video on a Windows computer.
Otherwise, if you are utilizing a Mac computer, here are the steps on how to convert PowerPoint to video on Mac:
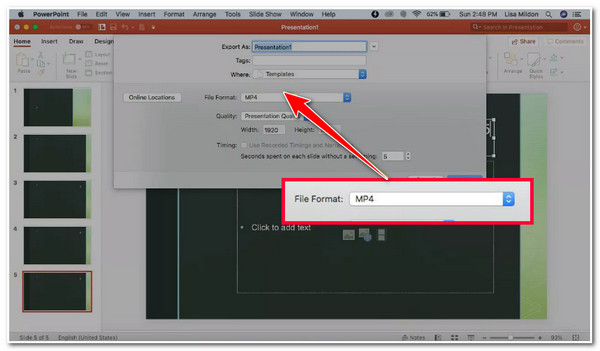
Step 1Launch the PowerPoint on your Mac and access the presentation you wish to convert into video. After that, tick the "File" tab and select the "Export" option.
Step 2Then, on a pop-up window, head to the "File Format" dropdown menu and select "MP4" or MOV format. Next, select your preferred quality by ticking the "Quality" option’s dropdown button. Before selecting a specific quality option, consider their corresponding file sizes.
Step 3After that, choose whether you want to include the presentation’s record timings and narrations or not (if there are any). Click the "Use Recorded Timing and Narrations" checkbox to include them.
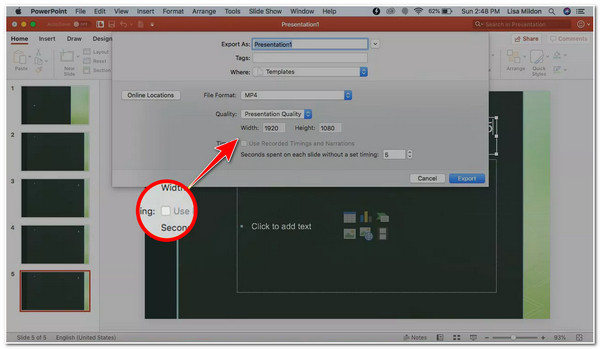
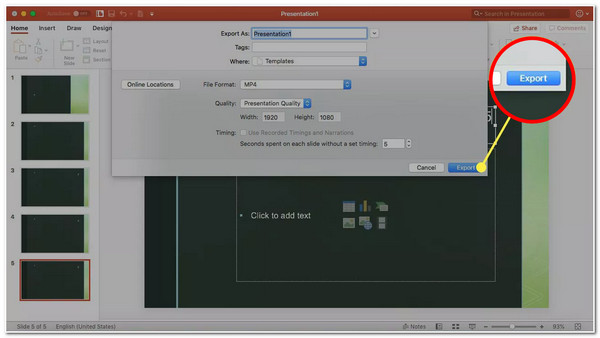
Step 4Next, choose whether you want to increase/decrease the timing for the slides by ticking the "Up and Down" button next to "Second spent on each slide without a set timing". Finally, click the "Export" button. And that’s it! That’s how you convert PowerPoint to video on Mac.
How to Record and Convert PowerPoint to Video with Audio
That’s it! Those are the 2 easy ways how to convert PowerPoint to video! If you want to capture your presentation with audio, control its playback speed, and add annotations to highlight key points, you can use the 4Easysoft Screen Recorder tool! This tool lets you record PowerPoint presentations on the full-screen selected region or an active window. Moreover, it provides high-quality settings with up to 60 fps and 4K resolution. Furthermore, it offers real-time drawing features that enable you to add text, lines, arrows, shapes, etc., highlighting a key point or making your PPT much more creative. Also, unlike the default ways above, this tool saves your video in different formats, such as MP4, MOV, WMV, WebM, and more. With this tool, you can control how long you wish to display each slide based on your preferences!

Gives you tweaking options that let you set format, quality, fps, etc., before recording.
Provide customizable hotkeys that let you set hotkeys for start, pause, stop, etc.
Offer you a built-in video trimmer to cut unwanted parts of the recordings.
Support scheduled recording that lets you set tasks to start/stop recording the PPT.
100% Secure
100% Secure
How to Convert PowerPoint to Video via the 4Easysoft Screen Recorder:
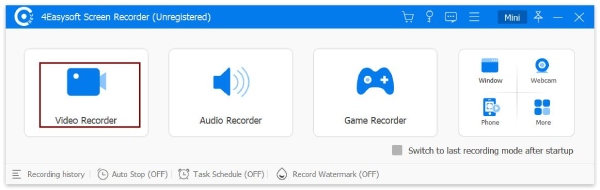
Step 1Download and install the 4Easysoft Screen Recorder tool on your Windows or Mac computer. Then, access the presentation you want to turn into a video on the PowerPoint program. After that, launch the installed tool and click the "Video Recorder" option.
Step 2Next, choose whether you want to capture your whole screen (Full), the PowerPoint presentation only (Custom), or a specific area (resolution).
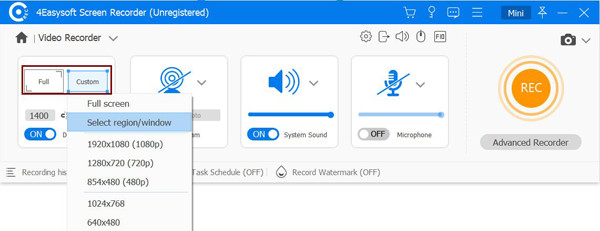
Whatever your chosen option, you can still move the borderlines freely and place them in the area where your PowerPoint presentation is located.
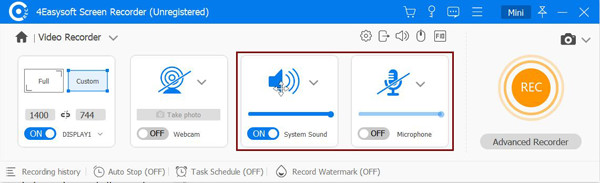
Step 3After that, if your presentation has sound or recordings, you can turn on the "System Sound" option by toggling its switch button. If you also plan to record it with your voice, you can turn on the "Microphone" by toggling its switch button.
Step 4Then, once you are done setting up the above options, tick the "REC" button to start recording the presentation. While recording, you can add shapes, text, lines, and callouts and take screenshots as well.
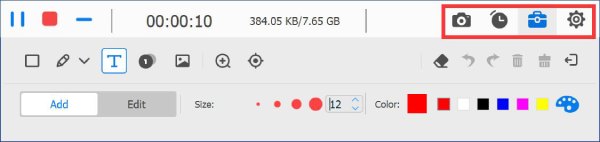
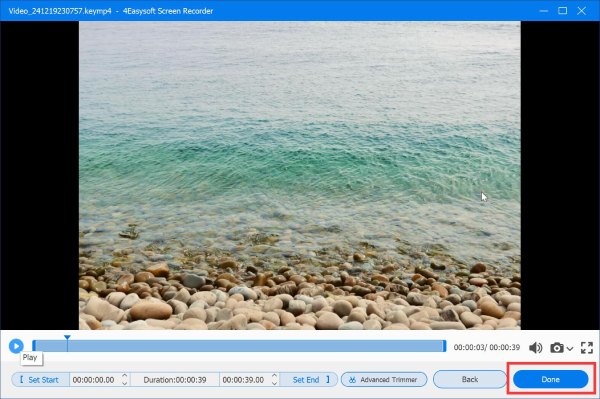
Step 5Once you are done recording, click the "Stop" icon. Then, on the preview window, you can trim the video's unwanted start and ending parts. Lastly, tick the "Save" button to export the recordings. And that’s it! That’s how you convert PowerPoint to video via recoding!
2 Easy Ways to Convert PPT to Video Online for Free
There you have it! That’s how you convert PowerPoint to video via screen recording. Apart from the above ways, you can also use online tools to convert PPT to video! These online tools are the best option if you only wish to convert a simple PowerPoint to a video. So, without further delay, start exploring each of them now.
1. Zamzar PPT Converter
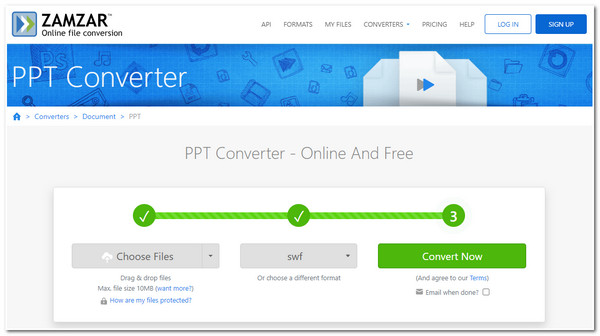
If you are looking for a tool that can easily and quickly convert PowerPoint to video, then the Zamzar PPT Converter tool is what you are searching for. With this online tool’s intuitive interface, you can quickly initiate the conversion process in no time. But, the waiting time for the conversion process will still depend on your internet speed. So, how to convert PowerPoint slides into video using Zamzar? Here are the steps you must follow:
Step 1Access the Zamzar PPT Converter on your computer browser. Then, click the "Choose Files" button to import the presentation that you wish to convert.
Step 2After that, tick the "Convert To" dropdown button, select a video format under the "Video Formats", and click the "Convert Now" button to initiate the conversion process.
2. CloudConvert PPT Converter
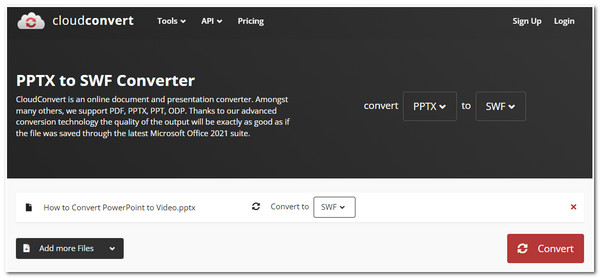
The last online tool recommendation that you can utilize to convert PowerPoint to video is the CloudConvert PPT Converter. The same goes for Zamzar; CloudConvert also offers a straightforward conversion process. With just a few ticks, you can convert PowerPoint to video quickly! However, similar to Zamzar, this tool’s conversion speed relies on your internet connection. Moreover, it only offers SWF format to convert your PowerPoint. If that’s ok with you, here are the steps to convert PowerPoint to video using CloudConvert.
Step 1On your browser, search and access the CloudConvert PPT Converter website. After that, tick the "Select File" button to import the presentation you want to convert.
Step 2Then, tick the "Convert to" dropdown button, select the "Video" menu, and click the "SWF" option. Finally, tick the "Convert" button to initiate the conversion process.
FAQs about How to Convert PowerPoint to Video
-
How long does it take to save the presentation as a video on PowerPoint?
The conversion process will take a few seconds or minutes and might also take an hour. But, the waiting time length will depend on your PowerPoint presentation's file size.
-
What would be the best resolution or quality to convert PowerPoint to video?
The best resolution or quality to convert PPT to video is based on the platform you will put it on. It is important to consider the platform when choosing a resolution/quality option so you can truly provide audiences with the best watching experience.
-
Are there any considerations I need to keep in mind when converting PowerPoint presentations to video?
Yes, there are a few things you need to consider when converting PowerPoint to video. Some things you need to consider are file size, resolution, and compatibility. Additionally, you also consider the possibility that not all of the animations may be perfectly converted to video.
Conclusion
There you have it! Those are the 5 workable yet efficient ways to convert PowerPoint to video! After reading this page, you can now easily present your PowerPoint presentation to your audiences and play it on various devices while keeping its interactive state! Suppose you are looking for a tool that will allow you to convert PPT to video easily with customized playback speed and annotations. In that case, the 4Easysoft Screen Recorder is what you are searching for! To discover more about this tool, visit its official website today.