Transfer and manage all data between iOS devices, device and computer, and iTunes and devices.
How to Quickly Transfer Files from iPhone 15/14/13/12 to Mac in Batch
 Posted by Paula Pailaga to iOS Transfer Dec 07, 2023
There are cases in which iPhone users want to transfer files from iPhone to Mac either to preserve files or to save storage space. Now, if you are one of them, let this post help you! You may know that AirDrop can transfer files one by one, but how to make it faster? This post covers 4 workable ways on how to transfer files from iPhone to Mac quickly and efficiently. So, without any further delay, explore them now!
Guide List
The Easiest Way to Transfer Files from iPhone to Mac in Batch How to Transfer Files from iPhone to Mac with iTunes/iCloud How to Transfer Files from iPhone to Mac via AirDrop FAQs about How to Transfer Files from iPhone to Mac SonomaThe Easiest Way to Transfer Files from iPhone to Mac in Batch
Everybody loves to transfer a batch of files from iPhone to Mac effortlessly, quickly, and efficiently. 4Easysoft iPhone Transfer can help you achieve those great points! This tool supports the ability to transfer almost all kinds of data, such as those categorized as essential, media, and social data. Moreover, it also enables you to manage iOS data on your computer freely. You can edit, delete, create, and convert files based on your preferences! These are just a glimpse of this tool’s unique features, and there is still much to offer. Explore more about it to transfer all files from your iPhone 15/14 to Mac!
Provide a safe and fast transfer of your files from your iPhone to your Mac.
Able to transfer iPhone files between from iTunes and iCloud to computer.
Support all iOS versions and iPhone models, including iOS 17 and iPhone 15.
Support different file types, like call history, contacts, photos, movies, Kik, etc.
100% Secure
100% Secure
How to Transfer File from iPhone to Mac in Batch using 4Easysoft iPhone Transfer:
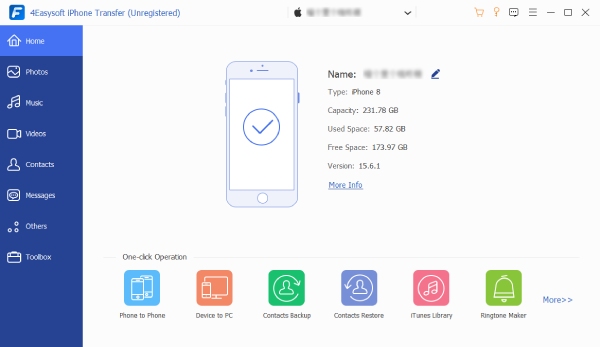
Step 1Download and install the 4Easysoft iPhone Transfer tool on your Mac computer. Then, link your iPhone to your computer via a USB cable. Once the connection is established, you’ll see your iPhone’s information on the interface. Then, you can easily transfer photos from iPhone to Mac.
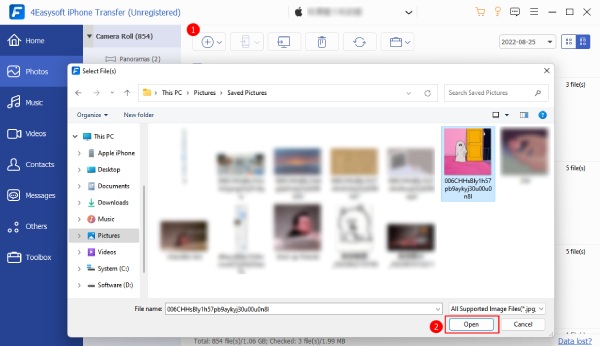
Step 2After that, on the left side of the tool’s interface, select a file tab you wish to transfer. Then, all the files available on your iPhone will appear on the tool’s interface. Click all the files you want to transfer.

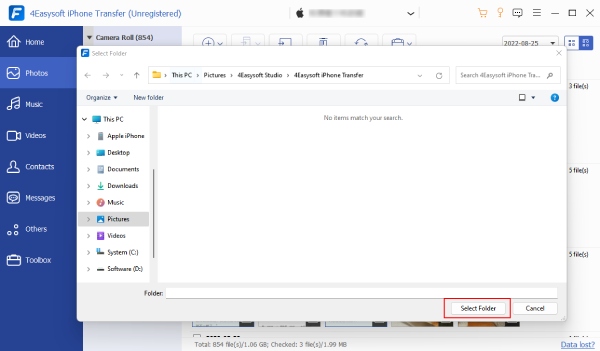
Step 3Once you are done selecting all the files you want to transfer, click the "Export to PC" button, and select or create a new file folder to store all the selected files to be transferred on the pop-up window. After that, click the "Select Folder" button.
Step 4After clicking the "Select Folder" button, all the files you want to transfer will be moved to the folder you selected or created. You can check them directly in your computer’s File Folder. That’s it! That’s how you transfer data from iPhone to Mac using this powerful tool!
How to Transfer Files from iPhone to Mac with iTunes/iCloud
Apart from using a third-party tool that can transfer files from iPhone to Mac, you can also use default ways. These ways are by using iTunes or iCloud! If you don’t know how to use them, explore the options below.
Option 1. How to Transfer Files from iPhone to Mac using iCloud Drive
iCloud Drive lets users store various files, such as Word Documents, PPTs, Excel Files, etc., and sync them to other iOS devices. That will only be possible if your iOS devices share the same Apple ID. Now, how to transfer files from iPhone to Mac using iCloud Drive? Here are the steps you must go after:
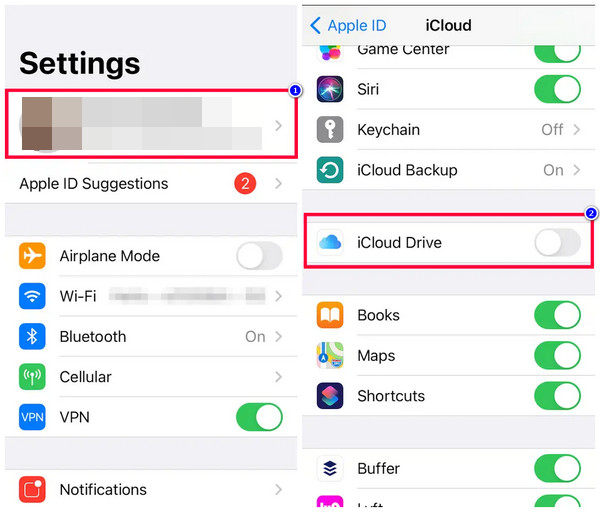
Step 1Enable "iCloud Drive" on your iPhone by going to your "Settings" app, tap your "Name" at the upper part of the screen, and select the "iCloud" option.
Step 2Next, tap the "iCloud Drive" button and enable the "Sync this iPhone" option by moving its switch button. Ensure that the switch button turns green.
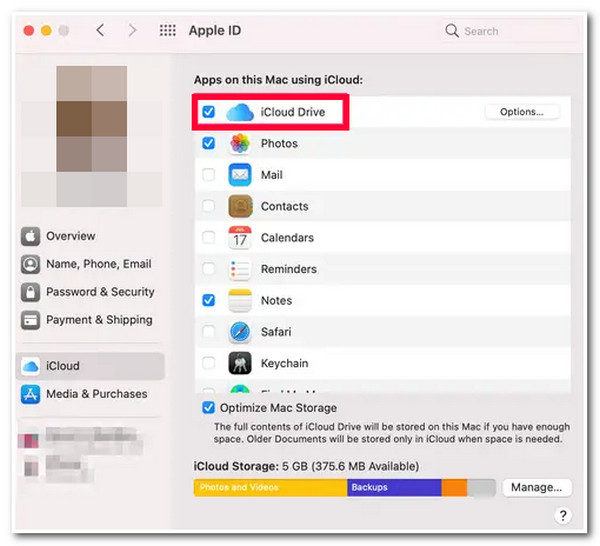
Step 3Then, on your Mac, you also need to enable "iCloud Drive" by accessing the "Apple Menu" and clicking the "System Preferences" button.
Step 4After that, click the "Apple ID" button, select the "iCloud" option, and click the "iCloud Drive’s Checkbox" to enable it.
Step 5Once you are done enabling iCloud Drive on your iPhone and Mac, access the file you want to share, tap the "Share" button to transfer files from iPhone 15/14 to Mac.
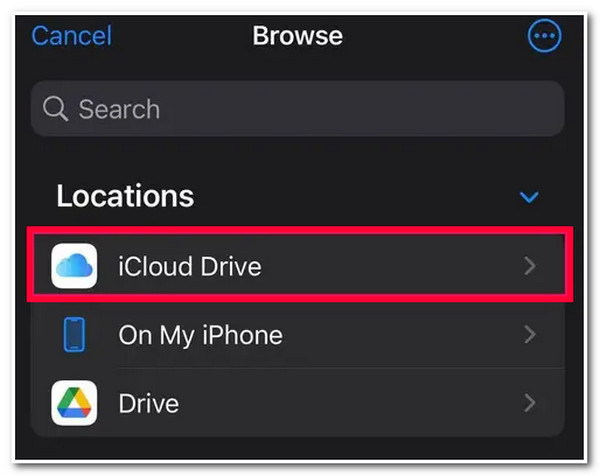
Step 6Then, browse down, tap the "Save to Files" button, then on the new menu under "Locations," select the "iCloud Drive" option, and tap the "Save" button to confirm your selection.
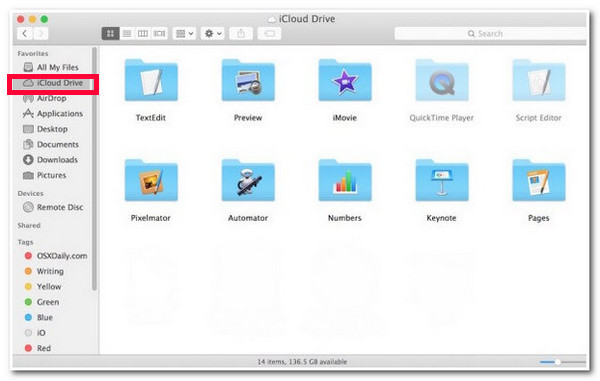
Step 7After that, head to your Mac, access the "Finder," and click the "iCloud Drive" button, and the files you have saved on your iPhone’s iCloud Drive will be there.
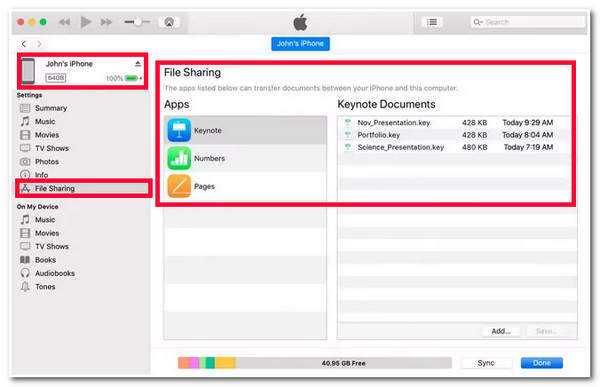
Option 2. How to Transfer Files from iPhone to Mac through iTunes File Sharing
Aside from iCloud Drive, you can also use iTunes File Sharing to transfer files from your iPhone to your Mac. However, you must check things before you can use the app. The first thing you need to work on is to have a USB cable that you will use to link your Mac and iPhone. Moreover, you also need to ensure you are utilizing the latest version of iTunes on your Mac. Here are the steps that show you how to transfer data from iPhone to Mac using iTunes File Sharing:
Step 1Link your "iPhone and your Mac" using a "USB cable." After that, on your Mac, launch iTunes, tick the "Device" icon at the upper left of the interface, and wait for iTunes to display all the transferable files.
Step 2Then, click the "File Sharing" option on the left bar, select the file you wish to transfer, and tick the "Save to" button. After that, select your preferred file location where you want to store the selected file. Then, tick the "Save" button to confirm your selection, and that’s it!
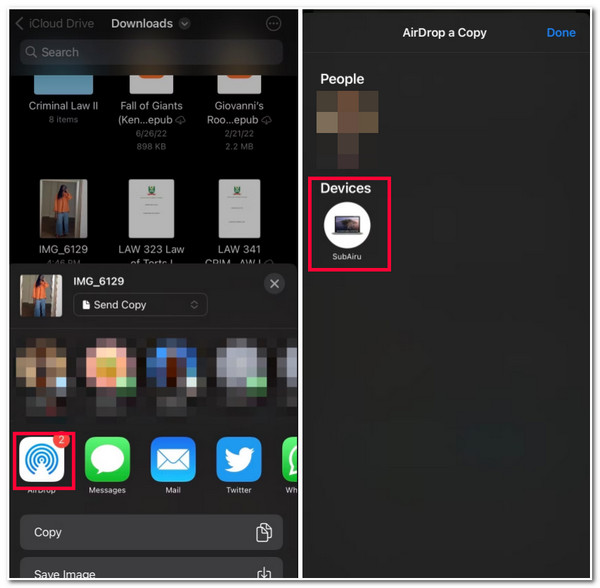
How to Transfer Files from iPhone to Mac via AirDrop
Aside from those two default ways, you can transfer files from iPhone to Mac through AirDrop. AirDrop is Apple’s wireless file-transfer app that utilizes Bluetooth and Wi-Fi connection to transfer files from different devices. During the process, you should keep your iPhone and Mac are close to each other, and you can only transfer the files one by one with quite a long time. So, how to transfer files from iPhone to Mac using AirDrop? Here are the steps you must go after:
Step 1On your iPhone, access your "Control Center", tap the "AirDrop" option, and set it to be discovered by "Contacts Only" or "Everyone".
Step 2Next, head to your Mac, go to "Finder", click the "Go" button, and click the "AirDrop" to turn it On. The same goes with iPhone AirDrop’s setup; set your Mac’s AirDrop to be discovered by "Everyone" or "Contacts Only".
Step 3After that, on your iPhone, select the "Files" you want to transfer, tap the "Share" button with the upward arrow icon, and select your Mac icon to start the file-transferring process.
FAQs about How to Transfer Files from iPhone to Mac Sonoma
-
How to quickly transfer movies from iPhone to Mac?
To quickly transfer movies from iPhone to Mac, use this post’s featured third-party tool or a USB cable. These two ways are the best options for transferring big file-size movies quickly.
-
How to transfer files from iPhone to Mac using a USB Cable?
Connect your iPhone to your Mac via a USB cable. After that, access the Finder on your Mac and click your iPhone under Locations. Then, choose the Files on your iPhone’s Finder window, and click the arrow icon beside the folder to see all the files stored on it. Next, drag and drop the files to the Mac’s sidebar that you wish to transfer.
-
Why does my AirDrop doesn’t transfer any files?
The reason why your AirDrop doesn’t transfer any files might be because your Hotspot and AirPlane modes are active. You must turn them Off to make AirDrop transfer files from various devices.
Conclusion
Now those are the 4 workable ways to transfer files from iPhone to Mac efficiently. With those ways, you can now transfer different files from your iPhone to your Mac! If you find those 3 default ways to be laborious and take a lot of time to transfer files, then you can use the advanced 4Easysoft iPhone Transfer tool as the best alternative! This tool offers fast, safe, and efficient file transfer between devices. Within just a few clicks, you can reach your purpose of transferring files from iPhone 15/14 to Mac! If this tool interests you, visit its official website to learn more!
100% Secure
100% Secure