For Windows
 For Mac
 Free Online Solutions
Content
Basics
Introduction
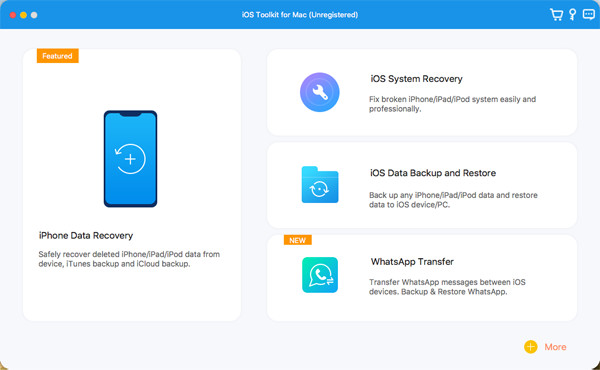
4Easysoft iPhone Data Recovery for Mac is designed for recovering your mistakenly deleted data from your iPhone/iTunes/iCloud. You can use it to recover most text and media contents, including contacts, messages, call history, notes, reminders, calendar, safari bookmark, app document, WhatsApp data, videos, camera roll, photo library, music, etc. The best part of 4Easysoft iPhone Data Recovery for Mac is to preview all the deleted data and choose the desired one to recover. What’s more, it supports three additional functions to fix your iOS system, back&restore your data, and transfer WhatsApp data.
Register
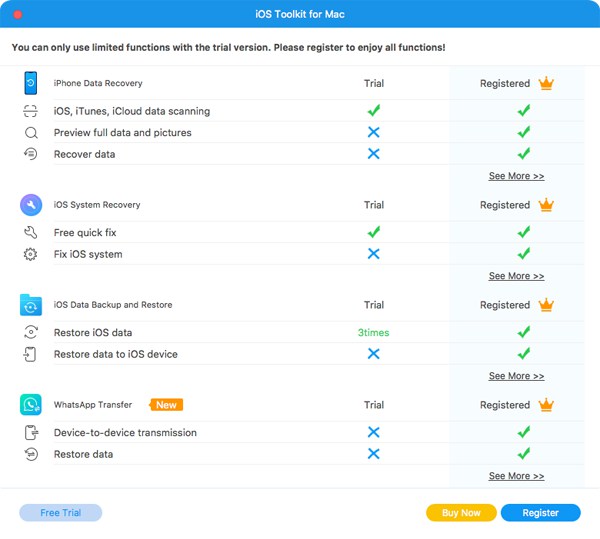
The free trial of 4Easysoft iPhone Data Recovery for Mac only supports scanning your iOS devices, quickly fixing the system problem, and restoring your device with 3 times limitation. To get thefull functions to recover all your data, you need to click the Purchase icon at the top-right menu and choose the desired license.
After purchasing, you can read the steps below to register your paid account. Click the Register this product icon on the main interface, and choose the Register button. Then, you should input your email address and the received registration code. At last, click the OK button to activate the full version.

Recover iOS Data
Recover from iOS Device
This recovery mode will help you directly recover the deleted data from your iOS device. Firstly, you need to download the latest iTunes on your computer. Here are the detailed steps in the following:
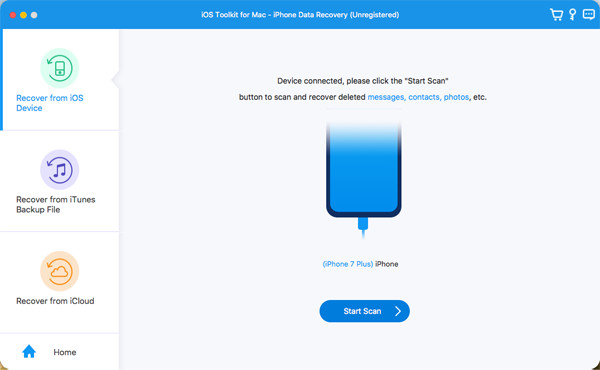
Step 1Launch 4Easysoft iPhone Data Recovery for Mac on your computer, and then connect your iOS device to the computer via USB cable. If your device using the iOS 7 or above system, please unlock your device and tap the Trust button on the screen.

Step 2Click the iPhone Data Recovery option on the main interface and choose the Recover from iOS Device tab. Then click the Start Scan button to scan all the deleted data on your iOS device. The more files you have, the longer process time will be.
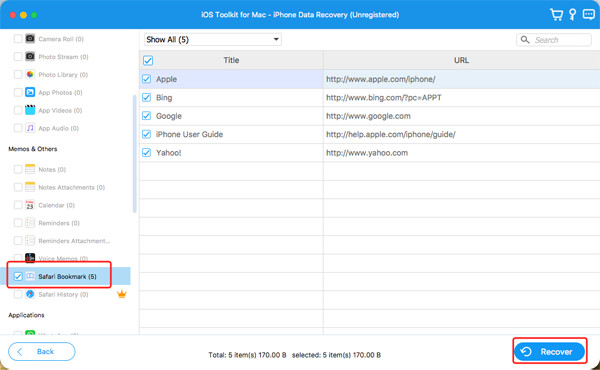
Step 3After that, all the data will be classified into different file types and listed on the program. You can double-click on the desired file to preview it and then tick it to recover. Finally, click the Recover button to start recovering all the chosen files simultaneously.
Note:
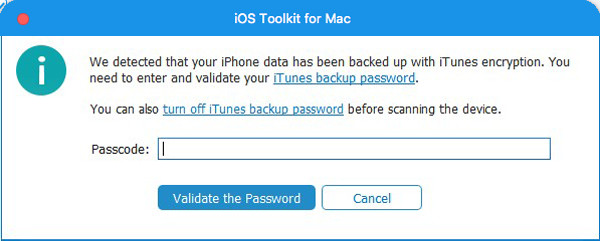
If you want to recover the encrypted iTunes backup files, you will see a popping-up window to ask for the iTunes backup password. You need to input the passcode to continue the scanning process.
If you want to recover some private and important data such as call history, safari bookmark, contacts, etc., from the iOS 13 or above system, you need to click the Encrypted Scan button to confirm the operation.
Recover from iTunes Backup File
If you always back up your iOS devices through iTunes, you can also recover the deleted data from iTunes. You should also make sure you have installed the latest version of iTunes.
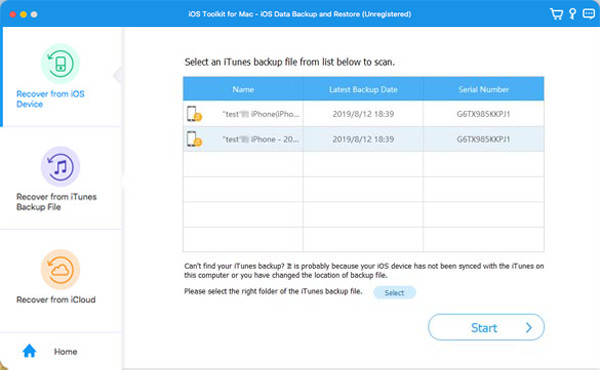
Step 1Open 4Easysoft iPhone Data Recovery for Mac and choose the iPhone Data Recovery option on the main interface. Then select the Recover from iTunes Backup File mode, and all synced devices will be shown. Choose the one you want to recover.
Step 2If you have encrypted iTunes backup files, you need to enter the backup passcode to continue the scanning process.
Step 3After scanning, you can tick all the desired data and files in the list. At last, click the Recover button to start recovering data from iTunes.
Recover from iCloud
If you have turned on the iCloud backup on your iOS device, this mode is also available for you. Follow the steps now:
Firstly, run 4Easysoft iPhone Data Recovery for Mac and select the Recover from iCloud button in the left bar. Then you can enter your Apple ID and password to log in to your iCloud.
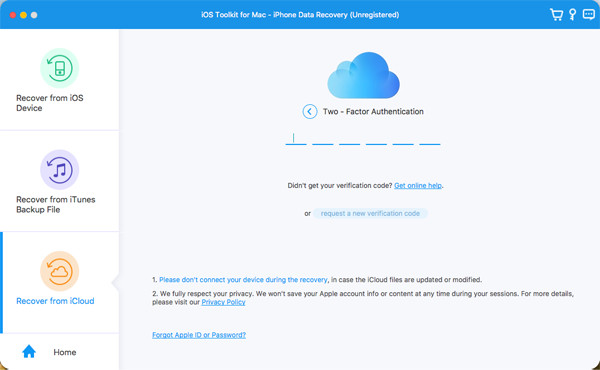
Note: If you have enabled two-factor authentication on your iOS device, you need to tap the Trust button. Then, a verification code will be sent on your iPhone/iPad, and you should enter it on the computer.
There are two methods to recover data from iCloud.
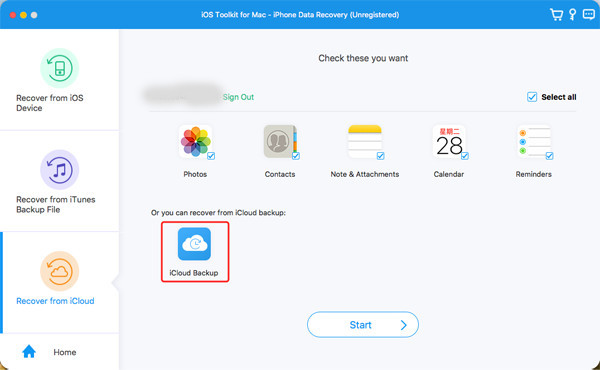
1.Recover All iCloud Backup
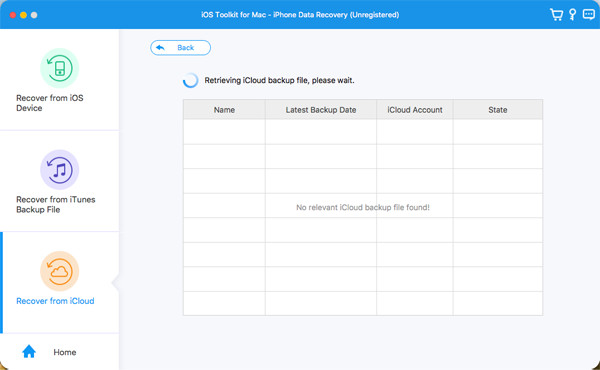
Step 1You can choose the iCloud Backup option to recover all the backups with different file types. Here you can see all the backup history, and you need to select one to download.
Step 2 After clicking the Download button, you can choose different file types to download. Tick the desired ones and click the Next button.
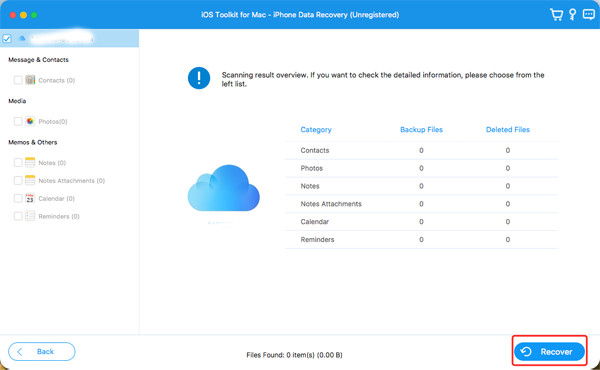
Step 3The scanning process will start, and the selected files will be listed on the program. Still, choose the desired data and click the Recover button to start recovering from iCloud.
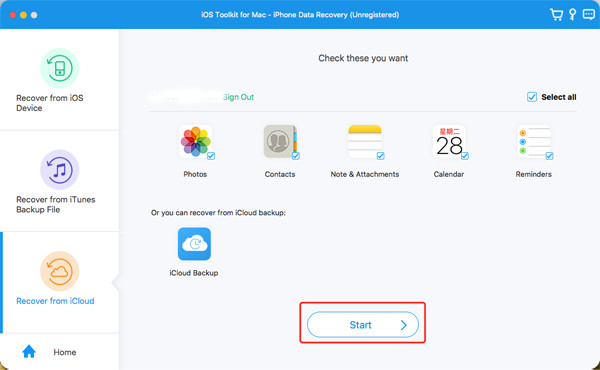
2.Recover Selected Important Data
Step 1Choose the desired files from Photos, Contacts, Notes&Attachments, Calendar, and Reminders. Then click the Start button to scan data.
Step 2 In a few minutes, this program will show all data in detail for you. Tick the data you want to recover and click the Recover button to start the process. If you choose the Contacts data, you can also recover it to your iOS device directly.
More Features
iOS System Recovery
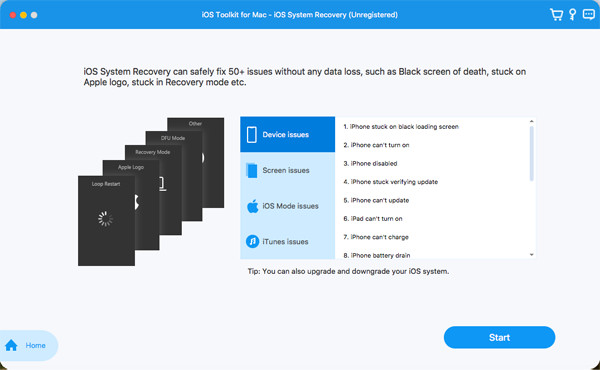
iOS System Recovery is an additional powerful function included in 4Easysoft iPhone Data Recovery for Mac. It will fix the device, screen, iOS mode, and iTunes issues, including a stuck device in the Apple logo, black screen, disabled device, updating error, and other 50+ problems. You don’t need to select the model, type, category, and any parameter; this program will automatically detect and fix it in one click. Here are the detailed steps:
Step 1Launch 4Easysoft iPhone Data Recovery for Mac and click the iOS System Recovery button on the main interface.
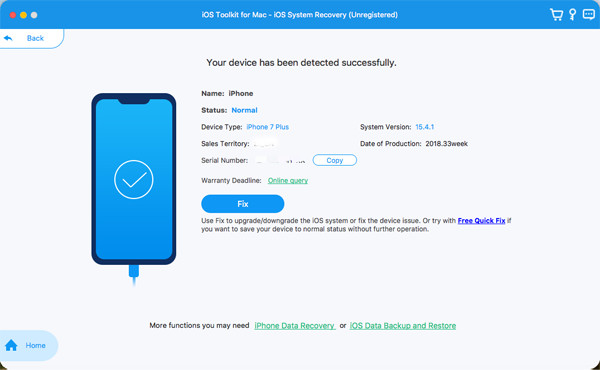
Step 2 Then, you need to connect your iOS device to the computer via USB cable. After that, click the Start button to continue, and this program will automatically detect your device.
Step 3All the information about your device is listed on the program. You can click the Free Quick Fix to fix some simple issues like a frozen screen or crashed system. Otherwise, you need to click the Fix button to do further fixes.
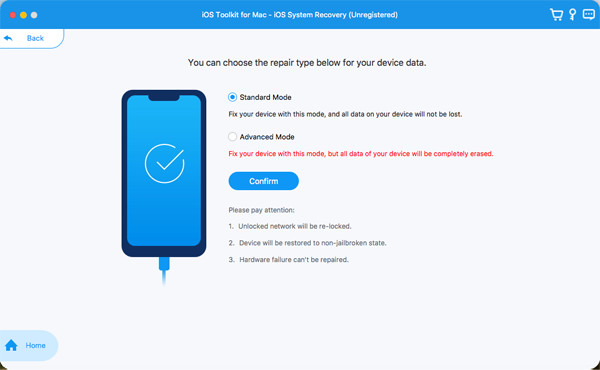
Here are two modes for you to choose from:
Standard Mode: Fix simple iOS system issue of your device and keep all the data on it.
Advanced Mode: Fix serious system issues on your iOS device and will delete all the data. The success rate is higher than the standard one.
Choose the desired one after deep consideration and click the Confirm button to go on.
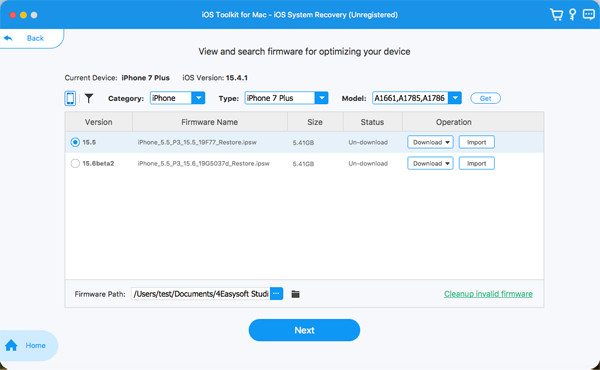
Step 4You need to choose the proper category, type, and model of your device. Then, choose the desired firmware with different iOS versions and click the Download button. In this way, you can also downgrade or upgrade your iOS version. After that, click the Next button to start fixing your iOS system.
iOS Data Backup and Restore
When you want to backup your iOS data on the computer, 4Easysft iPhone Data Recovery is also helpful for you. Simply use it to backup your important data and restore the data to your device when you need it. Read the following steps to learn how to use this function:
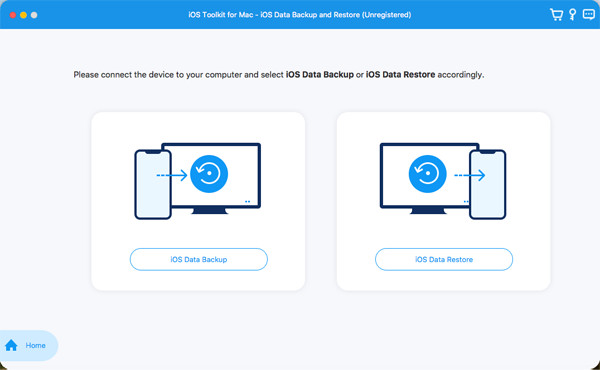
Open 4Easysoft iPhone Data Recovery for Mac and choose the iOS Data Backup and Restore function. Here you can choose to backup or restore data.
1.Backup iOS Data to Computer
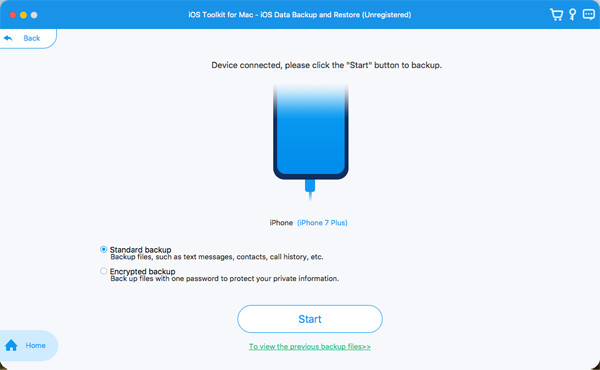
Step 1Click the iOS Data Backup button and connect your device to the computer through a USB cable. You can choose the Standard Backup or Encrypted Backup options. The difference is that you need to set a password for the encrypted backup, and it is needed when you want to restore the backup.
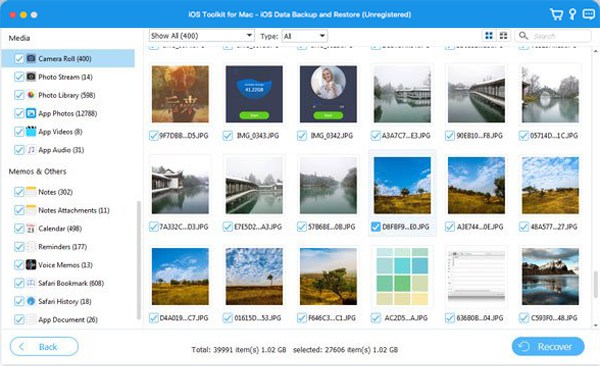
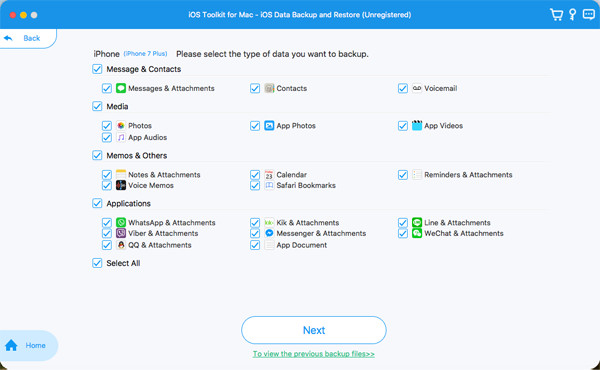
Step 2 After clicking the Start button, you can see all the data types on the list. Choose the desired one from Media, Messages, Contacts, and Memos, and then click the Next button to start the process.
1.Restore Backup Data to iOS Device
Step 1Choose the iOS Data Recover button and connect your iOS device to the computer. Here you can view all the backup histories with the device information, backup size, and time.
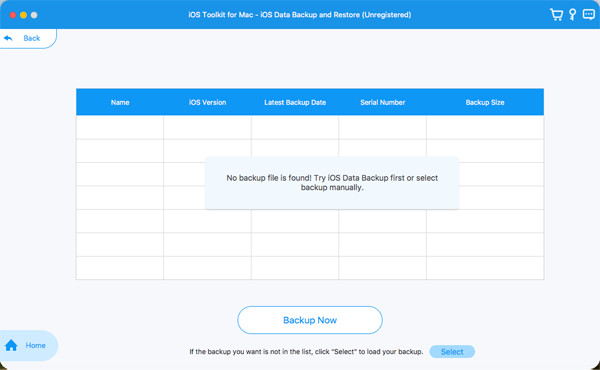
Step 2 Choose the desired one and click the View Now button to browse all the backup data in detail. Then select the data you want to restore. You should note that only Contacts and Notes can be restored to the device currently, and other data will be saved on your computer.
WhatsApp Transfer
This is also an easy-to-use feature for you to transfer the messages, photos, videos, and attachments of WhatsApp between iOS devices. Moreover, you can backup and restore WhatsApp data and even export WhatsApp data in HTML and CSV. Follow the details below:
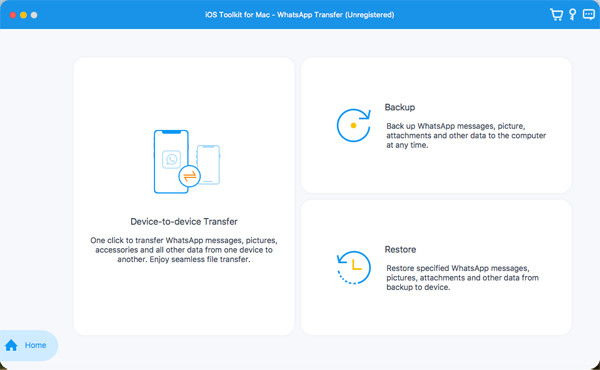
1.Transfer WhatsApp Data between iOS Devices
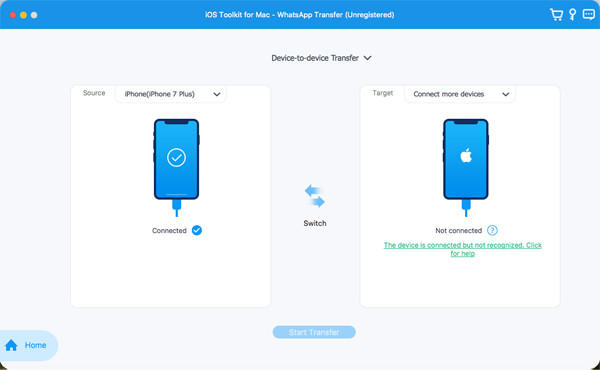
Step 1Open 4Easysoft iPhone Data Recovery for Mac and choose the WhatsApp Transfer button. Then click the Device-to-device Transfer module.
Step 2After that, you should connect two iOS devices to the same computer through USB cables. And you need to choose the Source and the Target devices, and then click the Start Transfer button.
Note: If you are using the iOS 7 or higher system version, please tap the Trust button on your device and follow the guide to proceed.
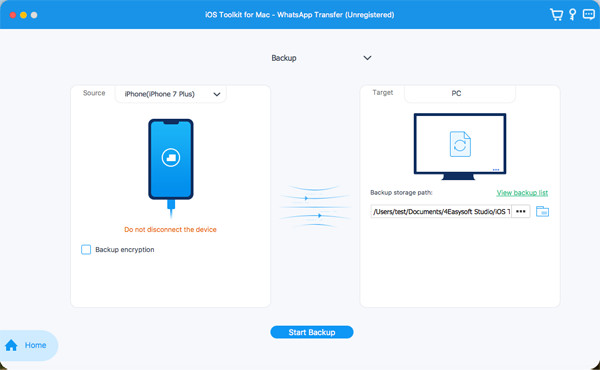
2.Backup WhatsApp Data on the Computer
Step 1Run 4Easysoft iPhone Data Recovery for Mac on your computer. Choose the WhatsApp Transfer option and then click the Backup button.
Step 2Connect your iOS devices to the computer, and then choose the storage path to save your backup files. You can also tick the Backup encrypted option to set a password to protect your privacy. At last, click the Start Backup button to backup your WhatsApp data.
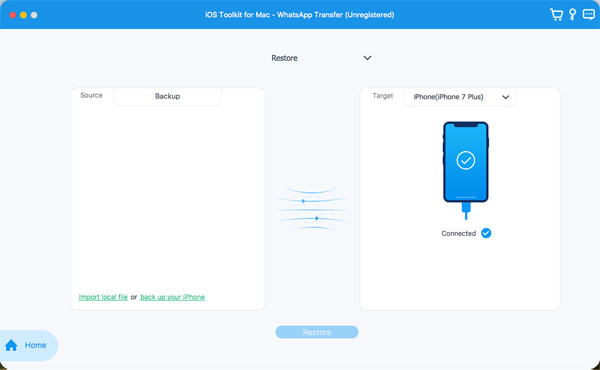
3.Restore WhatsApp Backup to iOS Device
Step 1Open 4Easysoft iPhone Data Recovery for Mac and choose the WhatsApp Transfer option. Then click the Restore option to start restoring the backup.
Step 2Connect your iPhone/iPad to the computer, and it will be automatically detected. You can see the WhatsApp data in the list, or you can click the Import local file button to add new backups. After that, click the Restore button. If the file has been encrypted before, you need to enter the password.
Step 3Then, you can view all the WhatsApp data in detail and choose the desired ones to restore. You can choose to restore to the device directly or just restore to your PC.