Capture video, audio, gameplay, and webcam to record precious moments easily.
Overall Screencastify Reviews on Its Features and Alternatives
When you want to record a lecture, capture your gameplay, or just make a reaction video to share, Screencasify may be recommended to you. This is a Chrome extension that enables you to record, edit, and share videos of your screen - you can even use it offline. It offers a great solution to share records via email and other digital learning platforms. But is it suitable for you? See below the full Screencastify review with excellent features, pros, and cons, an alternative program to it is also discussed.
Guide List
Part 1: Unbiased Reviews on Screencastify: Pros, Cons, and Features Part 2: The Detailed Steps to Use Screencastify on Chrome for Capturing Part 3: The Best Professional Alternative to Screencastify on Windows/Mac Part 4: FAQs about Screencastify ReviewsPart 1: Unbiased Reviews on Screencastify: Pros, Cons, and Features
Screencastify is an online tool that allows users to record, edit, and share. You can simply press the Record button, then it will start record all screen activity, including the audio. It is a great tool for teachers and students, as they will have an excellent digital learning experience. Screencastify is for business professionals and individuals as well. However, an application or program not only brings convenience to you but also has negative services. Below is a list of Screencastify’s features, pros, and cons.
Main Features:
- Record the whole screen with the webcam and audio from your microphone. And the recordings will be automatically saved in your Google Drive.
- Provide annotation tools, allowing you to draw on your computer's screen with the drawing pen tool for on-screen explanations.
- Offer a special mouse spotlight to locate the mouse pointer's position at any point on the screen.
- The full-featured editing solution is web-based, allowing you to cut, merge, crop, zoom in or out, and more.
- Teachers can collect assignments from the whole class with one click and view them individually. They can also restrict students from viewing the works of others.
- Pros
- Its free version offers you all the features with no ads.
- Your files are directly saved without managing files.
- You can record the screen and use your webcam at the same time.
- Students don't need an account to submit assignments.
- Cons
- The recording videos can only be saved as MP4 and GIF.
- It doesn’t support audio effects
Part 2: The Detailed Steps to Use Screencastify on Chrome for Capturing
Screencastify is as easy as 1-2-3. You don’t have to download anything to start using it. It supports all students, teachers, business professionals, and individuals who need to connect effectively with people by recording interactive videos. Ready your screen, and microphone, or you could use a webcam, then follow the steps below to start recording.
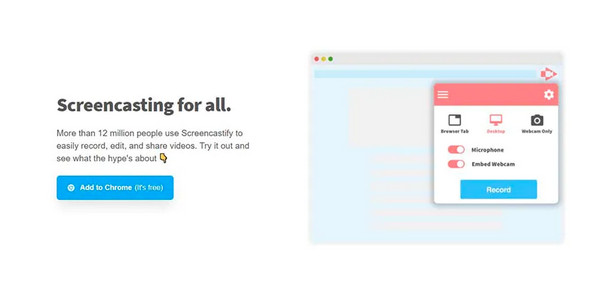
Step 1Go to Screencastify’s official website, and click Add to Chrome to add the extension. Choose Browse Tab, Desktop, or Webcam Only to select what part you want to record. Click Record to begin, and it will be saved automatically on your Google Drive.
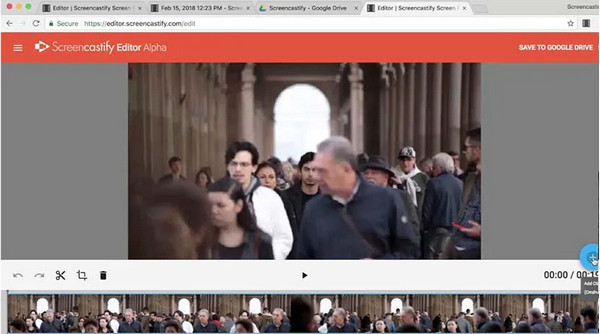
Step 2Sign in to your account and open the Screencastify editor, then an empty project will appear. Add the video files from your Google Drive. You can cut, trim, arrange, add or delete clips, and more.
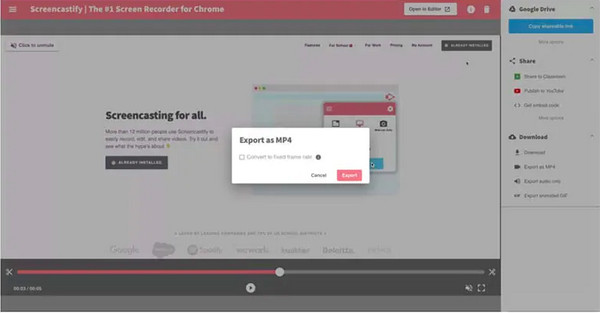
Step 3Save the project or export it on Google Drive as MP4 when you're done. You can also download and share the files after the export.
Part 3: The Best Professional Alternative to Screencastify on Windows/Mac
If you want a more professional tool to help you record your screen, the best alternative to Screencastify is the 4Easysoft Screen Recorder. This program is easy but powerful to record every moment, including tutorials, lectures, Webex meetings, online games, taking screenshots, and more. Furthermore, you can choose to record in full screen, a selected window, or a customized region.

The Best Alternative to Screencastify that enables you to record with high quality setting up to 60FPS and 4K resolution.
You can record your favorite music on your computer and your voice from the microphone.
Provide you with shapes, lines, and annotations, which are suitable to use to have effective learning interaction.
Allow you to capture your gameplay without lag and upload the recordings on social media platforms.
100% Secure
100% Secure
Step 1Download and install the video recorder, then launch it on your computer. Click Video Recorder to record the screen with audio.

Step 2Choose the Full option to record the whole screen or click Custom to select the desired window. You can adjust the borderlines freely to change the capture area in your chosen region. Unlike Screencastify, you can change the resolution, output formats, and more settings in the Preference button.
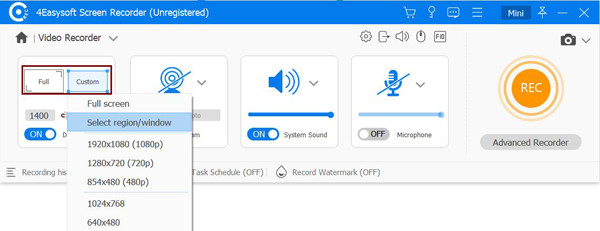
Step 3Toggle the switch button of the System Sound to turn it on if you want to record meetings, lectures, or any video with audio. Pull the Microphone slider to turn it on to record your sound.

Step 4Click the REC button to start recording, a toolbox will appear, and you can use it to add shapes, lines, callouts, and take screenshots.

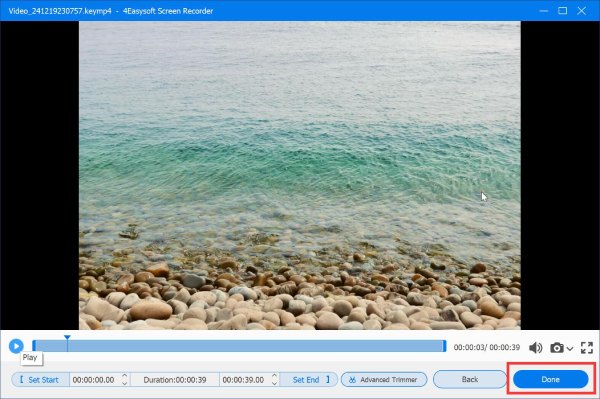
Step 5Click the Stop icon if you are finished. Now, in the preview, you can choose to clip unwanted parts and click the Save button to export your recording from this Screencastify alternative.
Part 4: FAQs about Screencastify Reviews
-
1. How long can I record with Screencastify?
The free version of Screencastify enables you to record as many videos as you want, and they should be up to 30 minutes each. You can store videos on your Screencastify library, but a maximum of 10 videos only.
-
2. Is Screencastify worth it to use?
It is an excellent choice if you are going to record a short video or share short presentation videos. It offers a high-quality video, is very simple to use, and you can quickly record on it. Furthermore, aside from recording, you can edit videos by trimming, cropping, merging, and more. For the free version, there are limitations, so it depends on you if you want to upgrade.
-
3. How to hide the mouse cursor when using Screencastify?
After you start recording with Screencastify, please press the Alt(Option) and the H keys to hide the cursor. And it will not appear before you move your mouse.
Conclusion
Several tools are available to help you record screens. However, some can’t provide editing functions as Screencastify provides. You can record video offline with it, a feature that most screen recording programs lack. Want something that will meet almost all your requirements? Try 4Easysoft Screen Recorder! It offers you different ways to record your screen. You can record tutorials, lectures, meetings, TV shows, music, gameplay, and more.
100% Secure
100% Secure


