 For Windows
 For Mac
 Free Online Solutions
Content
Basics
Introduction
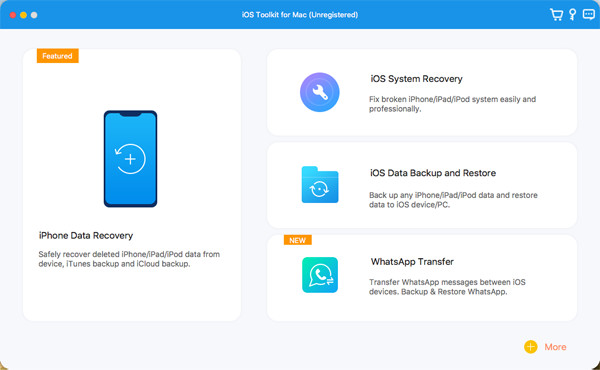
4Easysoft iPhone Data Recovery for Mac is designed for recovering your mistakenly deleted data from your iPhone/iTunes/iCloud. You can use it to recover most text and media contents, including contacts, messages, call history, notes, reminders, calendar, safari bookmark, app document, WhatsApp data, videos, camera roll, photo library, music, etc. The best part of 4Easysoft iPhone Data Recovery for Mac is to preview all the deleted data and choose the desired one to recover. What’s more, it supports three additional functions to fix your iOS system, back&restore your data, and transfer WhatsApp data.
Register
The latest version of 4Easysoft iPhone Data Recovery for Mac only supports scanning your iOS devices and find all the lost data from iOS, iTunes, and iCloud. To get the full functions to recover all your data, you need to click the Purchase button at the top-right menu and buy the desired license.
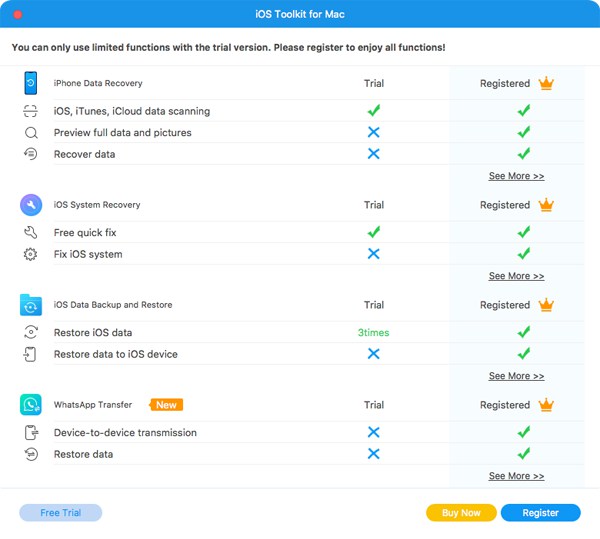
After purchasing, you can click the Menu and the Register buttons on the main interface. Click the Register button after iPhone Data Recovery and input your email address and the received registration code. At last, click the OK button to activate the full version.

Recover Data from iOS Devices
This recovery mode will help you directly recover the deleted data from your iOS device. Firstly, you need to download the latest iTunes on your computer. Here are the detailed steps in the following:
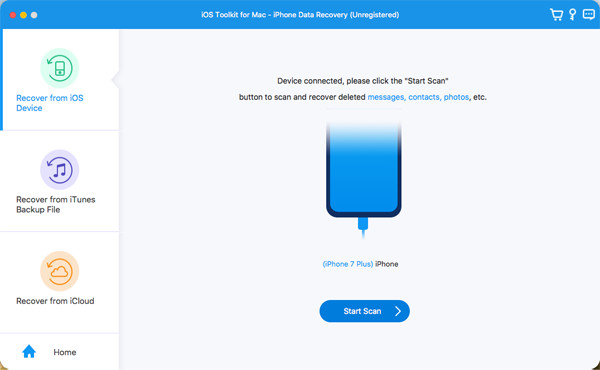
Step 1Launch 4Easysoft iPhone Data Recovery for Mac on your computer, and then connect your iOS device to the computer via USB cable. If your device using the iOS 7 or above system, please unlock your device and tap the Trust button on the screen.

Step 2Click the iPhone Data Recovery option on the main interface and choose the Recover from iOS Device tab. Then click the Start Scan button to scan all the deleted data on your iOS device. The more files you have, the longer process time will be.
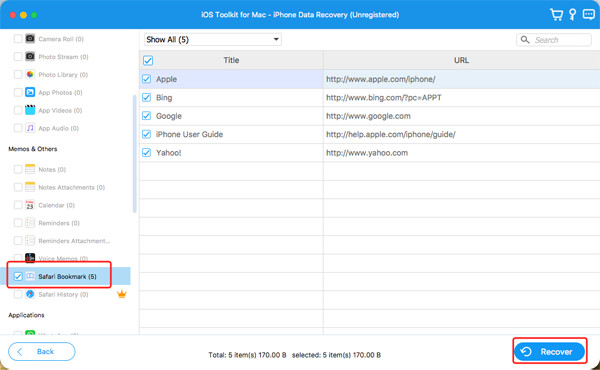
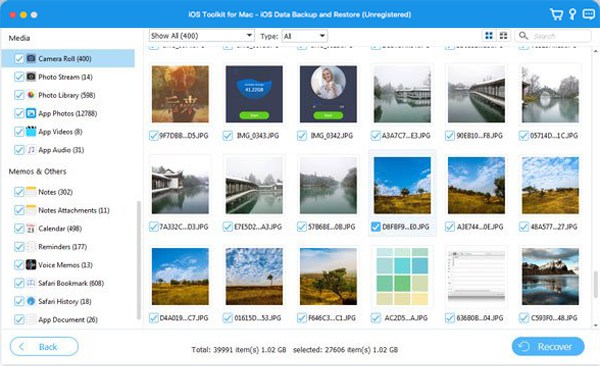
Step 3After that, all the data will be classified into different file types and listed on the program. You can double-click on the desired file to preview it and then tick it to recover. Finally, click the Recover button to start recovering all the chosen files simultaneously.
Note:
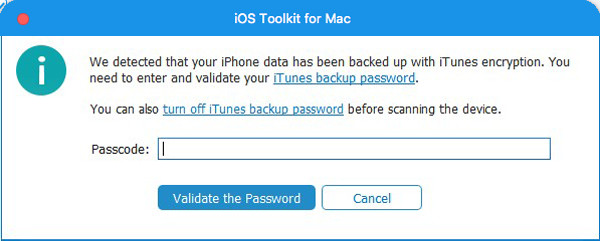
If you want to recover the encrypted iTunes backup files, you will see a popping-up window to ask for the iTunes backup password. You need to input the passcode to continue the scanning process.
If you want to recover some private and important data such as call history, safari bookmark, contacts, etc., from the iOS 13 or above system, you need to click the Encrypted Scan button to confirm the operation.
Recover Data from iTunes Backup
If you always back up your iOS devices through iTunes, you can also recover the deleted data from iTunes. You should also make sure you have installed the latest version of iTunes.
Step 1Open 4Easysoft iPhone Data Recovery for Mac and choose the iPhone Data Recovery option on the main interface. Then select the Recover from iTunes Backup File mode, and all synced devices will be shown. Choose the one you want to recover.
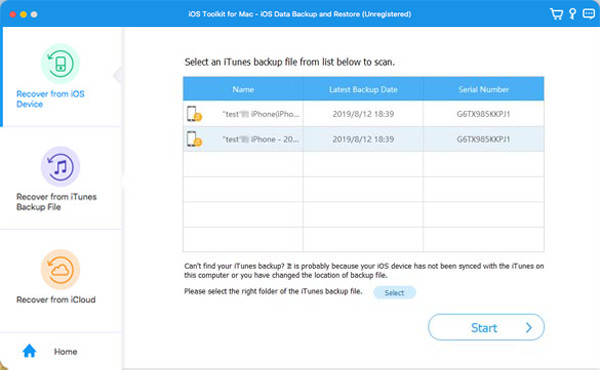
Step 2If you have encrypted iTunes backup files, you need to enter the backup passcode to continue the scanning process.
Step 3After scanning, you can tick all the desired data and files in the list. At last, click the Recover button to start recovering data from iTunes.
Recover Data from iCloud
If you have turned on the iCloud backup on your iOS device, this mode is also available for you. Follow the steps now:
Firstly, run 4Easysoft iPhone Data Recovery for Mac and select the Recover from iCloud button in the left bar. Then you can enter your Apple ID and password to log in to your iCloud.
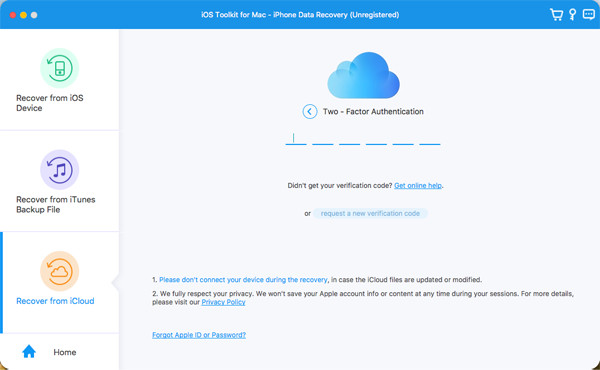
Note: If you have enabled two-factor authentication on your iOS device, you need to tap the Trust button. Then, a verification code will be sent on your iPhone/iPad, and you should enter it on the computer.
There are two methods to recover data from iCloud.
1.Recover All iCloud Backup
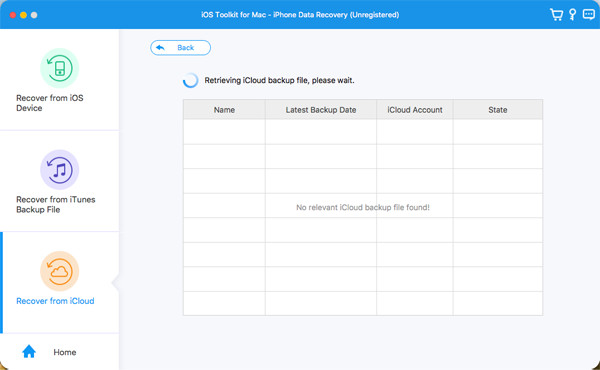
Step 1You can choose the iCloud Backup option to recover all the backups with different file types. Here you can see all the backup history, and you need to select one to download.
Step 2 After clicking the Download button, you can choose different file types to download. Tick the desired ones and click the Next button.
Step 3The scanning process will start, and the selected files will be listed on the program. Still, choose the desired data and click the Recover button to start recovering from iCloud.
2.Recover Selected Important Data
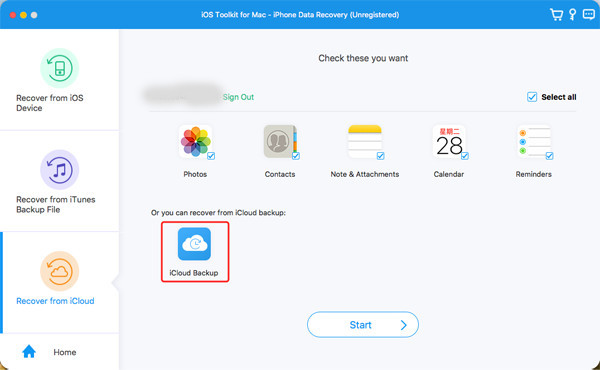
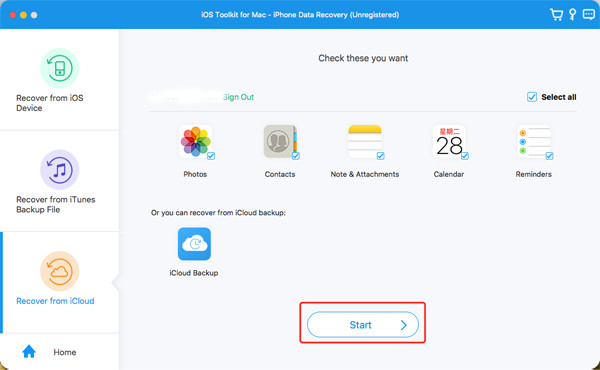
Step 1Choose the desired files from Photos, Contacts, Notes&Attachments, Calendar, and Reminders. Then click the Start button to scan data.
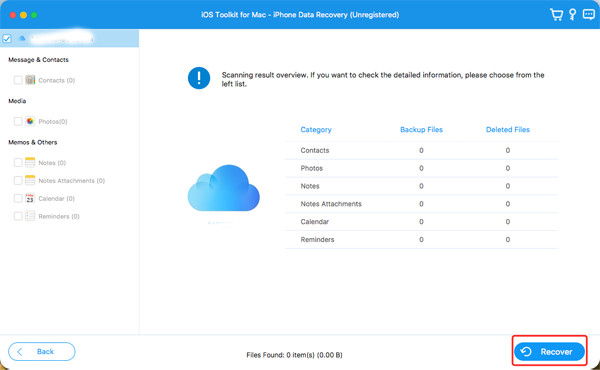
Step 2 In a few minutes, this program will show all data in detail for you. Tick the data you want to recover and click the Recover button to start the process. If you choose the Contacts data, you can also recover it to your iOS device directly.
How to Recover All iOS Data
Recover Messages
- Recover Deleted Text Messages
- Recover WhatsApp Messages
- Recover Deleted TikTok Messages
- Recover Deleted Messages on Discord
- Recover Deleted Voice Messages
- Recover Deleted Messages on Messenger
- See Deleted Messages on WhatsApp
Recover Media (Photos, Videos, Music, etc.)
- Recover Permanently Deleted Photos
- Recover Recently Deleted Photos
- Recover Deleted Videos from iPhone
- Recover Deleted Instagram Photos
- Recover Deleted Facebook Videos
- Do Deleted Photos Stay on iCloud
- Recover Deleted Photos from Snapchat
Recover App Data
- Recover Deleted Calendar Events
- Recover Deleted Voicemail iPhone
- Recover Gmail Emails
- Recover Deleted Safari History
- Recover Deleted Drafts on TikTok
- Recover Deleted Notes on iPhone
- Recover Deleted Snapchat Memories
- Recover Deleted Call History